Overview
This post is for those of you who want to dive right into the steps of setting up a SFTP server. I’m sure some of you have been resourceful enough to go through the documentation and sift through all the relevant pages in there. But for those who just want one place for it all, this is the article for you.

For this tutorial, I’ll be using JSCAPE MFT Server, our managed FTP server that supports SSH FTP as well as a number of other secure file transfer protocols. Since this managed file transfer server is built from Java, it can run on different platforms, including Microsoft Windows (32 and 64 bit), Linux/UNIX, Solaris, AIX, IBM z/OS and Mac OS, with support for SSL and TSL.
If you want to follow this tutorial, you may download a free evaluation edition of JSCAPE MFT Server by clicking here.
Installing Your Managed File Transfer Server
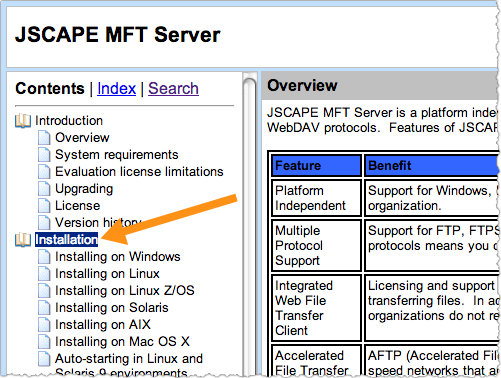
Once you’ve downloaded the installation file, follow the appropriate instructions in this documentation. Go to the Installation section and look for the instructions that correspond to your operating system.
If you’re using Linux, you can also watch any of the video tutorials below:
You can also follow the instructions on this three-part series (still for Linux installations). That particular tutorial includes instructions for activating a file transfer service and for creating FTP/SFTP user accounts. Both are essential elements of your SFTP server and will be discussed again later in this article.
Preparing Server And Client Keys
SFTP connections protect file transfers through various security mechanisms, including data-in-motion encryption, 2-factor client authentication, and data integrity checks. Data-in-motion encryption renders files unreadable during transmission, thereby protecting data from eavesdroppers. Strong authentication, on the other hand, prevents impostors from gaining access to files stored on the server. Lastly, data integrity checks ensure that any changes to the data while in transit can be detected.
These security mechanisms are implemented through the use of server keys, client keys, and various algorithms. For a thorough discussion on server and client keys, please read the article:Roles of Server and Client Keys in Secure File Transfers. SFTP algorithms are covered in the article Setting SFTP Algorithms On Your SFTP Server.
Setting Up Server Keys
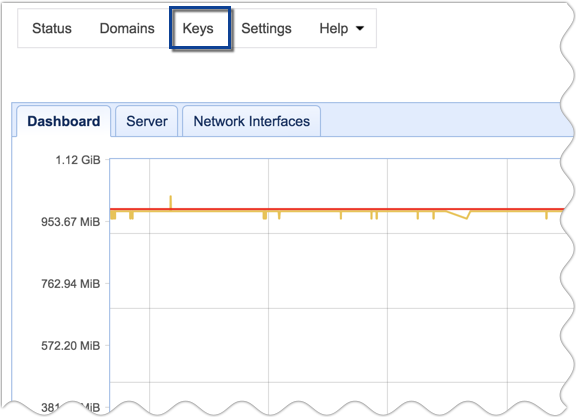
SSH file transfer protocol (SFTP) creates secure connections and SSH keys to access and manage SSH servers. To start setting up your server keys, login to the JSCAPE MFT Server Manager and go to the Keys menu at the top of the control panel.
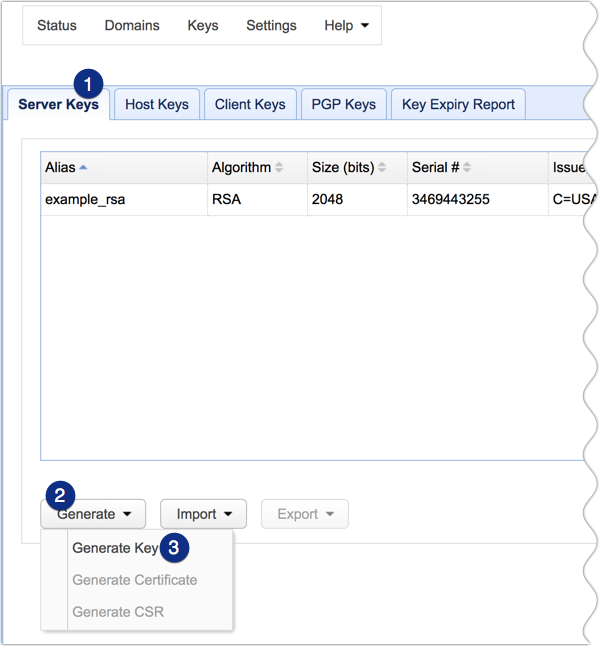
Next, navigate to the Server Keys tab and then click Generate > Generate key.
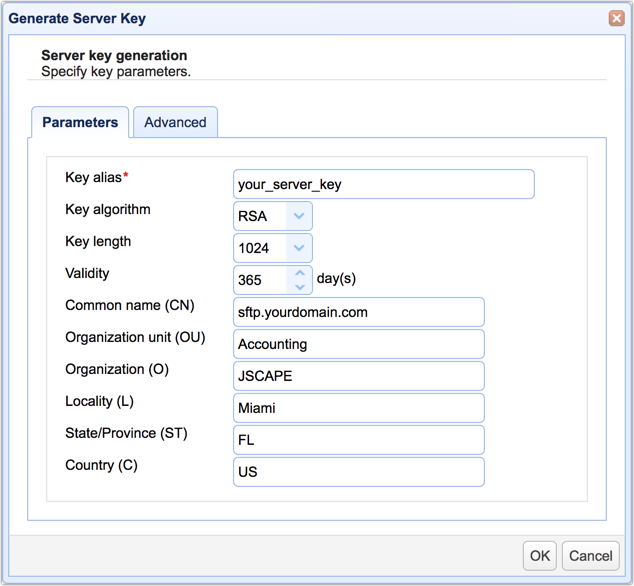
Fill out the fields in the Generate Server Key dialog. You’ll need to enter the following information:
Key alias – The key alias is the name that will refer to this particular key within the JSCAPE MFT Server Manager environment, e.g., your_server_key.
Key algorithm – Choose between RSA or DSA. Click that link for an enlightening discussion on these two key algorithms.
Key length – Choose between 1024 and 2048. Read the post “Choosing Key Lengths for Encrypted File Transfers” if you need more information. Another helpful article is “Should We Start Using 4096 bit RSA keys?“
Validity – Specify how many days you want this key to remain valid.
Common name (CN) – This will be the name of the key. Normally, you would use the domain name of the server, e.g., “sftp.yourdomain.com”.
Organization unit (OU) – Indicates the specific unit in your organization that will use this key, e.g., Accounting.
Organization (O) – The name of your organization.
Locality (L) – The name of your city.
State/Province (ST) – The name of your state or province.
Country (C) – Your two-character country code, e.g. “U.S.”

When you’re done, click the OK button.
You should now be able to see your newly created server key in the list of server keys.

Setting Up Client Keys
Client keys are used to establish a more vigorous authentication process during client logins. Regular SFTP logins only require usernames and passwords. However, these login credentials can sometimes be obtained by cyber criminals through brute force attacks or social engineering methods.
Client keys allow you to add another layer of protection because users would then be required to submit something in their possession, namely their respective client key private keys. In other words, each client key should correspond to a single user.
When two different authentication methods are combined – in this case, password authentication and public key authentication (host key authentication) – you have two-factor authentication. This results in a much stronger method of authentication. Read more about SFTP’s public key authentication in the article What Is An SFTP Key?
To set up a client key, go to the Client Keys tab and click the Generate button.

You’ll then be presented with a dialog similar to the one shown earlier. Most of the fields have the same definition as those fields on the server key dialog, except for these two:
Key alias – We recommend you use the username of the user account this key will be bound to.
Common name (CN) – This should be the full name of the user.
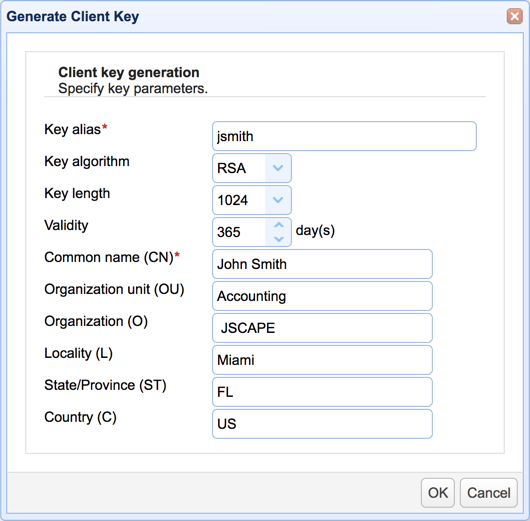
Click the OK button when done.
You’ll then be asked to specify the file name that will hold this key. Make sure the file is saved in the PEM format. Otherwise, you won’t be able to use it for SFTP public key authentication.
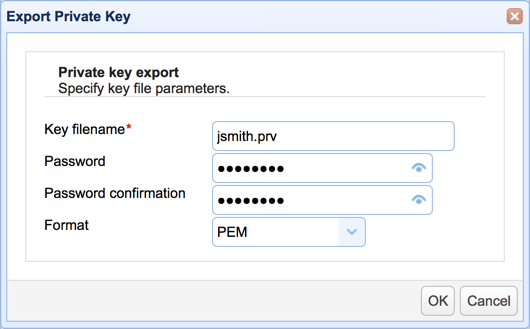
Click the OK button when done.
Because it is this file that the user will be required to submit during login, you will have to send this file to the user after it has been created. It’s just a file, so you can send it via email, burn it to a CD, or copy it to a USB stick. As an added layer of protection, you can also specify a password (better known as a “passphrase”) for this file.
Note: Make sure the user keeps the file in a secret location.
You should be able to see your newly created client key in your list of client key certificates.

At this point, you would have already successfully prepared your server and client keys. Click OK to proceed.
Activating The SFTP Service
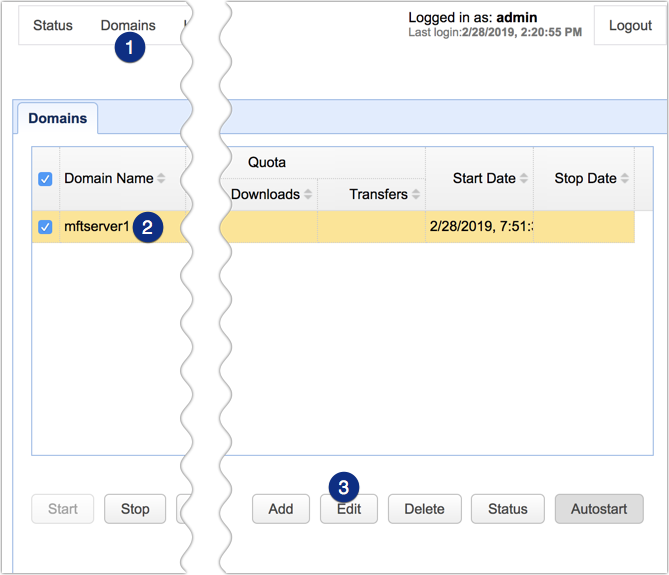
To enable your SFTP service, go back to the JSCAPE MFT Server Manager main screen, navigate to the Domains menu, select the domain name of the server whose SFTP service you want to enable, and click the Edit button.
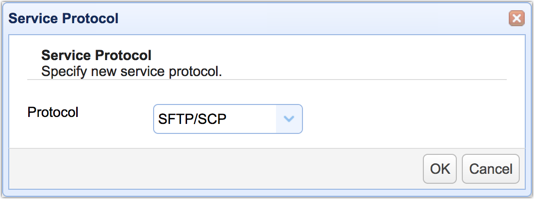
Next, go to the Services module and then click the Add button.

Once the Service Protocol dialog appears, select SFTP/SCP from the drop-down list and click OK.
In the next screen, navigate to the Host drop-down list and select your server’s host or IP address.
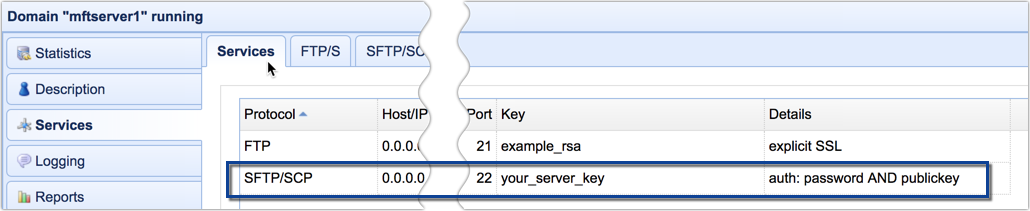
Leave the Port number as is. The port number will likely be set to 22.
In the Private key drop-down list, select the alias of the server key you created earlier.
Finally, choose the password AND public key from the list of Authentication methods. This will enable SFTP two-factor authentication. Meaning, that a user who attempts to log in to your SFTP server will have to enter his username and password AND load his private key file (the file you downloaded earlier and sent to the user).

Click the OK button to proceed.
Your newly activated SFTP service should now be added to your list of services.
Adding Users
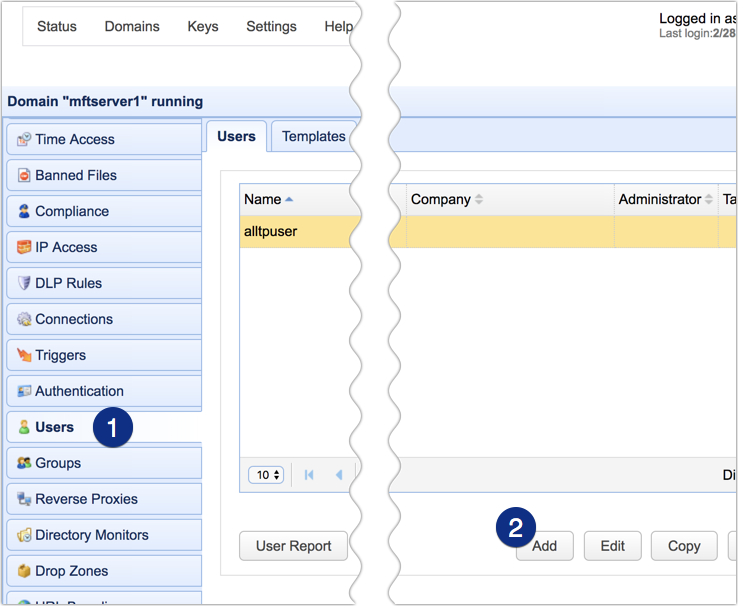
The final step is to add new users. Go to the Users module and then click the Add button.
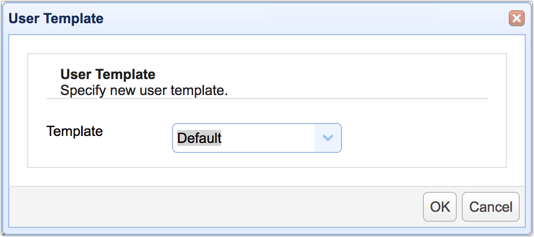
Once the User Template dialog appears, just click the OK button to select the default template.
In the Add User dialog, enter the full name of the user whose account you want to create.
Specify a Login username and an initial Password.
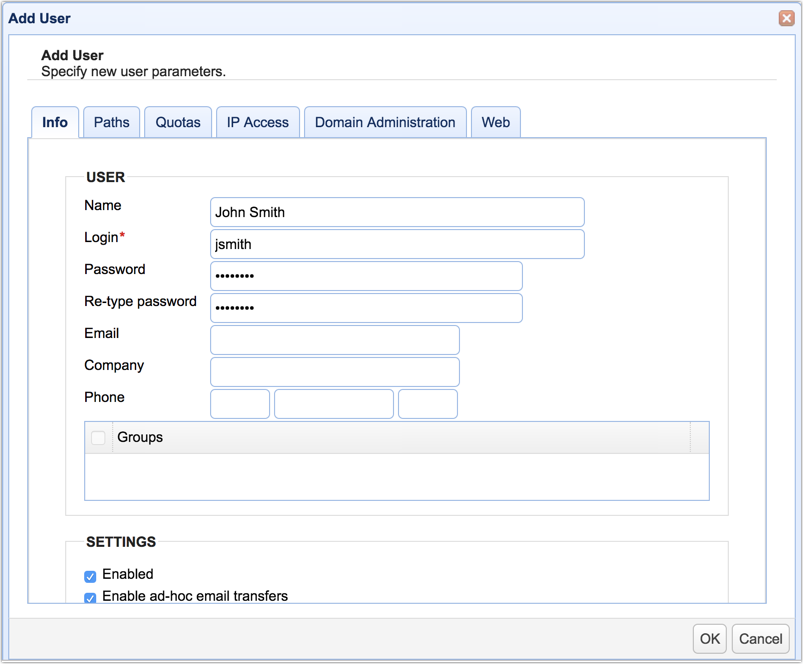
You may also enter additional information (e.g. email, company name, phone number, etc.).
If you created a client key earlier, you will want to associate that key with this user (assuming of course that key was meant for this user). To do that, scroll down to the bottom and then tick the checkbox beside the name of the client key you want to associate/bind with this user.

Click OK once you’re done.

That’s it! Barring any hitches, you should now have your fully functional SFTP server up and running. If you want to learn how to connect to this service using an SSH FTP client and to actually exchange files with it, read the article How To Use An SFTP Client . Or, if you like to use the terminal, read the article Using SFTP On The Command Line to learn how to connect via a terminal-based client.
Get Your Free Trial
Would you like to try this yourself?
Get a free trial of JSCAPE MFT Server.
Related Content
How To Install An SFTP Server On Windows
Install A Linux SFTP Server Via Command Line And Configure Via Web UI