
SFTP Public Key Authentication enhances security by allowing users to access SFTP services without passwords, favoring automated transfers. The setup process involves creating a .ssh directory, generating a key pair with ssh-keygen, securing permissions, and copying the public key to the server, ensuring a secure connection without the need for passwords
Most customers who use SSH File Transfer Protocol (SFTP) for file transfer automation prefer to authenticate SFTP clients through SFTP keys instead of passwords. Given the numerous inquiries on how to set up and use SFTP public key authentication, we decided to publish how-to articles to help organizations that wish to implement this authentication method in their SFTP environment. This article will focus on setting up instructions for the command line.
Before you proceed with the tutorial, it’s probably good to understand SFTP key authentication and why it can benefit your data transfer workflows. Of course, if you’re already familiar with the basic concepts, feel free to skip over to the section “How to configure SFTP key…”
What is SFTP public key authentication?
Public key authentication is an SFTP authentication method that uses public key cryptography. This method involves public key/private key pairs instead of passwords. These “keys” are essentially long strings of characters that are generated and linked together mathematically.
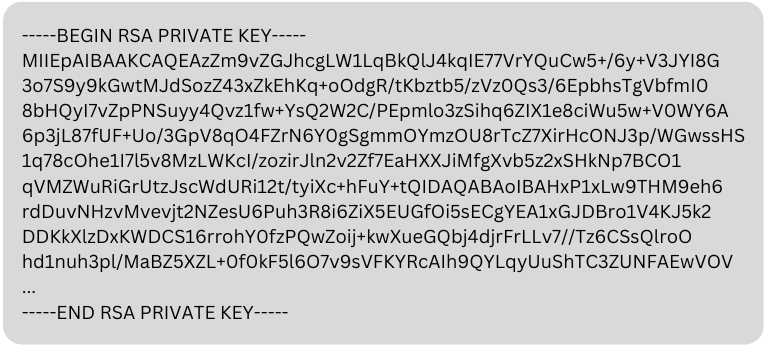
Here’s an example of a private key encoded in the Rivest-Shamir-Adleman (RSA) format:
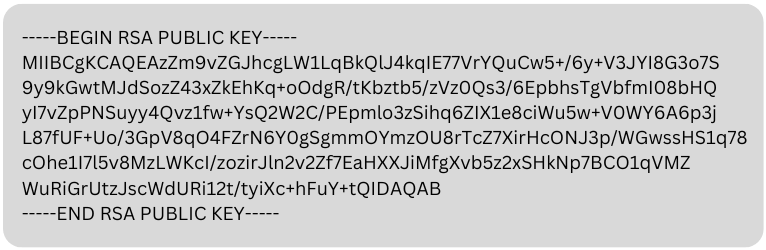
Here’s its corresponding public key, again in RSA format:
The private key is supposed to be kept secret by the entity that wishes to be authenticated. Let’s call this entity E1. The public key, on the other hand, is shared with the entity that’s supposed to authenticate or verify the identity of E1. Let’s call this second entity E2.
Public key authentication can be used in both client and server authentication. In client authentication, the SFTP client serves as E1 and the SFTP server serves as E2. In server authentication, the roles reverse, often referring to the public keys as host keys. The SFTP server acts as E1 and the SFTP client acts as E2.
In the tutorial below, the SFTP keys we’ll set up are for client authentication. During this process, the SFTP client uses the user’s private key to generate a digital signature that the SFTP server can validate and match with the user’s account through the corresponding public key stored on the server.

Why are SFTP keys more commonly used than passwords in automated SFTP file transfers?
As mentioned at the start of this article, SFTP keys are more commonly used than passwords in automated secure FTP file transfers. These are some of the reasons why:
- Keys can be stored in files, which can be accessed through automation scripts and other software without manual intervention.
- Since no login interfaces are similar to those used in password authentication, tools used for brute force attacks are rendered useless.
- Assuming an attacker somehow finds a way to launch a brute force attack on a remote server that uses public key authentication, it would be more computationally challenging for the attacker to succeed. That’s because digital signatures are substantially longer than normal passwords.
- Digital signatures are immune to phishing and other social engineering attacks.
What are the differences between SSH keys and SFTP keys?
SFTP derives its security features from the Secure Shell (SSH) cryptographic network protocol, including public key authentication. If you’re using SSHv2, your SSH clients can function as SFTP clients. Similarly, your SSH servers can be used as SFTP servers. So, if you’re using SSH, you can generate SSH key pairs and use them as SFTP key pairs. Your SSH keys can then serve as SFTP keys. Simply put, SSH keys and SFTP keys are the same.
That said, file transfer solutions that offer SFTP do not necessarily provide SSH functionality. These solutions only focus on the file transfer capabilities of SSH, along with relevant security functions such as password-based authentication, SFTP key authentication, data-in-motion encryption and digital signatures.
Why use an SFTP server?
One major reason to use an SFTP server for file transfer workflows is the ability to employ SFTP key authentication. You can even combine SFTP key authentication with password-based authentication to achieve two-factor authentication (2FA). 2FA can help prevent hackers from gaining unauthorized access by providing two layers of protection to your user accounts.
Moreover, unlike, say, a File Transfer Protocol server or FTP server, which is also a popular file transfer solution, SFTP servers provide better protection to your files as they traverse the internet. Unlike FTP connections, every SFTP connection is protected by data-in-motion encryption, which prevents data from being compromised in man-in-the-middle attacks.

How to configure SFTP key authentication on the command line
You’re now ready to discuss the steps for setting up SFTP key authentication on the command line. Most mainstream Linux distributions or ‘distros’ already have OpenSSH included by default, so let’s use Linux machines for the examples. The first Linux machine will act as your client and the second as your server. In case you’re unfamiliar with it, OpenSSH is a free, widely used, open-source implementation of SSH.
The setup process requires only four major steps:
- Create a .ssh directory on the client machine
- Generate the private/public key pair on that client .ssh directory
- Create a .ssh directory on the server machine
- Copy the public key from the client’s .ssh directory to the server’s .ssh directory
Let’s now go over those steps in more detail.
1. Create a .ssh directory on the SFTP client
You must create the client .ssh directory in your user account’s home directory. To do that, log in to your client machine and navigate to your user account’s home directory by entering the following:
cd ~
That should bring you to your user home directory. Run the ‘ls -a’ command to list all the files in your home directory. This is just so you can see what’s currently inside.
$ ls -a
.  ..  .bashrc  .profile  Documents  Downloads  Pictures  Videos
Add the ‘.ssh’ directory by using the ‘mkdir’ command as shown below. After creating the .ssh directory, you can verify if it’s actually there by running ‘ls -a’ again.
$ mkdir ~/.ssh
$ ls -a
.  ..  .bashrc  .profile  .ssh  Documents  Downloads  Pictures  Videos
Make sure only the owner of this account has access to this directory.
You can do that by changing the user permissions of the directory by running: ‘chmod 700 .ssh’.
$ chmod 700 .ssh
2. Run ssh-keygen
Now that you have a .ssh directory in your client machine create a private key/public key pair for the user account in question and store the key pair in that .ssh directory. For this purpose, run the ssh-keygen command in your home directory.
After running the ssh-keygen command, you’ll be asked to enter a couple of values. These values include:
- The file where you intend to save the private key: This file is normally named ‘id_rsa’. Just press Enter to accept the default value.
- The passphrase: This phrase works just like a password, except that it’s supposed to be substantially longer. The passphrase will be used to protect your private key file. Only the person who knows the passphrase can access the private key file. Make sure it’s a phrase you can easily recall.
After you enter the passphrase twice, the ssh-keygen tool will generate your private key file (id_rsa) and public key file (id_rsa.pub) key file. These files will be placed inside your user account’s .ssh directory. In addition, you’ll be shown the key fingerprint that represents this particular key.
Here’s how the output would look like:
$ ssh-keygen

Generating public/private rsa key pair.

Enter file in which to save the key (/home/user1/.ssh/id_rsa):

Enter passphrase (empty for no passphrase):

Enter same passphrase again:

Your identification has been saved in /home/user1/.ssh/id_rsa

Your public key has been saved in /home/user1/.ssh/id_rsa.pub

The key fingerprint is:

SHA256:fRHY/5dkEnDdOGkb8GrI6kQsYQZ2/Zf9TqLfgNHB0Hw user1@hostname

The key's randomart image is:

+---[RSA 3072]----+

|  .oo+==..o.     |

| ..+o. * . o     |

| .+ o . B o      |

|  .   + * o      |

| . . . S .       |

| .   . .         |

|    . .          |

|                 |

|                 |

+----[SHA256]-----+
Check whether the key files were actually created by navigating into the .ssh directory and then running the ‘ls’ command.
$ cd .ssh

$ ls

id_rsa  id_rsa.pub
If you open those files (like say, by using the ‘less’ command), you should see contents similar to the private key and public key examples shown earlier in this article.
Again, you’d like to ensure that only the owner can read, write and execute these files. To prevent unauthorized access, you should run the ‘chmod’ command again to assign the appropriate permissions.
$ chmod 700 ./id_rsa.*
You’ve completed the steps for the client machine. Let’s now move on to the server machine.
3. Create .ssh directory on the SFTP server
Just like on the client machine, you need to create a .ssh directory on the server machine. You can do this remotely by logging on to your server from your client machine through SSH. Of course, assuming you already have a user account on the server and the SSH service is already up and running there.
Recommended article: Setting up an SFTP server.
When you log on to your server machine, don’t be alarmed if you see a message that goes like this: “The authenticity of the host … can’t be established … Are you sure you want to continue connecting?” That happens if a trust relationship between your server and your client has not yet been established. Just type ‘yes,’ press [enter] and then enter your password.
The sample output below shows how the step described above would look like: remote-server is the hostname of the server machine, and 192.168.1.100 is its corresponding IP address. Of course, you’ll be dealing with different values at your end.
$ ssh user@remote-server

The authenticity of host 'remote-server (192.168.1.100)' can't be established.

ECDSA key fingerprint is SHA256:hTfI35b5R1y9mVepxBRPva/sDeBIM57XTG0iz8Cujk0.

Are you sure you want to continue connecting (yes/no)? yes

Warning: Permanently added 'remote-server,192.168.1.100' (ECDSA) to the list of known hosts.

user@remote-server's password:

Welcome to Ubuntu 20.04.2 LTS (GNU/Linux 5.4.0-77-generic x86_64)
Once you’ve gained access, navigate to your home directory on the server and create a .ssh directory underneath it as you did on your client.
$ cd ~

$ ls -a

.  ..  .bashrc  .profile  Documents  Downloads  Pictures  Videos

$ mkdir .ssh

$ ls -a

.  ..  .bashrc  .profile  .ssh  Documents  Downloads  Pictures  Videos

Assign the required permissions for this directory.

$ chmod 700 .ssh
4. Copy the public key to the SFTP server
The next step is to copy the public key from the .ssh directory of your SFTP client to the .ssh directory of your SFTP server. Before you do that though, you need to create a file named authorized_keys, which will hold your public key. Create this file in your server .ssh directory.
Navigate into your server .ssh directory and then create the authorized_keys file. You can use the ‘touch’ command for this purpose.
$ cd .ssh

$ touch authorized_keys
Once more, you need to run chmod on this file.
$ chmod 700 authorized_keys
As soon as you’re done, exit your remote SSH session.
$ exit

logout

Connection to remote-server closed.
You may now copy the contents of your public key from your SFTP client to the authorized_keys file on your SFTP server.
The easiest way to do this would be to use the ssh-copy-id command tool. The ssh-copy-id tool is usually included when you install ssh.
The syntax for using this command-line tool is:
ssh-copy-id -i id_rsa.pub user@remoteserver
Here, the user is just the username you used earlier to log in to your server from your client, and the remote server is just the IP address or hostname of your SFTP/SSH server. In this case, that would be ‘remote-server.’
After executing that command, you’ll be asked to enter your account’s password. This is the same password you used to log in remotely via SSH earlier.
$ ssh-copy-id -i id_rsa.pub user@remote-server

/usr/bin/ssh-copy-id: INFO: Source of key(s) to be installed: "id_rsa.pub"

/usr/bin/ssh-copy-id: INFO: attempting to log in with the new key(s), to filter out any that are already installed

/usr/bin/ssh-copy-id: INFO: 1 key(s) remain to be installed -- if you are prompted now it is to install the new keys

user@remote-server's password:

Number of key(s) added: 1

Now try logging into the machine, with:   "ssh 'user@remote-server'"

and check to make sure that only the key(s) you wanted were added.
The purpose of that last instruction is to ensure the public key was successfully copied. Log on to your server and view the contents of the authorized_keys file.
It should contain exactly the same characters as the public key file on your client machine.
5. Login using SFTP public key authentication
Barring any unforeseen circumstances, you would have already successfully configured your SFTP client and server for SFTP public key authentication. To be sure everything is in place, try to log in to your SFTP server.
$ sftp user@remote-server

Enter passphrase for key '/home/user1/.ssh/id_rsa':

Connected to remote-server.

sftp>
Notice that you’ll be asked for your key’s passphrase instead of your account password. If you didn’t enter any passphrase during the key creation process, you should see something like this:
$ sftp user@remote-server

Connected to remote-server.

sftp>
Congratulations! You’ve just learned to set up SFTP public key authentication on the command line.
An easier way to use SFTP and set up public key authentication
Setting up an SFTP server and SFTP public key authentication doesn’t have to be done through the command line. If you prefer an easier way, check out JSCAPE MFT Server by Redwood. It’s a GUI-based managed file transfer server that supports SFTP and several other file transfer protocols, including FTP/S, SCP AS2, OFTP, WebDAV, HTTP/S and many others.
JSCAPE MFT Server is platform-agnostic and can be installed in all major operating systems, including Windows, Linux, Mac OS and UNIX.
If you want to see how easy it is to set up an SFTP server using JSCAPE MFT Server, read our Guide on how to do so. You may also want to read our tutorial on setting up public key authentication between trading partners.
Get Your Free Trial
Would you like to try this yourself?
Get a free trial of JSCAPE MFT Server.
Related Content
Two Ways To Generate An SFTP Private Key
Three Ways To Generate OpenPGP Keys
How To Automatically Transfer Files From SFTP To Azure Blob Storage
Frequently Asked Questions
What is SFTP public key authentication?
STFP public key authentication is a method for establishing a secure FTP connection, instead of using a password. Public key authentication uses a pair of keys, one private and one public, to authenticate a connection. These keys are paired in such a way that any data encrypted with one can only be decrypted with the other. The user keeps the private key secret, and stores it locally. To establish an SFTP connection, the client first encrypts some data that the server already knows, such as the username, with the private key. Next, the client returns the encrypted data to the server. Finally, the server uses the public key to decrypt it. If the server can find a match between the known data and the decrypted data, then it assumes it was encrypted with the private key. The server then grants access and authenticates the connection, because it assumes the client is in possession of the private key.
What is an SFTP certificate?
The SFTP abbreviation is frequently used in error to describe FTPS. SFTP is short for “SSH File Transfer Protocol,” whereas FTPS refers to the SSL/TLS protocol under FTP. SFTP uses SSH keys to authenticate secure connections, while FTPS uses X.509 certificates. X.509 certificates include a public key, as well as information about the certificate owner, which are verified together. An SSH key contains only a public key, and no information about the owner of the key.
Why do you need SSH client authentication?
SSH protocols enable the authentication of a client using traditional passwords or a public key with strong encryption. Given the major security risks of using passwords, public key authentication has become more widely used and recommended. SSH keys also allow system admins to avoid manually logging in with a password, to automate systems and configuration management.

