
It’s possible to configure JSCAPE MFT Server so that the files your users and other client applications upload to your server are automatically streamed to an Azure File Share/Cloud Storage Service. If you think that’s something you can use, read on. To try it out yourself, request a free trial.
What we want to do
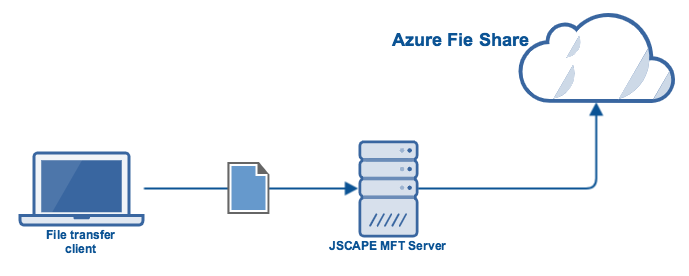
Here’s an illustration of what we want to achieve. The file transfer client on the left can represent any file transfer client, whether one that’s manned by an end user or an application that automatically uploads files to your server. From the client’s point of view, the Azure Files share will simply appear like a local directory on your server.
Prefer to watch a video version of this tutorial? Just play the video below. Otherwise, skip and proceed.
Prerequisites from Azure File Share
Before you start configuring anything on JSCAPE MFT Server, you need to have an Azure File share ready. You also need to gather a few pieces of information pertinent to that share which you will enter into your JSCAPE MFT Server settings. These are the information you need:
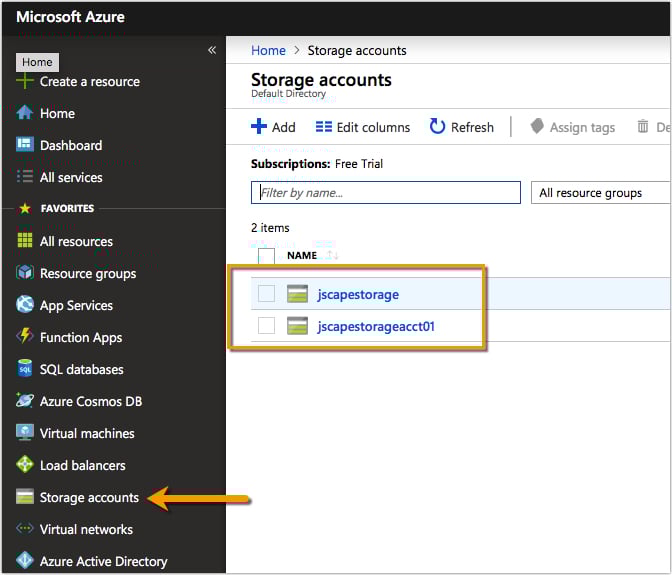
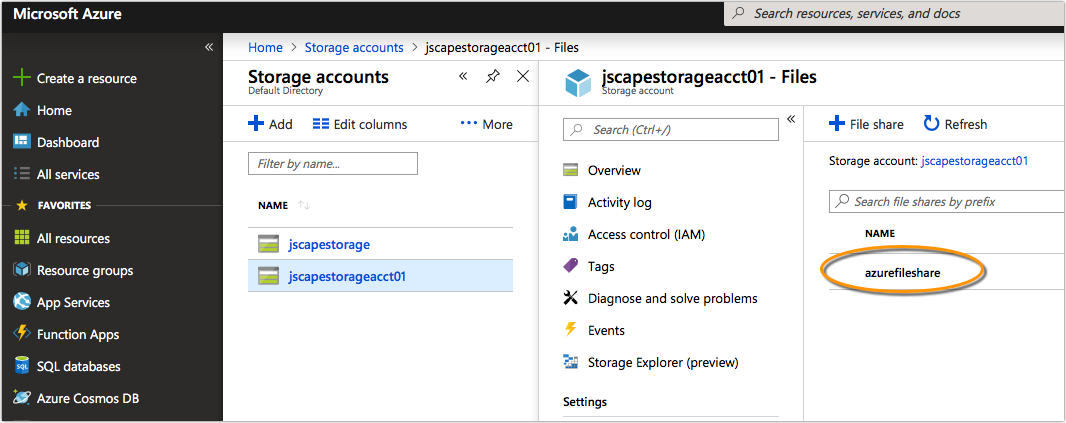
1. The name of your Azure File Storage account.
You can find that in the Storage accounts module.
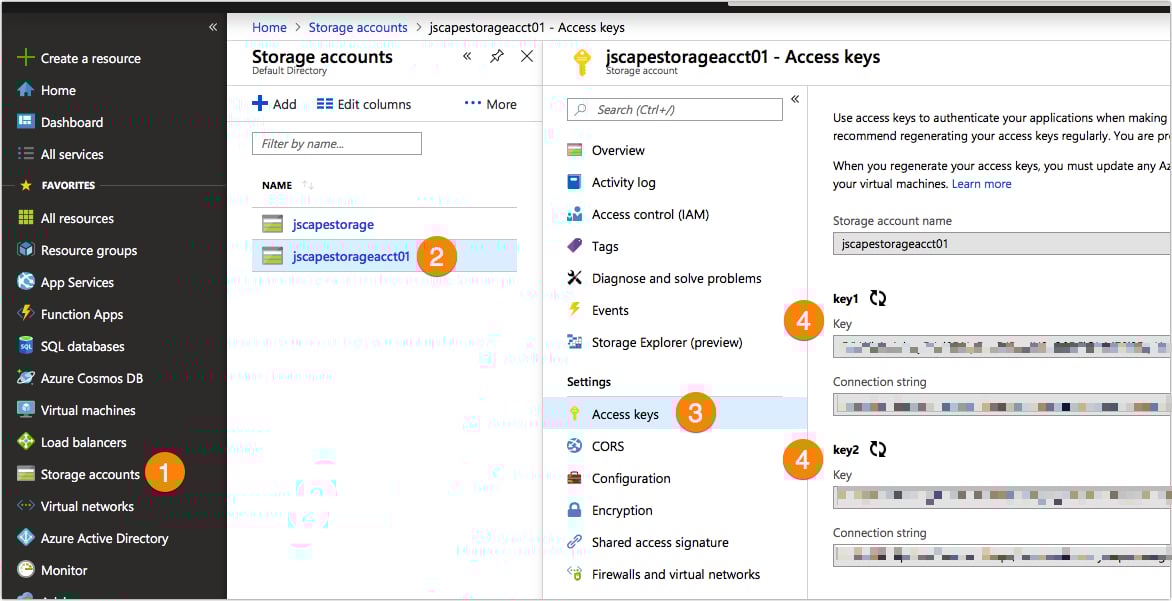
2. A key associated with that Azure File Storage account
You can find the storage account’s keys in Storage accounts > [name of account ] > Account keys. Each storage account has two keys. Choose one.
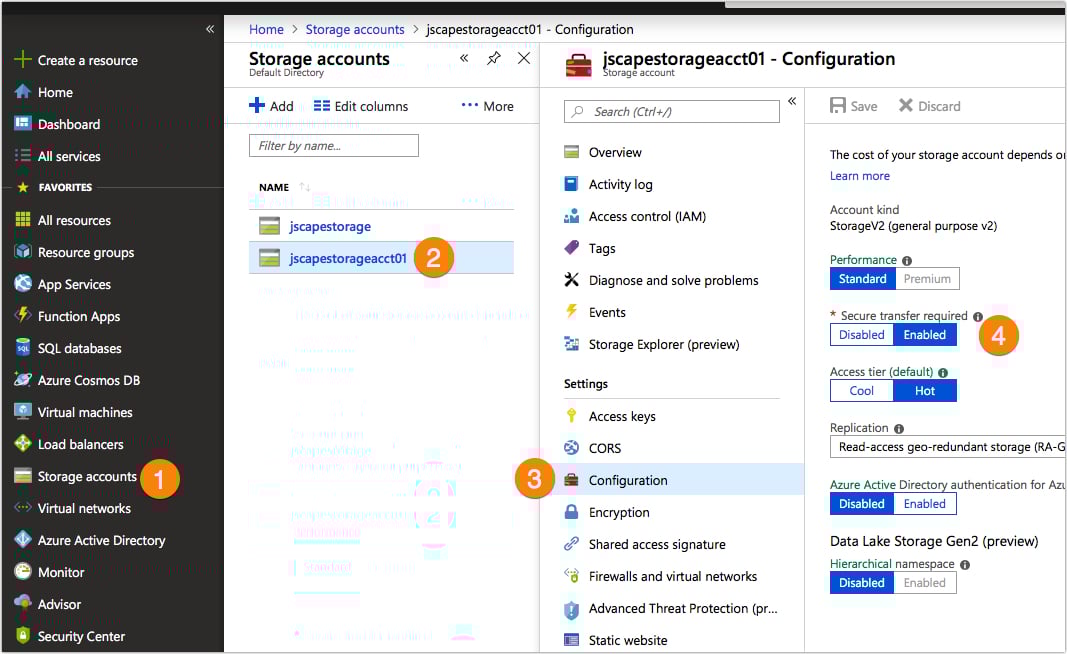
3. The setting of that account’s ‘Secure transfer required’ toggle switch
You can find this setting in Storage accounts > [name of account] > Configuration > Secure transfer required.
4. An existing file share under that storage account
Once you have all that information on hand, you can then proceed to your JSCAPE MFT Server instance to configure the settings required there.
Adding a Microsoft Azure File Service reverse proxy
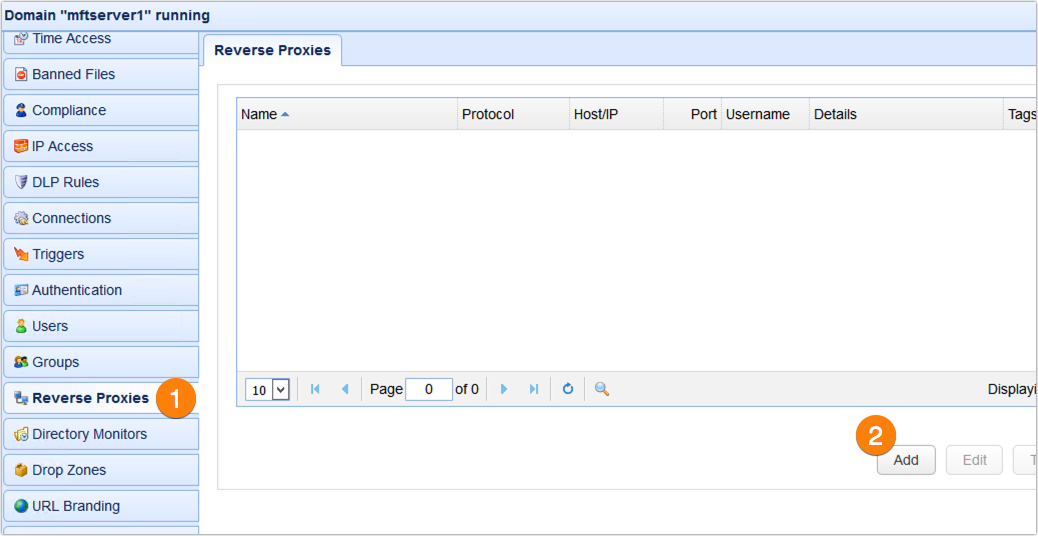
The first thing we need to do is add an Azure File Service reverse proxy. To do that, just go to the Reverse Proxies module and click the Add button.
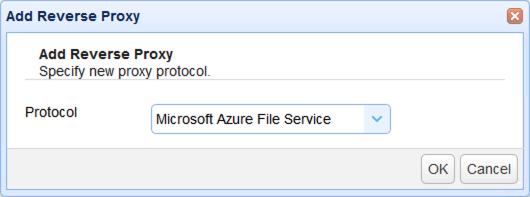
Next, select ‘Microsoft Azure File Service‘ from the drop-down list and then click OK.
Enter pertinent information into the reverse proxy parameters fields. This would typically include the following:
A Name – Enter a descriptive name for this reverse proxy service. You will use this name to refer to this service in later steps.
A Username – This is simply the name of the Azure storage account (see Prerequisites section)
A Password – This is just one of the keys associated with this Azure storage account. (see Prerequisites section)
If you enabled the ‘Secure transfer required’ toggle switch in Azure (see Prerequisites section), then make sure you check the Use SSL checkbox. Otherwise, just leave it unchecked.
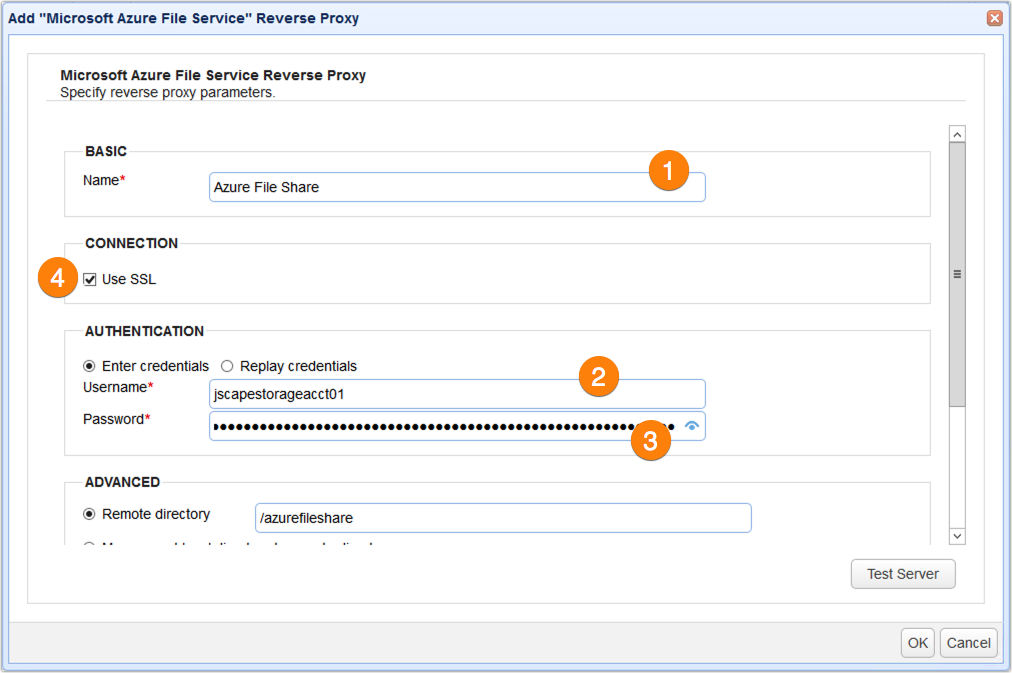
You may click the Test Server button to check if MFT Server can connect to the Azure share. If the test succeeds you may proceed.
Adding a virtual path that maps to the reverse proxy
The next step is to add a virtual path that maps to the reverse proxy service you created earlier. By doing so, user accounts who have access to this path will be able to see or detect this path as well as whatever files are stored in it from within their client application.
You can add a virtual path to a user account or a group. In this example let’s just add a path to a user account. Just edit a user account, navigate to the Path’s tab and click the Add button.

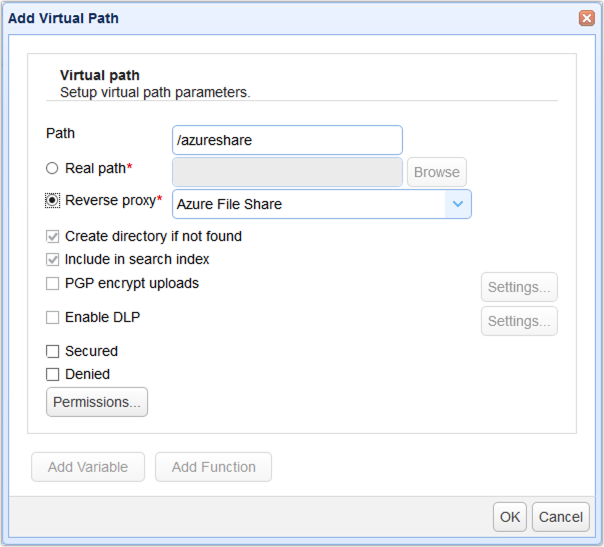
When the Add Virtual Path dialog appears, specify the name of the path as it should appear from within the client application. In our case, we want this path to appear just right below the account’s root path as a folder named ‘azureshare‘, so we enter ‘/azureshare‘ into the Path field.
Next, click the Reverse proxy radio button and select the name of the reverse proxy you created earlier. In our case, that would be ‘Azure File Share‘. Click OK to proceed.
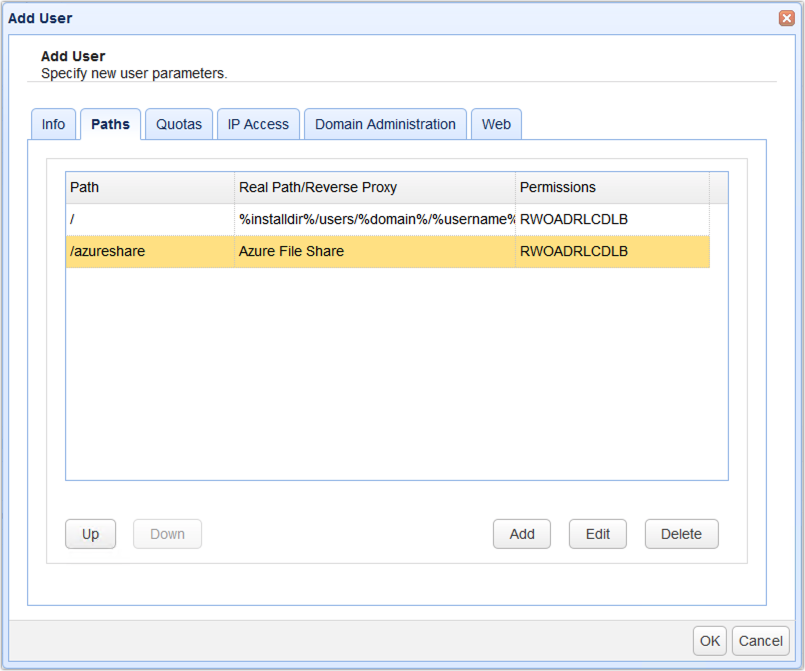
You should then see your newly added virtual path in the list of virtual paths for this user account. Again, click OK to proceed.
You’re done setting things up on the server, so let’s see how all this looks like when viewed from a client application.
The view from a client application
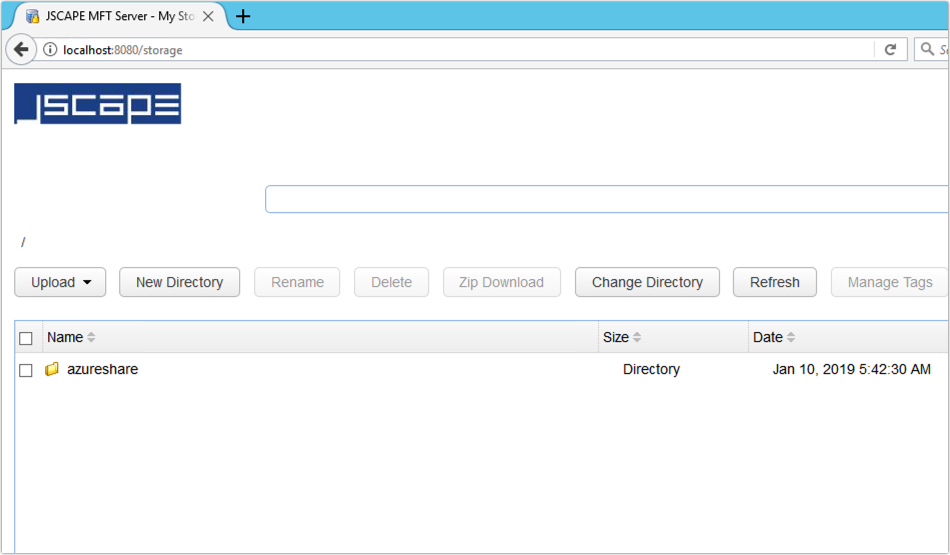
Login to JSCAPE MFT Server using the user account whose virtual path you set up earlier. Once you’ve logged in, you should then be able to see and navigate into the virtual path you created.
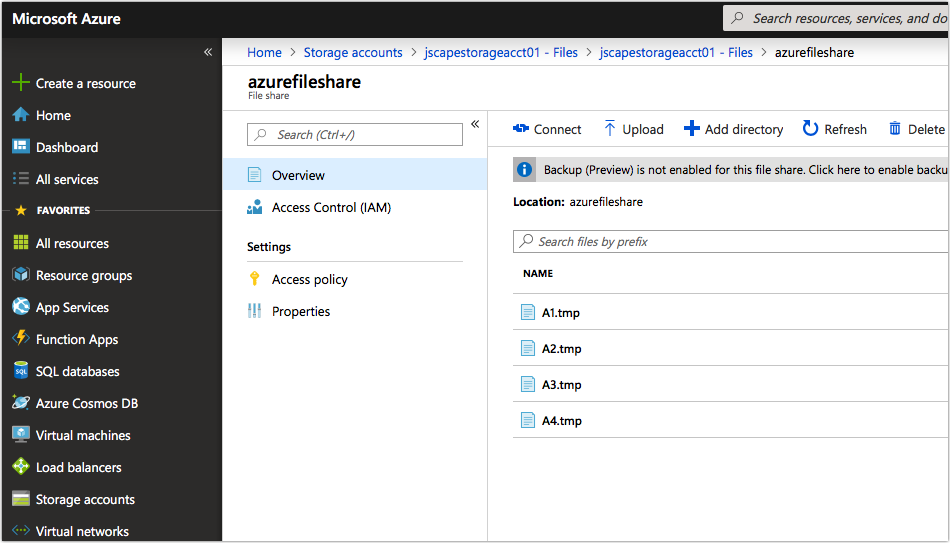
You can also upload files to it.
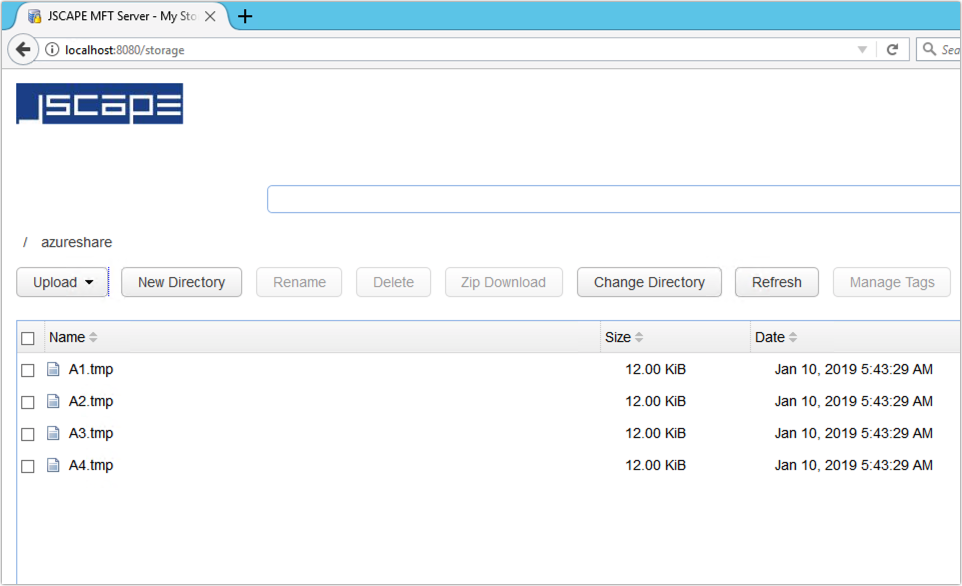
Remember, those files you uploaded won’t be stored on your MFT Server’s local disk. Rather, they’ll be streamed directly to your Azure file share. Here they are on my Azure file share.
Again, all this will be transparent to your end users, who’ll be interacting with the virtual path and all the files inside it as if it were a local folder on your server.
That’s it. Now you know how to use Azure Files as the file storage system of your MFT Server.
Would you like to try this out yourself?
Request the free trial of JSCAPE MFT Server now.
Fill out the form to be eligible for your free trial.
Related content
How To Leverage Cloud Storage Services When Dealing With High Volume File Transfers
How To Connect And Upload Files From Your Server To An Azure File Share
Amazon S3 vs Local Storage – Where Should You Store Files Uploaded to Your File Transfer Server?
How To Use Amazon S3 As The File Storage System of Your MFT Server
How To Connect and Upload Files To an Amazon S3 Trading Partner