
In this tutorial, we’re going to show you a simple method that will enable you to connect your server to a Microsoft Azure File Share and then automatically upload files to that share.
If you want a similar tutorial for Amazon S3, follow that link.
What we want to do
There are many ways to set this up on JSCAPE MFT Server. To give you a few examples, you can configure MFT Server to:
- upload files on a predefined schedule;
- automatically redirect each file uploaded to your server (e.g. via FTPS, SFTP, HTTPS, etc.) to the share;
- Encrypt each file before uploading to the share;
- select incoming files based on source, type, or some other criteria and then upload only those files to the share;
- and so on.
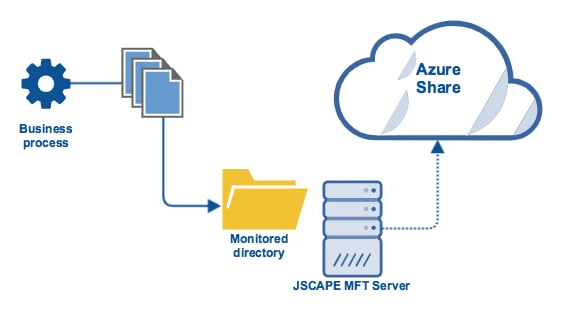
But in this particular tutorial, we’re going to configure MFT Server to detect every single file that gets added to a local directory (say, perhaps via a certain business process) and then automatically upload those files to an Azure File share. Fast forward to an in-person explanation and free trial here.
Would you prefer to watch the video tutorial version of this article instead?
No? Kindly proceed then.
Prerequisites from Azure
Before you start configuring anything on JSCAPE MFT Server, you need to have an Azure File share ready. You also need to gather a few pieces of information pertinent to that share which you will enter into your JSCAPE MFT Server settings. These are the information you need:
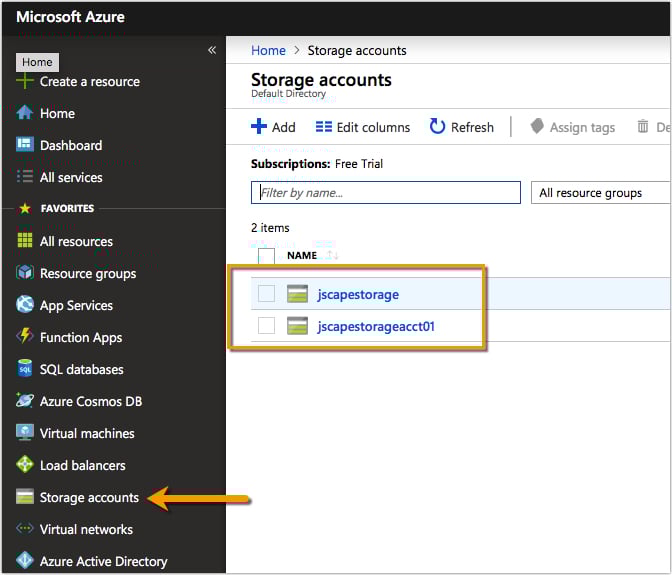
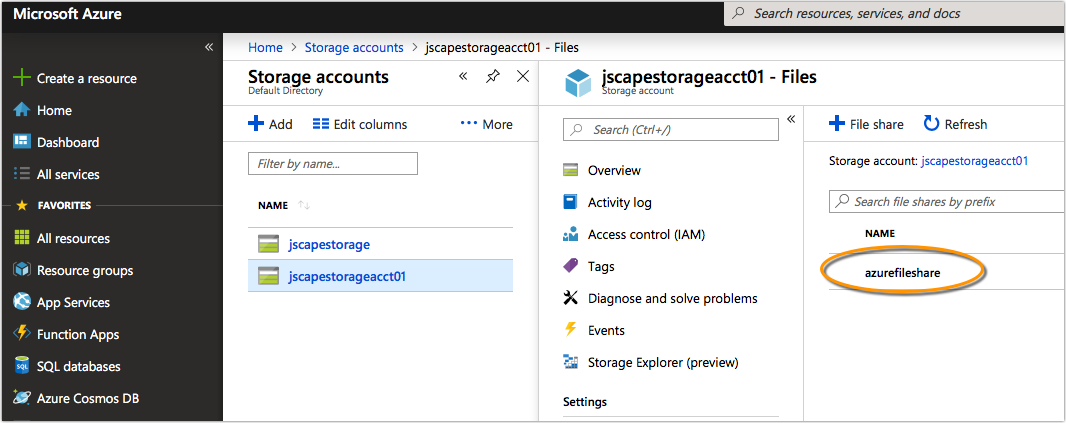
1. The name of your Azure storage account.
You can find that in the Storage accounts module.
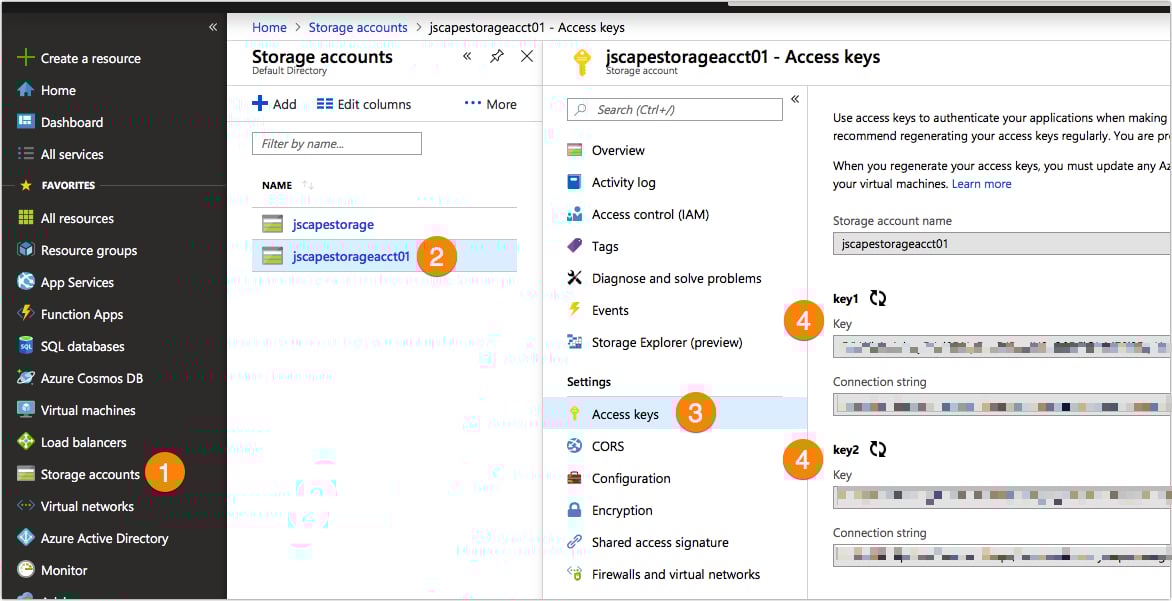
2. A key associated with that account
You can find the storage account’s keys in Storage accounts > [name of account ] > Account keys. Each storage account has two keys. Choose one.
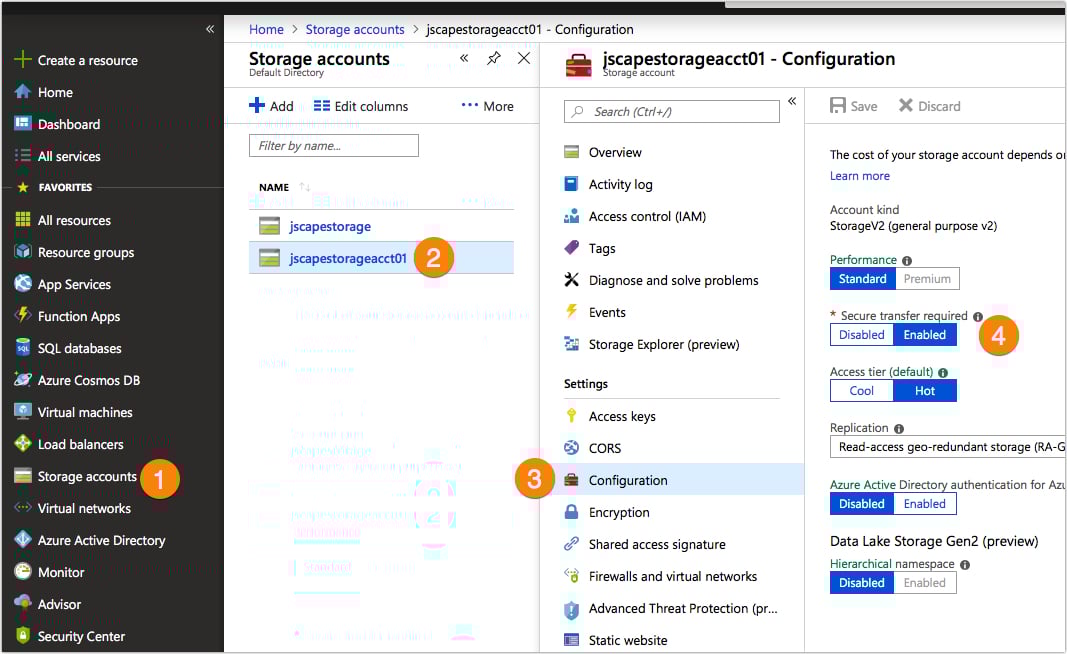
3. The setting of that account’s ‘Secure transfer required’ toggle switch
You can find this setting in Storage accounts > [name of account] > Configuration > Secure transfer required.
4. An existing file share under that storage account
Once you have all that information on hand, you can then proceed to your JSCAPE MFT Server instance. The first thing you’ll want to do is create a directory monitor.
Creating a directory monitor
If you’re not yet familiar with directory monitors, I suggest you watch the video below:
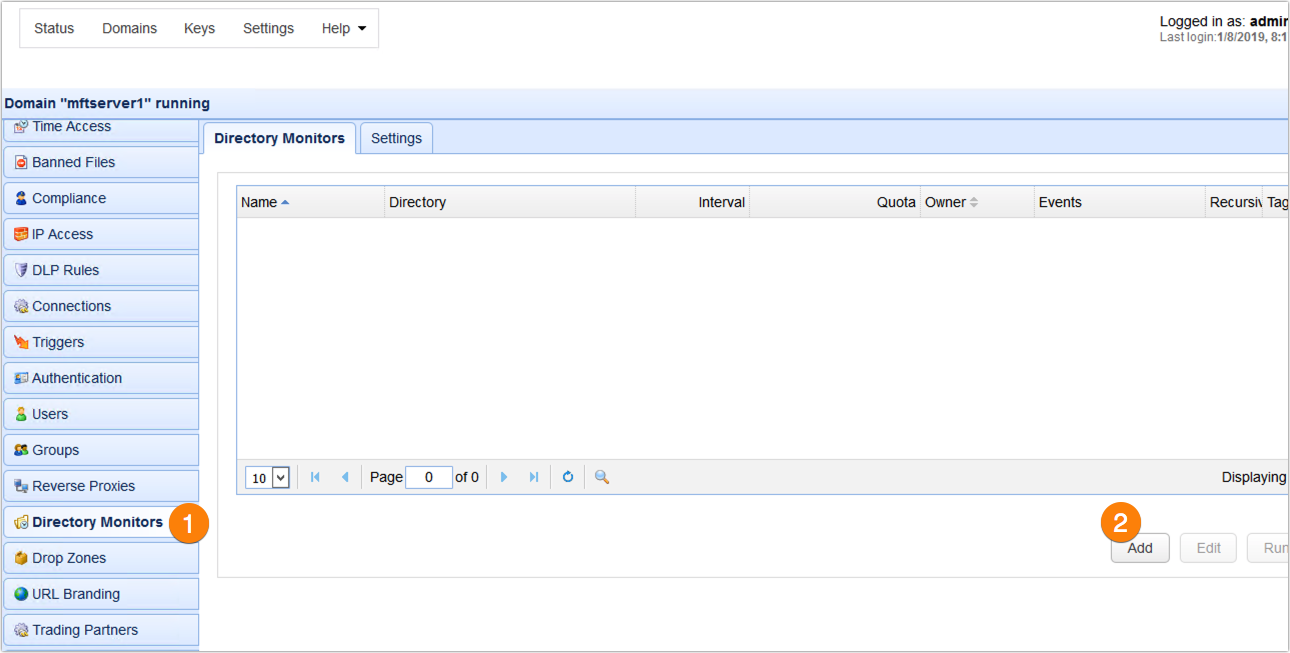
To create a directory monitor, go to the Directory Monitors module and click the Add button.
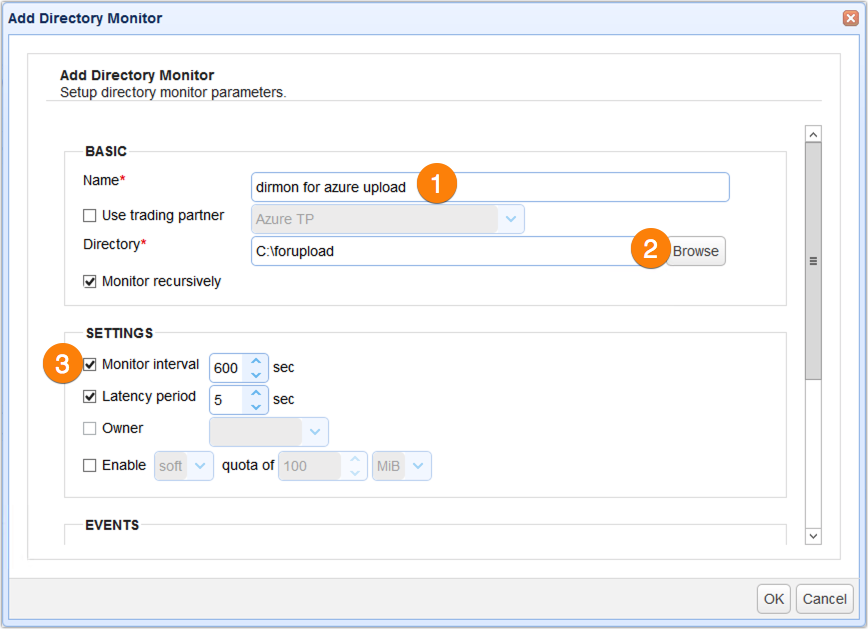
Give the directory monitor a name, select the directory you want to monitor, and set a desired monitor interval.
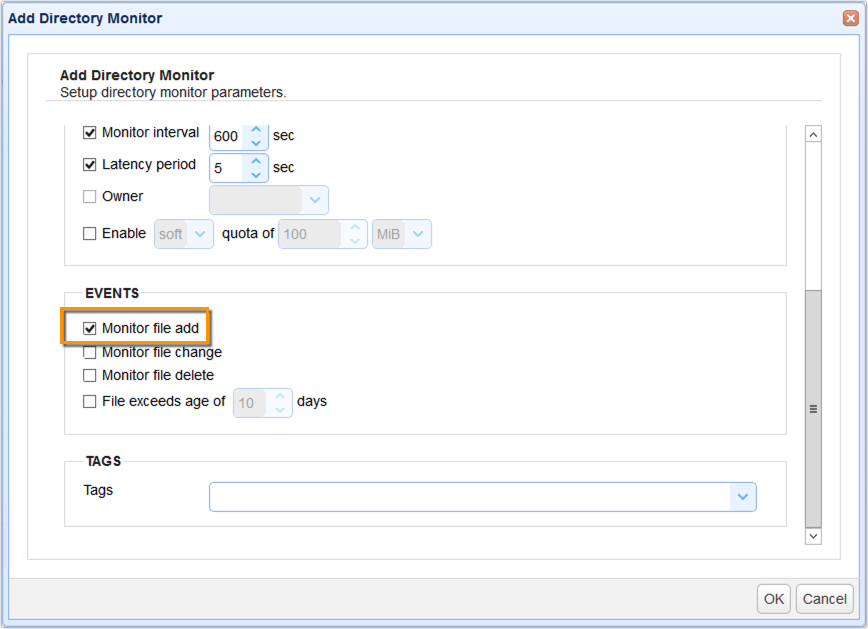
Because we only want this directory monitor to monitor for newly added files, let’s just uncheck all events except the Monitor file add event.
Click the Ok when you’re done.
So now, JSCAPE MFT Server will be able to detect each file that gets added into hat fileupload directory. The next step is to create an Azure File Service trading partner.
Creating a Microsoft Azure File Service Trading Partner
Again, if you’re not familiar with trading partners, I suggest you watch this video first:
To create a trading partner, go to the Trading Partners module and then click the Add button.
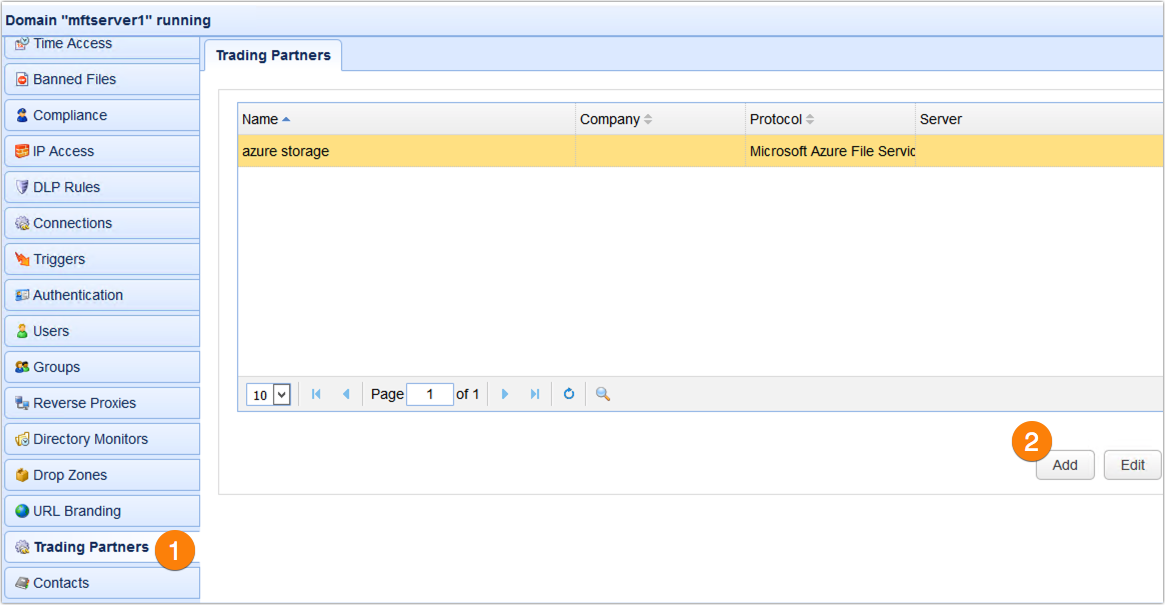
Select Microsoft Azure File Service from the drop-down list and then click OK.

Once you’re presented with the ‘Microsoft Azure File Service’ Trading Partner dialog box, give the trading partner a name. You’ll also be asked to enter a Username and Password. At this point, you can now use the information I asked you to collect earlier.
The username is just your Azure storage account name, while the password is just that storage account’s corresponding key. Just copy and paste those pieces of information into their respective fields.
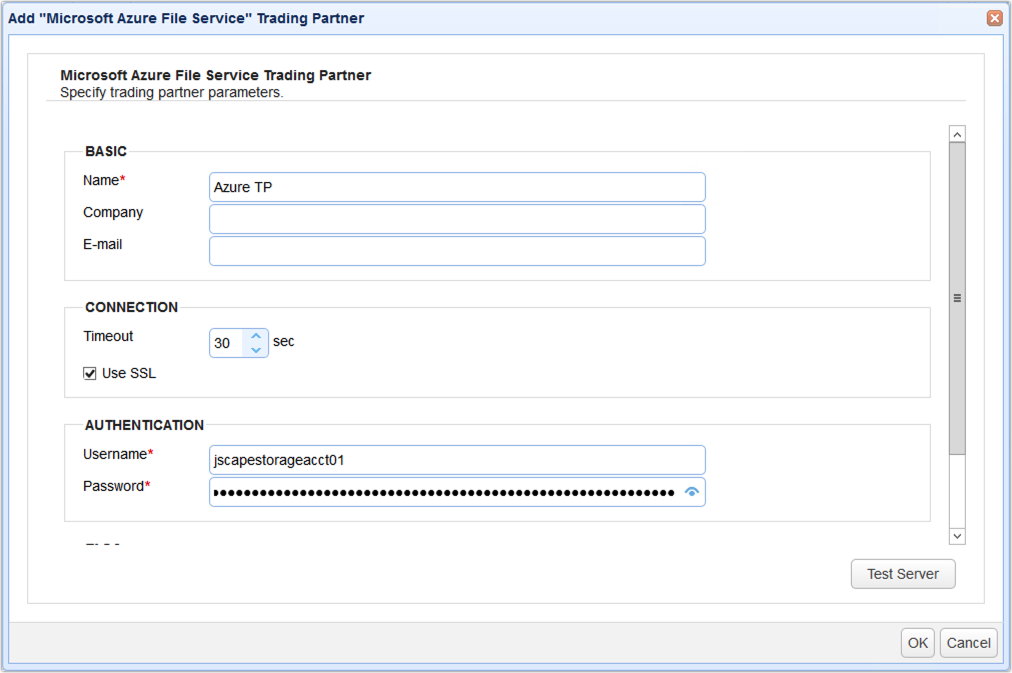
One more thing. Remember that I asked to you check whether the ‘secure transfer required’ toggle switch of your Azure storage account was enabled or not. If it was enabled, then you need to check the Use SSL checkbox in this trading partner dialog box. Otherwise, you can leave that setting unchecked.
What this simply means is that, if the secure transfer switch is enabled on your Azure storage account and the Use SSL checkbox is ticked on your trading partner, then file transfers made between these two entities will be done via a secure connection. Take note that the connection will fail if the settings on these two entities don’t match.
To see if the connection works, just click the Test Server button. If the test succeeds, you can then proceed.
The final step is to create a trigger that would listen to the directory monitor file added event and upload each detected file via a Trading Partner File Upload action. Let’s do that now.
Creating the trigger that would upload files to your Azure File share
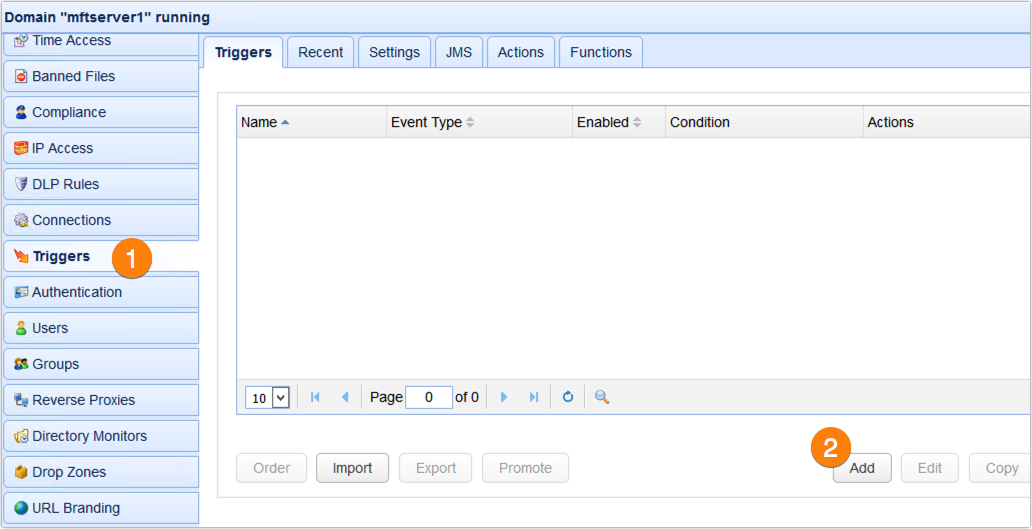
Navigate to the Triggers module and then click the Add button.
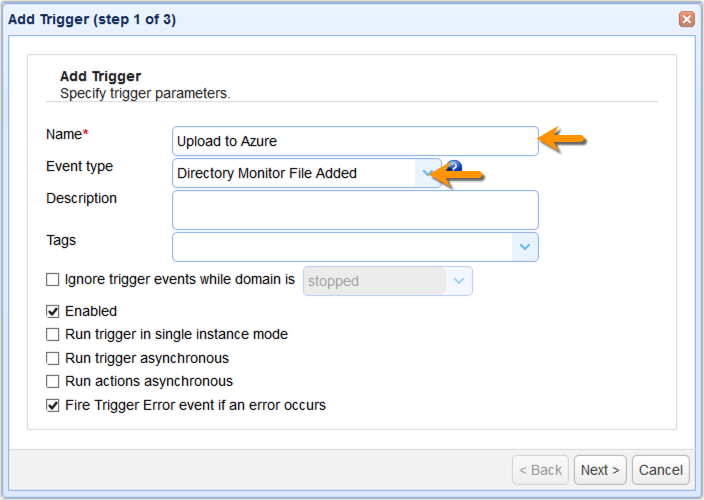
Give the trigger a name and select the Directory Monitor File Added event from the Event type drop-down list. Click Next to proceed.
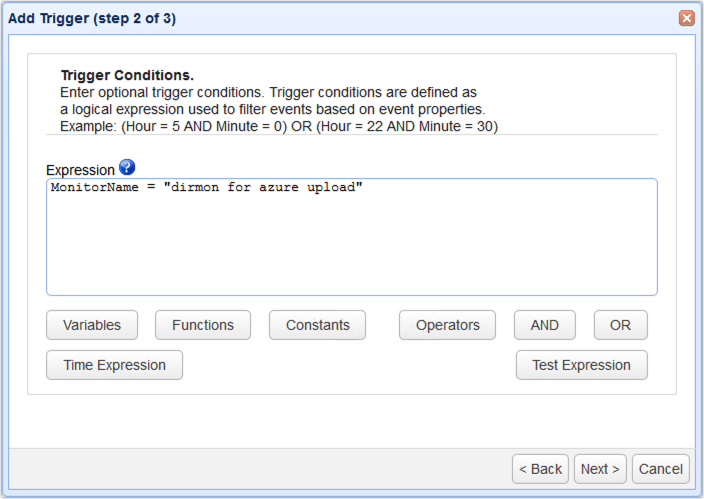
As you will likely have several triggers listening to the Directory Monitor File Added event type, you need to configure this particular trigger to respond only to those events that originated from the directory monitor you created earlier. In our case, that would be the directory monitor named ‘dirmon for azure upload’. So, we enter the following expression in the trigger conditions box:
MonitorName = “dirmon for azure upload”
Click Next to proceed.
Next, add the Trading Partner File Upload trigger action. This action will be responsible for uploading the files detected by your directory monitor to the Azure trading partner you created earlier. Click OK to proceed.
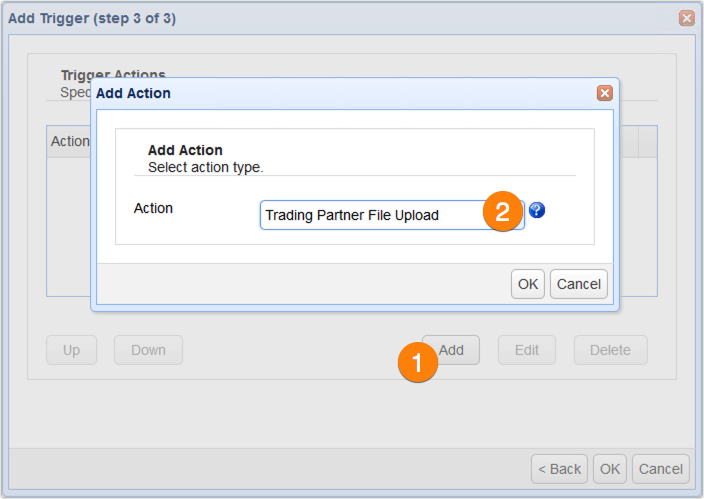
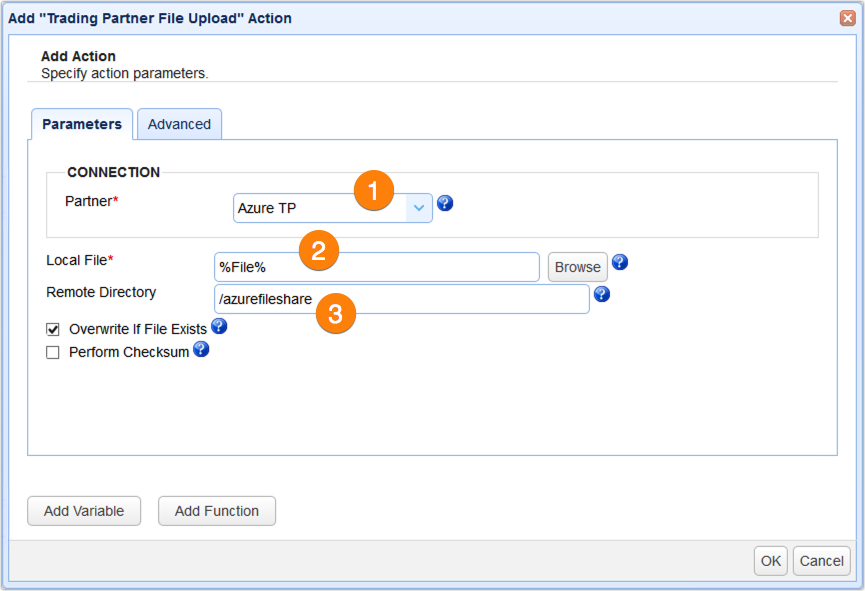
When the Trading Partner File Upload action dialog box appears, expand the drop-down list and select the trading partner you created earlier.
After that, go to the Local File field and enter the %File% variable (or select it from the Add Variable dialog). The value of the %File% variable corresponds to the local file path of each newly added file that’s detected by your directory monitor which in turn this particular trigger responded to.
Lastly, go to the Remote Directory field and enter the name of that existing file share I asked you to obtain earlier.
Click OK until you’re back at the main screen.
That’s it. Now you know how to configure your server to automatically upload files to an Azure File share.
Would you like to try this out yourself?
Request a free, fully-functional trial of JSCAPE MFT Server now.
Get started with your free trial request.
Related content
How To Leverage Cloud Storage Services When Dealing With High Volume File Transfers
Amazon S3 vs Local Storage – Where Should You Store Files Uploaded to Your File Transfer Server?
How To Use Amazon S3 As The File Storage System of Your MFT Server
How To Connect and Upload Files To an Amazon S3 Trading Partner
Frequently Asked Questions
What is Microsoft Azure?
Once known as Windows Azure, Microsoft Azure is a public cloud computing platform operated by Microsoft. Microsoft Azure offers a wide range of cloud services, including storage, compute, networking, and analytics. With Azure, users can build, test, deploy, and manage their applications in Microsoft-managed data centers. Azure offers a global footprint of over 54 data center locations. Users can choose which services are the best fit for their use case, which can be developing new applications or running existing applications.
Can JSCAPE integrate with Azure?
Yes. You can configure the JSCAPE MFT server so that the files that are uploaded are automatically streamed to an Azure File Share/Cloud Storage Service. Some options for configuring your JSCAPE MFT Server include uploading files on a predefined schedule, automatically redirecting each file uploaded to your server (for example, via FTPS, SFTP, HTTPS, etc.) to the share, encrypting each file before uploading to the share, or selecting incoming files based on source, type, or some other criteria and then upload only those files to the share.