In a previous post on automated AS2 file transfers, we showed you how to configure JSCAPE MFT Server so that it would monitor a directory for newly added files and then, each time a new file is detected, transmit that file to an AS2 trading partner. Today, we’re going to try something different. We’re going to set up JSCAPE MFT Server to carry out an AS2 transmission on a pre-defined schedule.
So, basically, we’re going to assume the (presumably updated) file we want to transmit will always be in the desired directory the moment it’s time to make that transmission.
Watch the video
Would you prefer to watch a video version of this tutorial instead? You can play the video below. Otherwise, just skip it if you wish to continue reading.
Prerequisites – Set up that AS2 trading partner first
We’re also going to assume our server is already configured with all the login credentials to establish a connection to the target trading partner. If you haven’t done that yet, I suggest you read the following articles first:
How to Setup an AS2 Server with JSCAPE – A QuickStart Guide
An Easier Way Of Exchanging AS2 Trading Partner Credentials
How To Set Up An Automated AS2 File Transfer
Alright, if you’ve already created an AS2 trading partner object and done all those configurations, you’re ready to set up that scheduled AS2 file transfer. As with all automated tasks on JSCAPE MFT Server, the first thing you need to do is create a trigger.
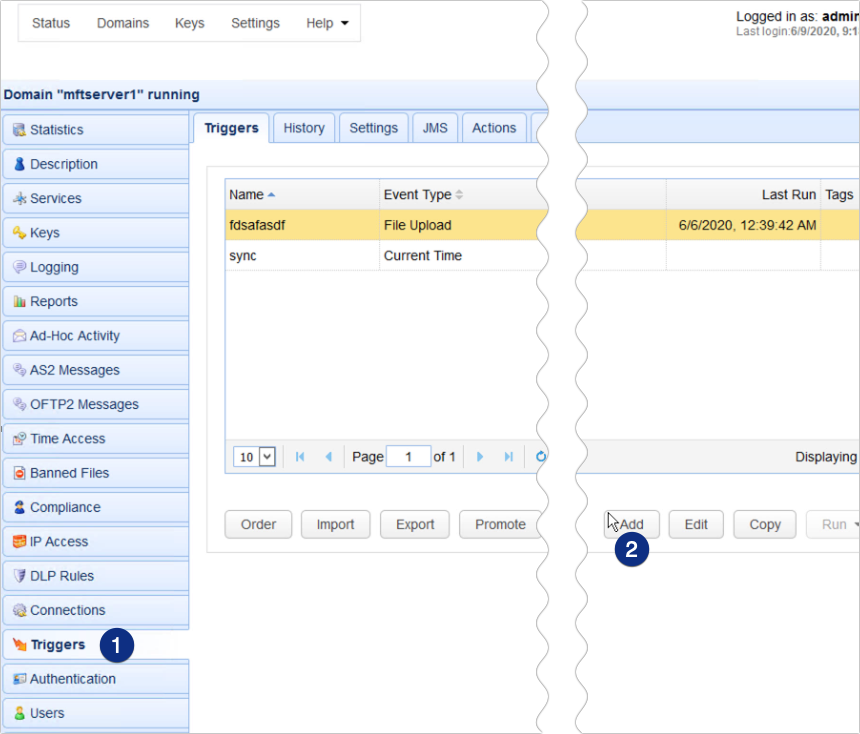
In your JSCAPE MFT Server administrative web interface, navigate to a domain and go to the Triggers module. Click the Add button to add a new trigger.
Related posts:
Automating File Transfer Processes Using Triggers
Introducing the New Trigger Conditions Expression Builder
Introducing the Redesigned Trigger Action Workflow
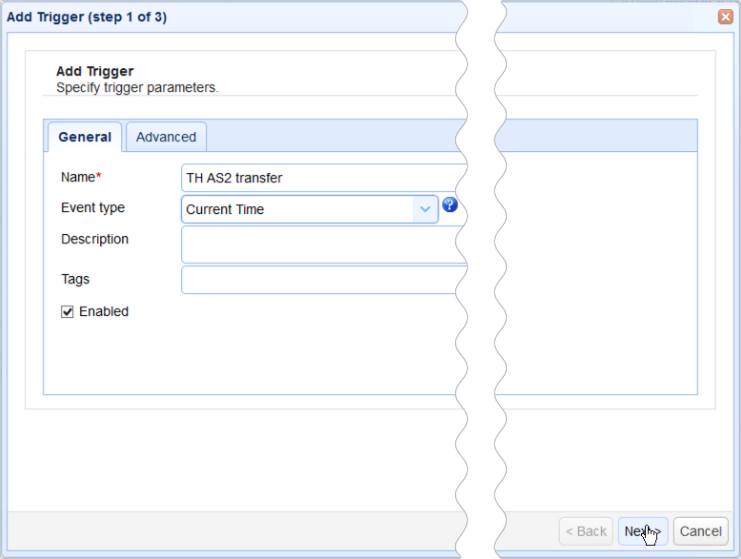
Give the trigger a name (e.g. TH AS2 transfer) and select the Current Time event type. Click Next to proceed.
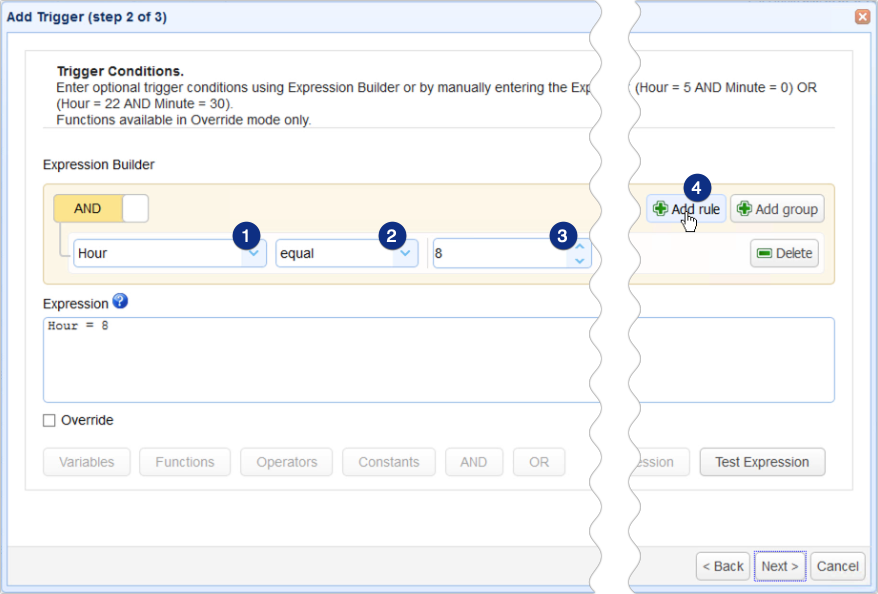
I want this AS2 file transfer to execute every Thursday at 8 AM. To start building an expression for that, I first select Hour, equal, and 8 from the drop down lists. This will create the first part of the expression.
I then add a new rule to add more elements to the expression.
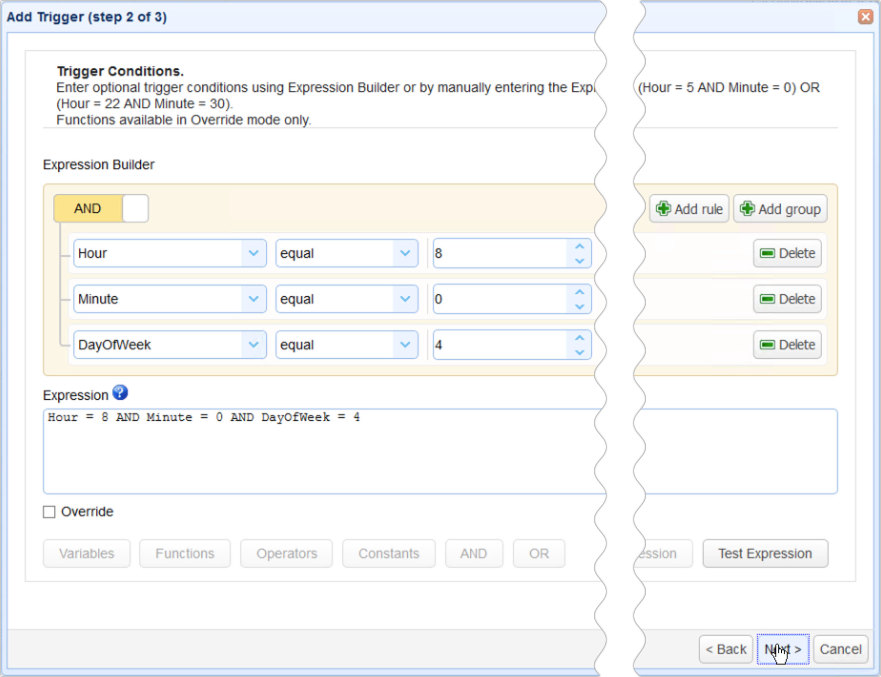
I then repeat the same process to specify the Minute and the DayOfWeek parameters. And so I end up with the expression:
Hour = 8 AND Minute = 0 AND DayOfWeek = 4
When I’m done, I click OK.
The next step is to add the trigger action that would perform the AS2 file upload to the desired trading partner. Click Add…
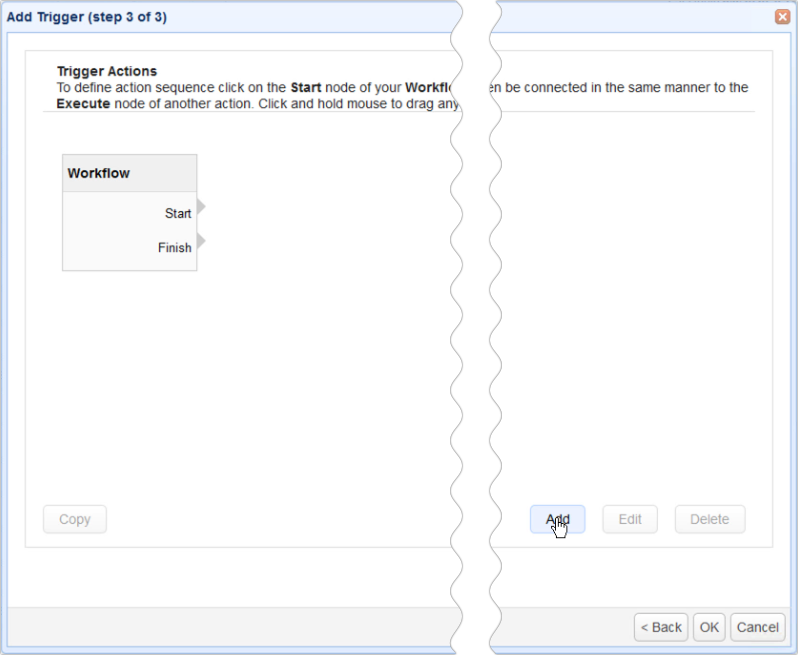
… and select Trading Partner File Upload from the Action drop-down list. Click OK to proceed.
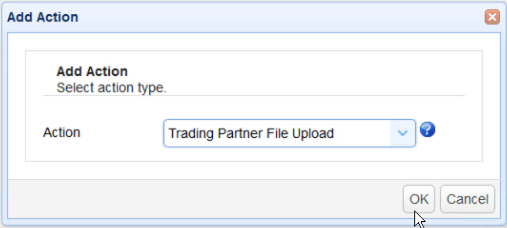
Once you’re inside the Trading Partner File Upload Action parameters dialog window, start by selecting the trading partner you want the file to be uploaded to from the Partner drop-down list.
After that, navigate to the file that you want to be uploaded. Click OK to finalize the trigger creation process.

Once the time for sending the file elapses, you can verify whether the file was indeed sent in the AS2 Messages module. So, here, as you can see, the file tpas2-00375.edi, which was the file we selected earlier, was sent at 8AM on a Thursday.
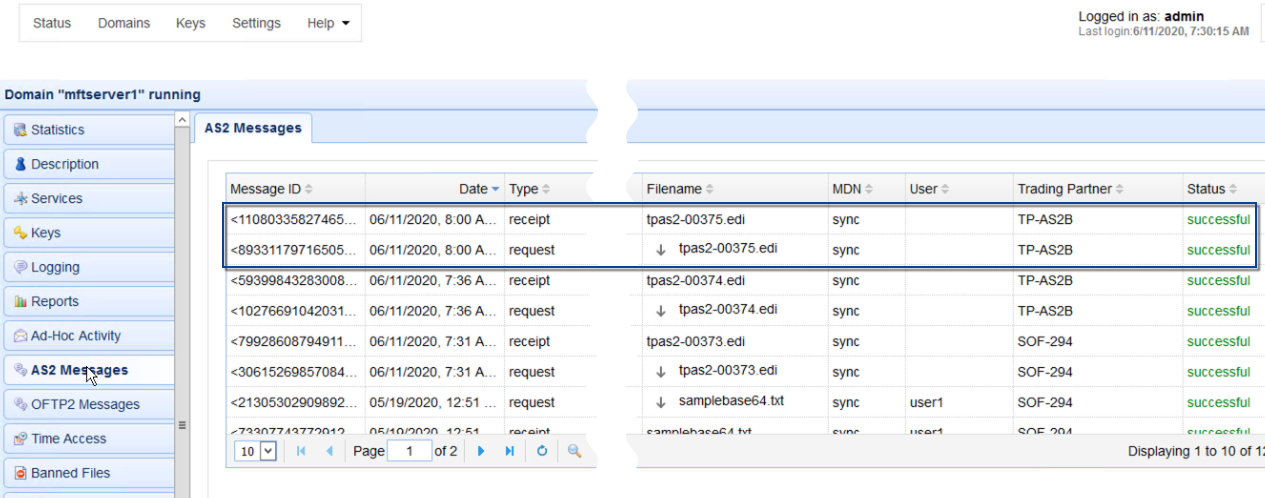
That’s it. Now you know how to configure JSCAPE MFT Server to schedule an AS2 file transfer.
Would you like to follow this tutorial yourself? Download the FREE Starter Edition of JSCAPE MFT Server now.


