
Last time, we introduced you the new Trigger Conditions Expression Builder, one of the new features that came with the recently released JSCAPE MFT Server v12. But that’s not the only new thing you’ll see in the Trigger’s module. You’ll also find a redesigned Trigger Action Workflow. Let me show you how it works.
Basic concepts
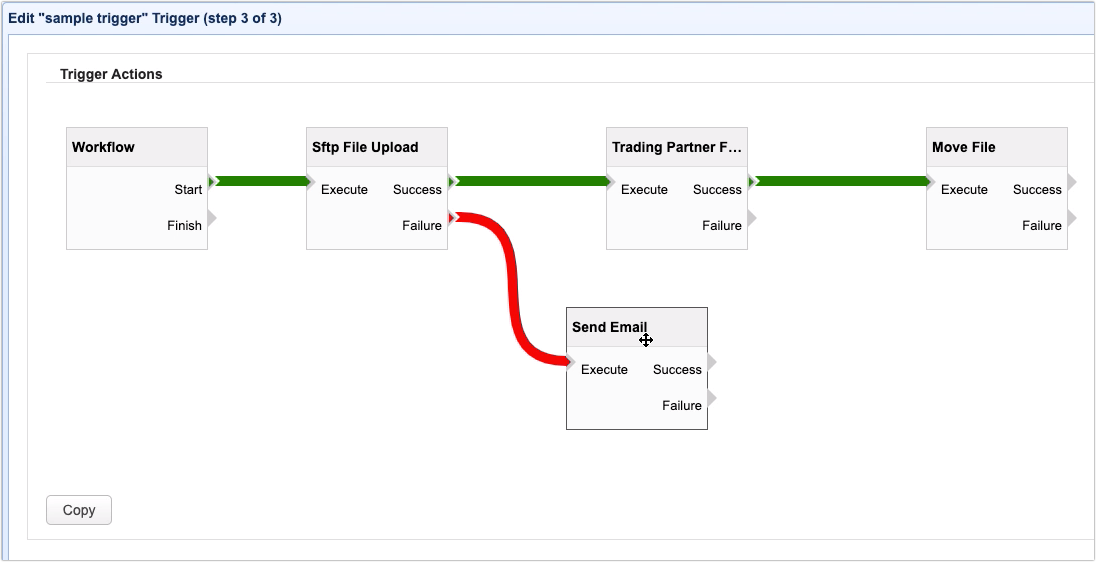
The new Trigger Action Workflow comes in the form of a flowchart, with a single Workflow node and one or more trigger actions making up the rest of the nodes.
Watch the video
Would you prefer to watch a video version of this tutorial instead? You can play the video below. Otherwise, just skip it if you wish to continue reading.
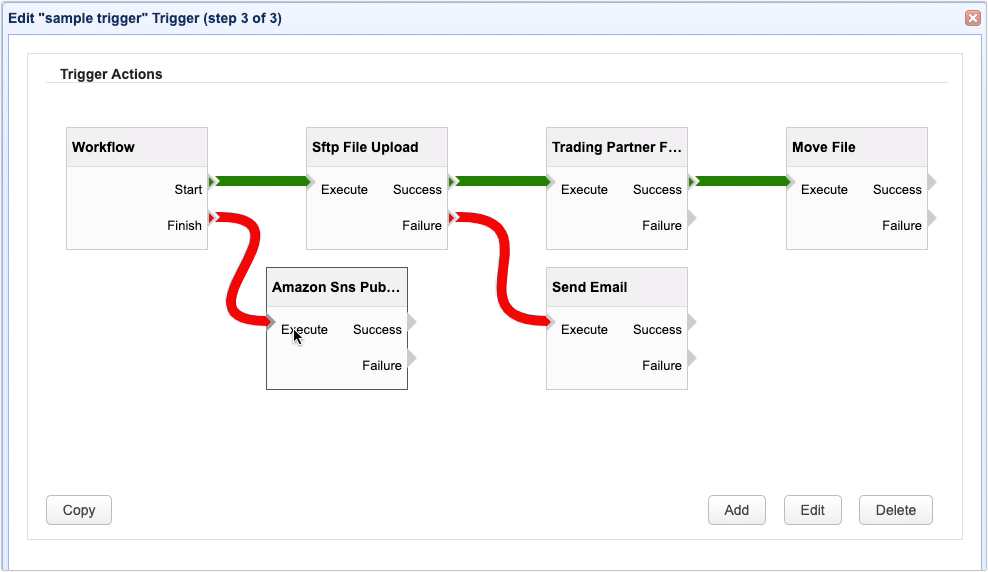
As you can see from our sample trigger action flowchart, the Workflow node has two outputs, Start and Finish.
Start – used to define what trigger action to execute when the trigger execution begins.
Finish – used to define what trigger action to execute when the trigger execution ends.
The flowchart also contains several trigger action nodes. Each action node has one input named Execute and two outputs named Success and Failure.
The first Start trigger action is linked to the Workflow node by an arrow extending from the Workflow’s Start output to the trigger action’s Execute input. On the other hand, the first Finish trigger action (if there is any) is linked to the Workflow node by an arrow extending from the Workflow’s Finish output to the trigger action’s Execute input.
So, when this trigger responds to a trigger event, it will start by executing the first action node in the Start branch of the Workflow. If there are other action nodes following the first node, those actions will likewise be executed depending on which output (Success or Failure) they are linked to and whether the previous action succeeded or not.
Once the trigger is done executing all Start nodes that could be executed, the action nodes linked to the Workflow node’s Finish branch will then commence execution. The action or actions in the Finish branch will be executed regardless whether or not all actions in the Start branch are able to execute successfully.
So, for example, if the SFTP File Upload action node fails, the Trading Partner File Upload action will no longer be executed. Instead, only the Send Email will execute. So, even if the Move File didn’t execute, the Amazon SNS Publish Message action of the Finish branch will still execute once the Send Email action is done executing.
How to build your trigger action flowchart
Now that you have a basic understanding of how the new trigger action workflow works, let me now walk you through the steps of building your first trigger action flowchart. Because the trigger action workflow is just one part of the trigger creation process, let’s just edit an existing trigger for this example. I’m just going to use the trigger we created in the article “Introducing the New Trigger Conditions Expression Builder“.
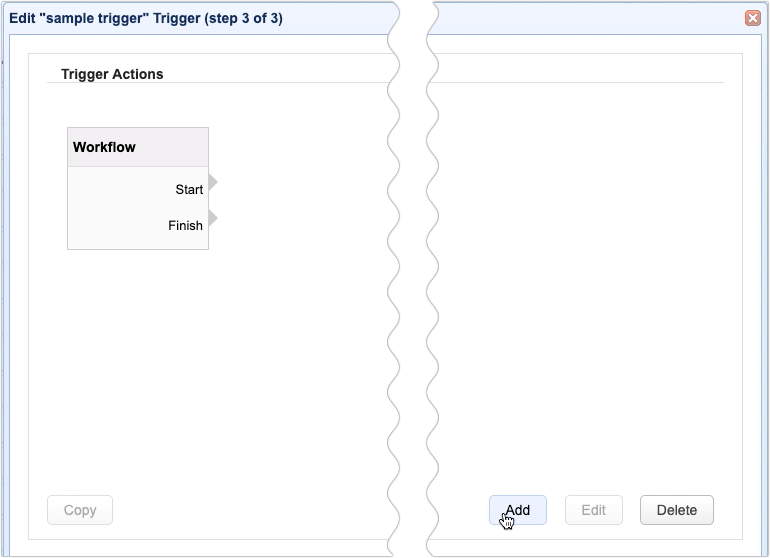
After you click the Next button in the Trigger Conditions window, the first thing you’ll see is a canvas with a single node — the Workflow node. To add a trigger action to the canvas, just click the Add button.
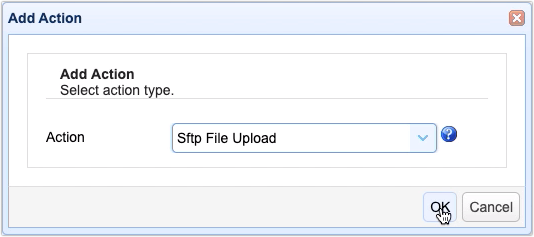
This will bring up the Add Action dialog. Expand the Action drop-down list and select your desired trigger action. For this example, let’s just choose the SFTP File Upload action. Click OK to proceed.
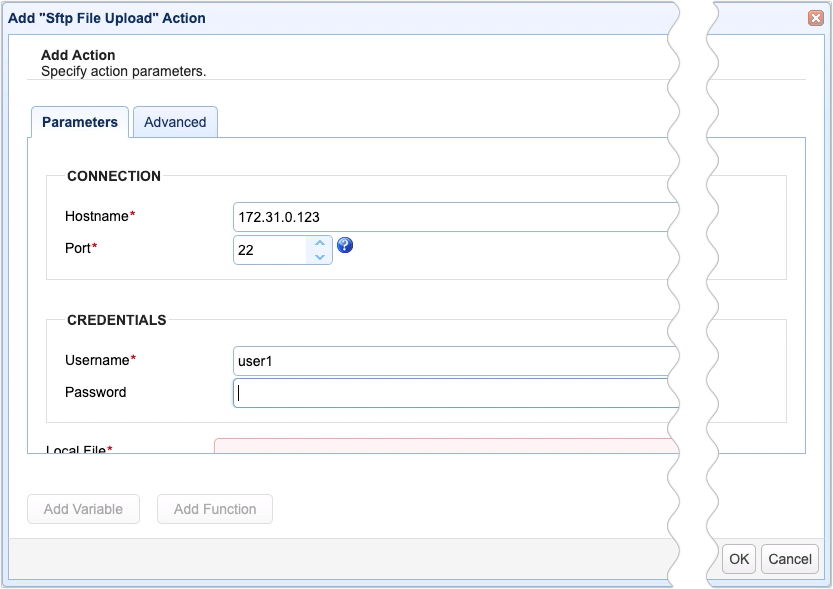
The contents of this screen will vary depending on the selected trigger action. Enter pertinent details for the action in question and then click OK.
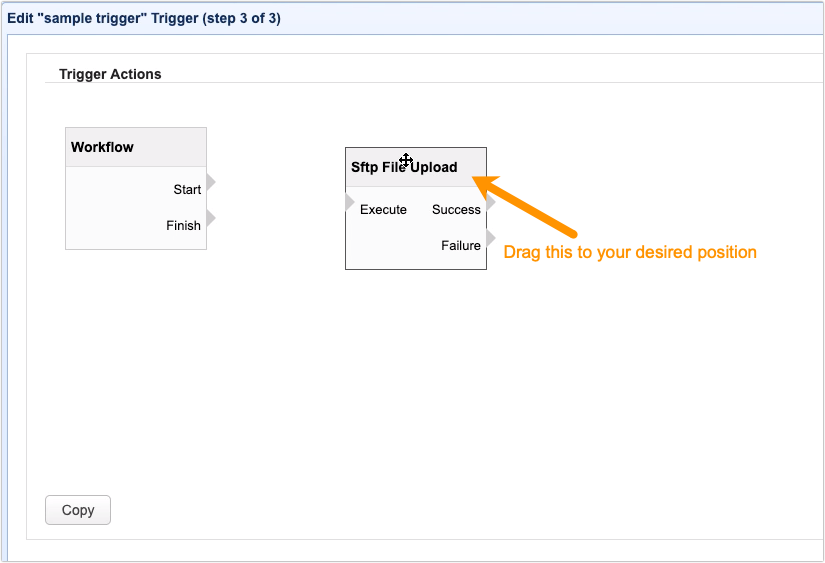
A new trigger action node bearing the action type chosen (e.g. Sftp File Upload) will then be added to the canvas. Drag this action node over the canvas and place it in your desired position. As stated earlier, you can link this action to either the Start or Finish outputs of the Workflow node. Let’s just link this to the Start output. That means, this action will be executed as soon as this trigger starts responding to the trigger event.
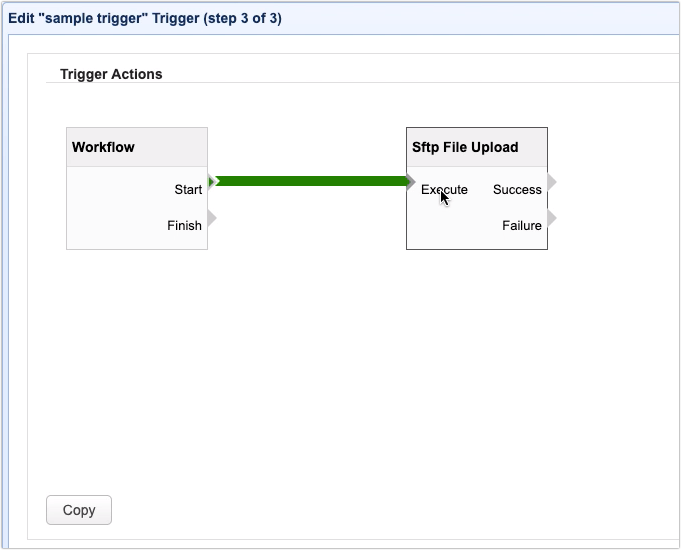
To link this action to the Workflow’s Start output, just click the Start output and then click the SFTP File Upload action’s Execute input. You’ll know the link is successful if you see a green arrow extending from Start on the Workflow node to Execute on the SFTP File Upload action node.
Adding more action nodes
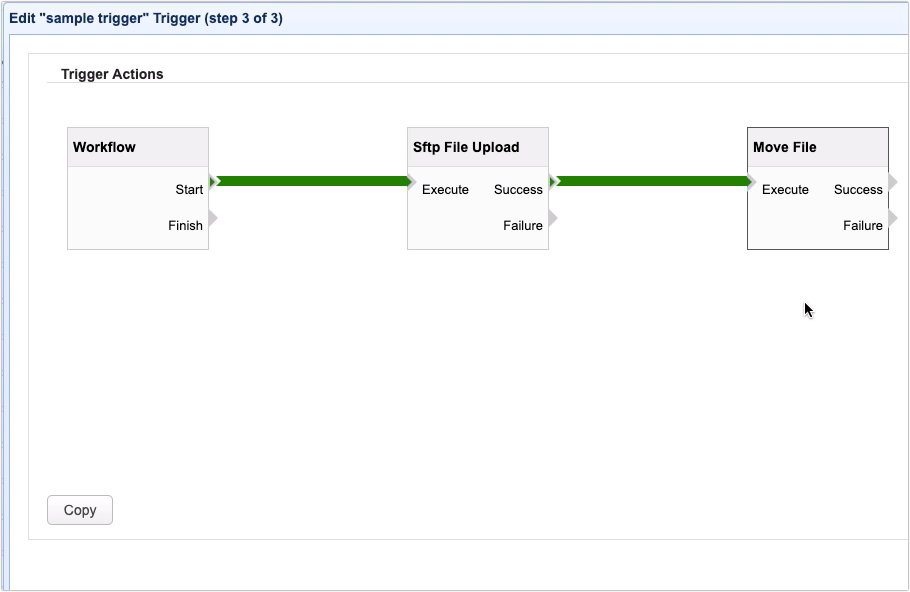
Should you wish to execute another trigger action after this existing action, just add another action node and link it to the previous node by clicking on 1) either the Success or Failure outputs of the first node and then 2) on the Execute input of the second node. For this example, let’s just link our second action node, a Move File action, to the Success output of the first action.
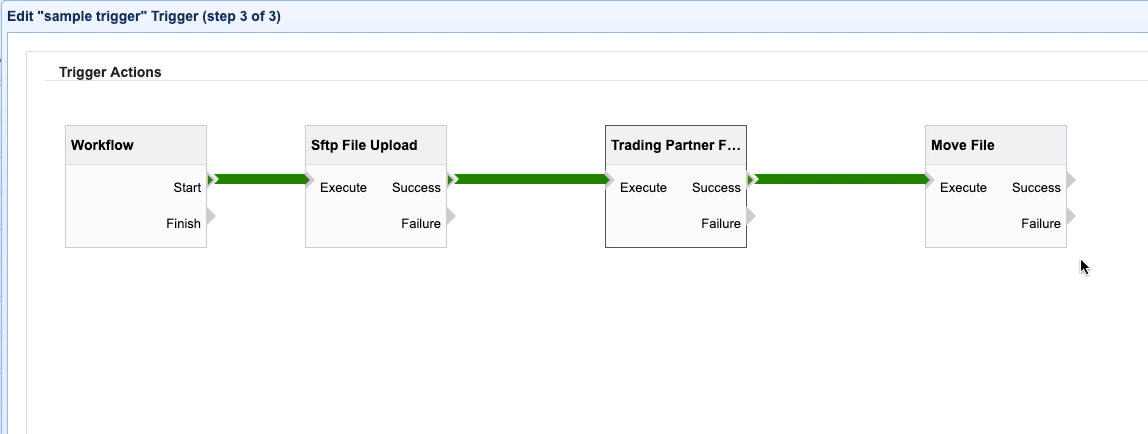
You may add more nodes as you wish and then link them in a daisy-chain fashion. To change the order of execution of existing action nodes, just delete all affected links (by selecting and clicking Delete), reposition the nodes in question, and then reattach new links that reflect the desired order of execution.
In most cases, you would link a succeeding action node to the Success output of a previous action node. However, action nodes can also be linked to the Failure output. Normally, this is done for error handling purposes. For example, if an action fails, you might want JSCAPE MFT Server to send an email to a designated server admin (e.g. via the Send Email action) or log the failure to a file (e.g. via the Append File action). Just add an action node as you normally would and then link it to the previous node’s Failure output.
Finishing a trigger
Lastly, you may link an action node to the Workflow’s Finish output. This action will be executed regardless whether or not all actions linked to Start are able to execute successfully. You can use this, for example, to send an email, an SMS notification, or a message to Amazon SNS, among other actions.

That’s it. Now you know how to build trigger actions using JSCAPE MFT Server’s redesigned trigger action workflow.
Try this yourself
Would you like to try this yourself? Download the FREE, fully-functional Starter Edition of JSCAPE MFT Server now.
Download JSCAPE MFT Server Trial