
On its own, AS2 already comes with a nice set of features that enable it to secure EDI transactions. It’s got encryption. It’s got non-repudiation. It even has data integrity checks as well as a form of server and client authentication. So, even if you run AS2 over HTTP, your data can already get a good amount of protection. Still, it wouldn’t hurt to add more layers of protection. And you can do that if you run your AS2 transactions over HTTPS.
Through SSL/TLS, HTTPS can provide additional security functions such as:
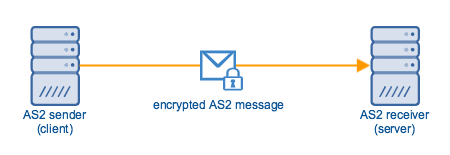
Data-in-motion encryption, which you can use in lieu of or in tandem with AS2’s built-in encryption, to preserve the confidentiality of your data while it’s traversing the network.
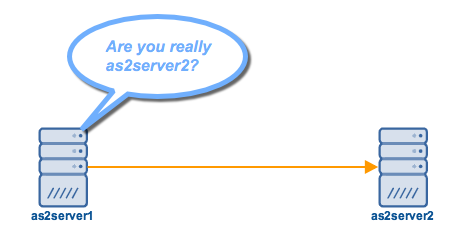
Server authentication, which you can use to verify whether the AS2 server you’re connecting to is in fact the one you intended to transact with and not an impostor.
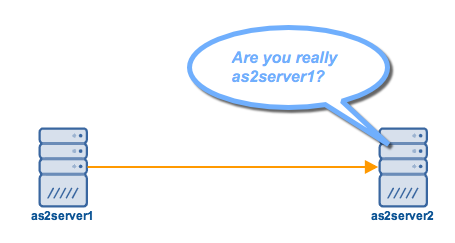
Client authentication, which your trading partner can use to verify that your AS2 client is in fact the one they intend to transact with and not an impostor.
Let’s now proceed with the steps to configure JSCAPE MFT Server so that these security functions can be brought into play. If you’d prefer to see it in-person, request your free trial.
Note: In the following sections, we’ll be indicating whether the succeeding steps should be performed on an MFT Server instance that will serve as a receiver or on one that will serve as a sender. However, if your MFT Server instances will act as both receiver and sender, then you will have to follow the steps for both sender and receiver.
We’ll also be assuming you’ve already set up your AS2 hosts and configured trading partners on them. If you haven’t done those yet, you may want to read the following posts first:
The Quickstart Guide To Setting Up An AS2 Server
How To Set Up An Automated AS2 File Transfer
You can also read the JSCAPE MFT Server AS2 online documentation (navigate to the AS2 section)
Enabling TLS data-in-motion encryption
Let’s start by enabling the data-in-motion encryption function of TLS./p>
Do this on the AS2 receiver
The only tasks you need to do on your AS2 receiver in order to secure your AS2 connections with TLS encryption is to enable HTTPS and specify a server key. The server key will contain all pertinent information needed by your AS2 receiver when it’s asked to send a digital certificate to an AS2 sender/client that’s attempting to initiate a connection.
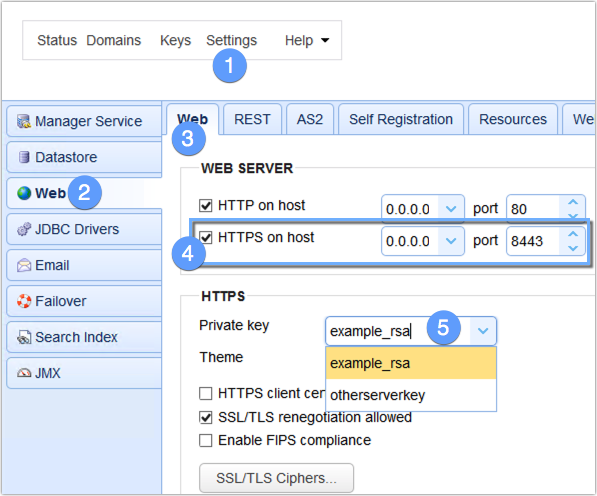
To enable HTTPS, go to Settings > Web > Web and then tick the HTTPS on host checkbox. You may specify an IP address/hostname and port number or just leave the defaults as is.
After that, expand the Private key drop-down list and select a server key from there. The contents of that list is sourced from your selection of server keys in the Keys > Server Keys section. What you see on the screenshot (example_rsa) is the built-in sample server key that comes with the default installation of MFT Server. However, you shouldn’t be using that in a production environment.
To learn how to create server keys for your HTTPS services, read the article:
How To Set Up A HTTPS File Transfer
When you’re done, click the Apply button.
So, when an AS2 sender successfully connects to your AS2 HTTPS service, the EDI documents it sends over that connection will be protected by TLS encryption.
Note, however that, while your EDI transactions will be sent over an encrypted channel, that might not be enough. What if an impostor spoofs your AS2 server? That would mean any AS2 client who connects to that server will end up be sending encrypted EDI documents to the wrong host!
To prevent that from happening, you can actually leverage TLS’ server authentication feature so that the sending AS2 server will know whether it’s really connecting to its trading partner or an impostor. Let me now show you how to activate that feature.
Activating TLS server authentication
In order to use TLS server authentication, you’ll need to configure both the sender and receiver. Let’s start at the receiving end.
Do this on the AS2 receiver
There’s nothing much to configure, really. All we need to do is export a digital certificate and then hand that over to the server admin of the AS2 sender, who will then import that into the AS2 sender.
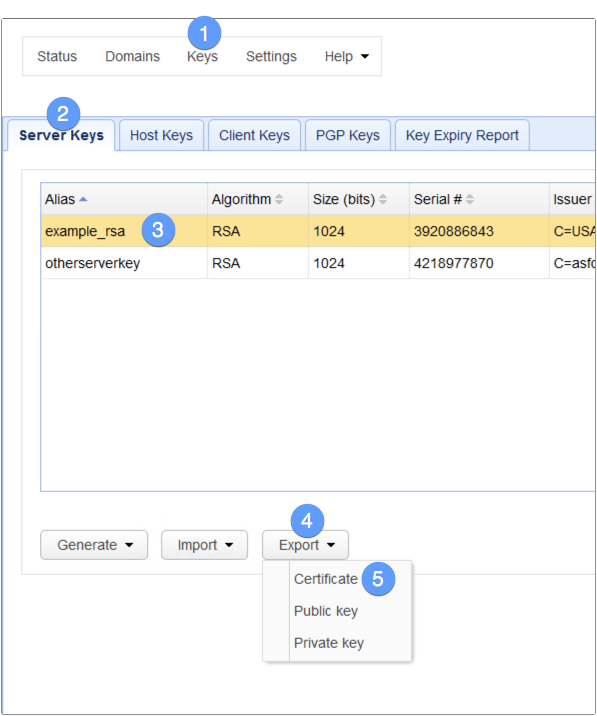
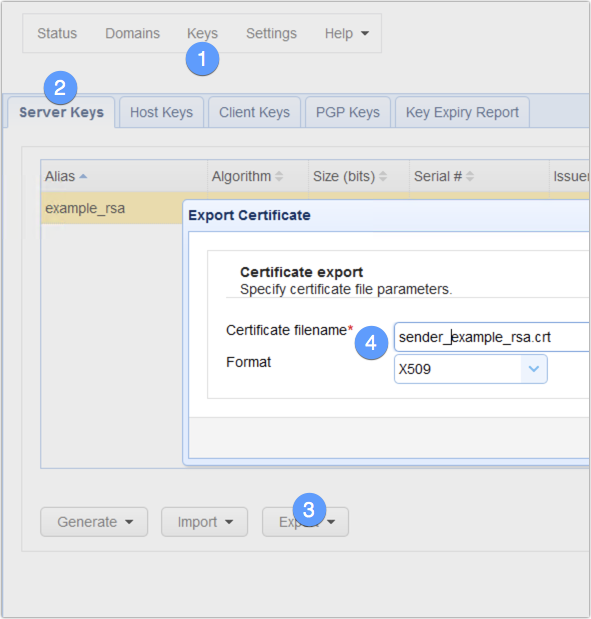
Login to the MFT Server manager and then navigate to the Keys menu. When you get there, go to the Server keys tab and select the server key used by your HTTPS service. Meaning, it should be the same one that you selected earlier in the previous section.
After that, click the Export button and then Certificate.
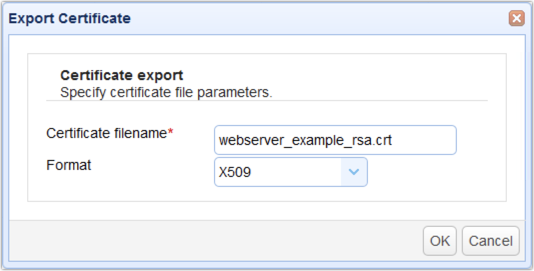
Specify a filename for the X509 certificate you’re about to export and then click OK.
Secure that file and then send it over to the server administrator of the AS2 sender.
Do this on the AS2 sender
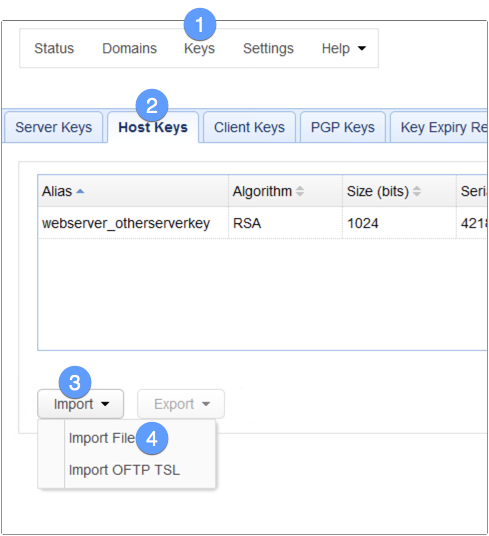
Let’s now head out to our AS2 sender and then import that file. To import that file on a JSCAPE MFT Server instance, go to Keys > Host keys and then click Import > Import File
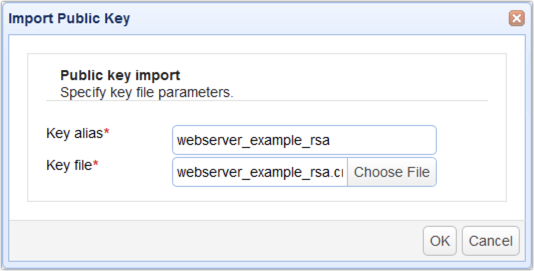
Give the imported key (which comes with the certificate) an alias and then select the file you exported earlier from the AS2 receiver. An alias is just an arbitrary name that you’ll be using to refer to that key within this AS2 host’s environment. Click OK to proceed.
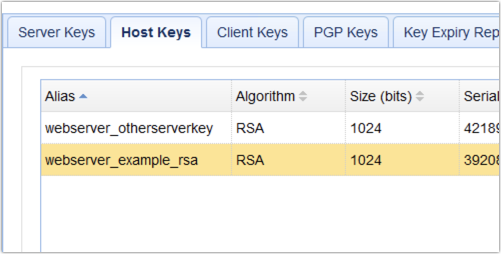
If the import succeeds, you should see your newly imported key among your list of host keys.
To use that key for authenticating the AS2 receiver, edit the trading partner object you set up for that AS2 receiver. Then in the SSL section, check Host key and then select the alias of the host key you recently imported.
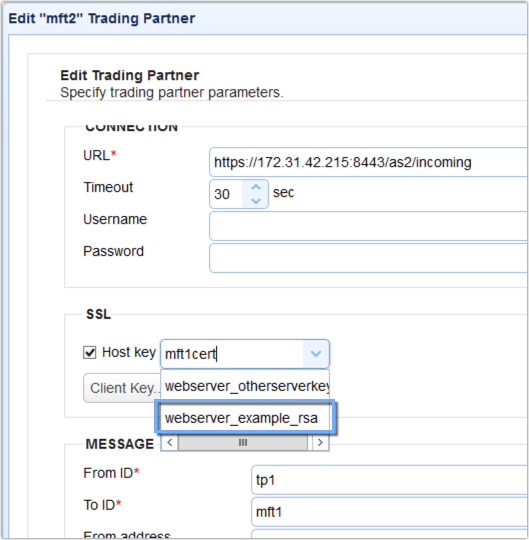
You can check it that works by clicking the Test Server button in the lower-right corner of that screen. If the trading partner test passed, you can then click the OK button to commit the changes.
So, when your sending AS2 server attempts to connect to your receiving AS2 server, the public key in your sender’s host key will be checked to see if it matches the private key in the receiver’s server key. If they match, then that means the sender is connecting to the right receiver and the AS2 connection is established.
In some instances, the folks at the AS2 receiver side might also want to authenticate the connecting AS2 sender. That brings us to our last TLS security feature; namely, client authentication.
Enabling TLS client authentication
Just like with server authentication, client authentication requires configurations in both the sender and receiver side. Remember the previous section, where we exported a certificate from the AS2 receiver and imported that cert into the host keys tab of the AS2 sender? Well, we just need to do the reverse of that … well, sort of. Let’s walk through the steps below.
Do this on the AS2 sender
Here, we just need to export a certificate from the AS2 sender and then import that certificate into the client keys tab (not the host keys tab!) of the AS2 receiver. So, assuming we’re on the AS2 sender, we just go to Keys > Server keys and then export a certificate from the server key. If that As2 sender host will also act as a receiver at some point in time, then just export the certificate from the server key that’s used in that host’s HTTPS service.
Do this on the AS2 receiver
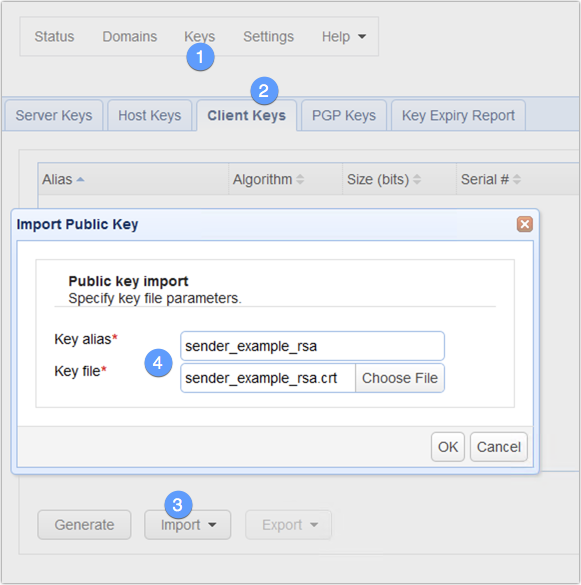
Next, head out to the AS2 receiver and import that certificate into the client keys tab.
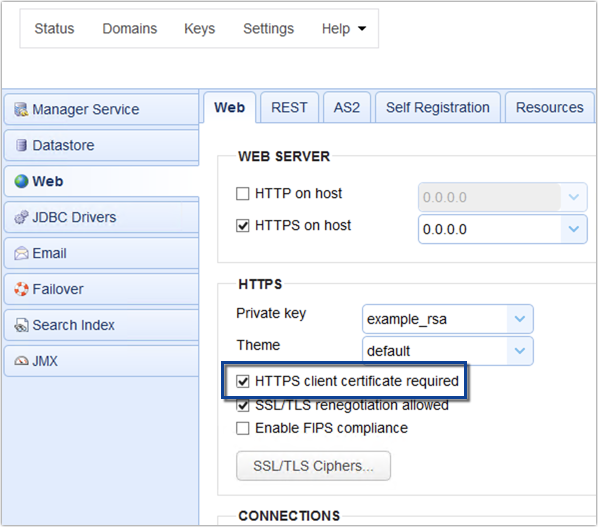
We’re not yet done here. Go to Settings > Web > Web and check the ‘HTTPS client certificate required‘ checkbox.
Do this on the AS2 sender
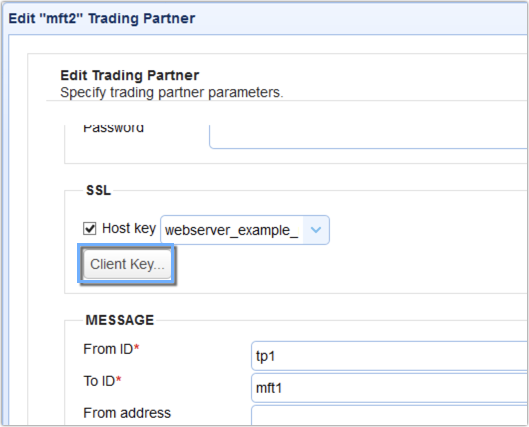
After that, we need to head back to our AS2 sender and load the server key into that same trading partner you set up for the AS2 receiver. Go back to the SSL section and then click the Client Key button.
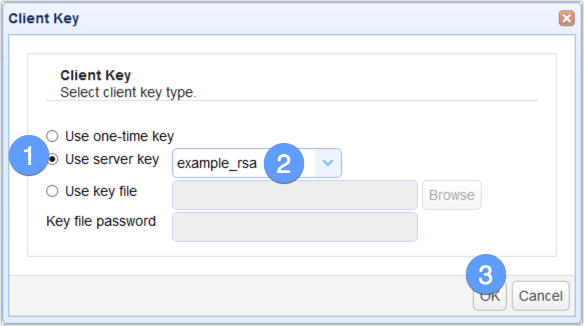
Select the Use server key option and select the server key that was used in exporting the digital certificate earlier in this section. Click OK to proceed.
Again, you can test if this works by clicking the Test Server button. If all goes well, the test should succeed. That’s it. Now you know how to configure your AS2 servers to leverage the security features of HTTPS.
Would you like to try this out yourself? Fill out a short form to request a free trial now.