
Overview
Not all AS2 servers authenticate trading partner clients through usernames and passwords. Many use digital certificates. If you want to know how to set up this kind of authentication on your AS2 server, read this post.
This tutorial involves two AS2 servers. The first AS2 server acts as the “sender” and the second AS2 server acts as the “recipient”. Let’s call the first server AS2 Server 1 and the second, AS2 Server 2.
AS2 Server 1 can also be considered the “client” and AS2 Server 2 the “server” in a client-server architecture. In order for the server to authenticate the client, the server must possess the public key that corresponds to the client’s private key.

All steps and screenshots shown below are based on the JSCAPE MFT Server environment. JSCAPE MFT Server is a managed file transfer server that readily supports AS2 transactions. You may request a free, fully-functional evaluation edition of this AS2 server by clicking here:
Before we proceed, you need to set up the two AS2 servers. Setting up an AS2 service on JSCAPE MFT Server is easy. Just follow the instructions in the tutorial
The Quickstart Guide To Setting Up An AS2 Server
Do that for the two AS2 servers. Ready with your AS2 servers? Let’s proceed.
Creating the private key and its corresponding digital certificate
Note: This is done on AS2 Server 1
The first steps are going to be carried out on AS2 Server 1 (a.k.a. the client). That’s where we’ll generate a private key and a digital certificate. The digital certificate will contain the private key’s corresponding public key. Once this certificate (along with the public key) is imported into AS2 Server 2 and the private key loaded unto the AS2 Server 1 side, the two parties will then be ready to perform certificate-based authentication.
We already wrote a tutorial for creating a private key and its corresponding certificate. Just follow the steps in the article How To Create A Client Certificate. Don’t forget to assign a filename and a corresponding password for the exported private key file.
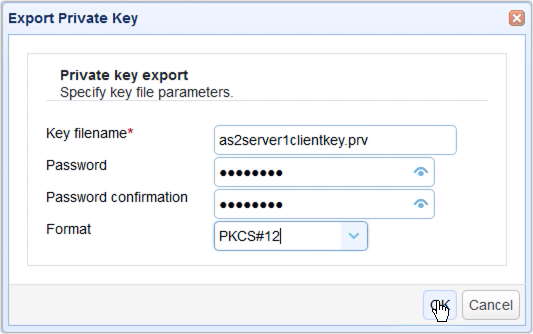
Save the private key file and store it in a secret location.

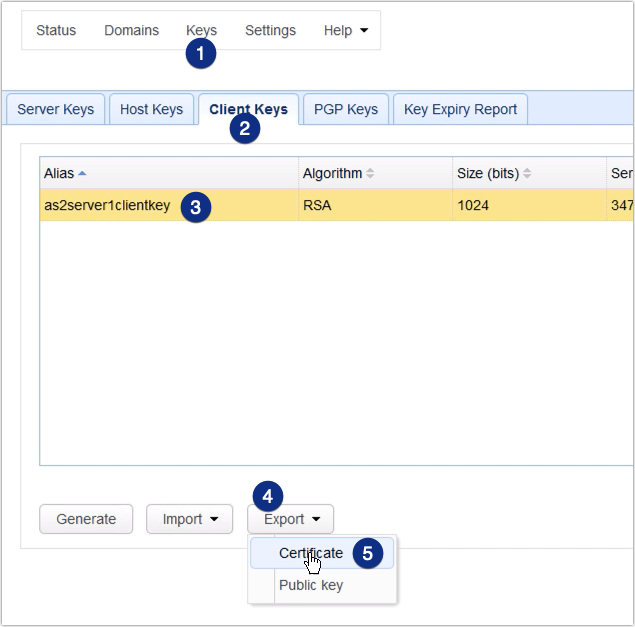
Now that you’ve created the private key, you’ll now need to export that private key’s public key. Again, the public key will have to be stored in a digital certificate. To export the digital certificate,
- 1. Go back to the Keys module
- 2. Then back to the Client Keys tab,
- 2. Select the newly generated client key,
- 3. Click Export and then
- 4. Click Certificate.
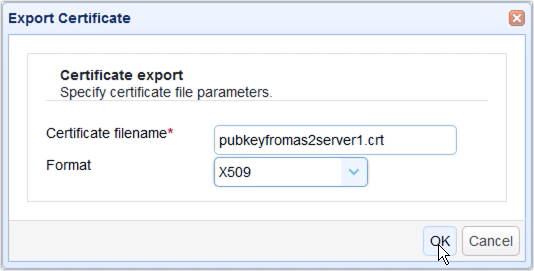
As soon as the Export Certificate dialog appears, specify a file name (or keep the one generated for you) and then select a certificate format. You’ll usually want it to be in X.509. Click OK.
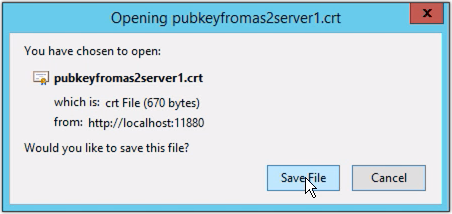
A certificate file will then be automatically generated. Save that file. You should then import this file into AS2 Server 2. In a real world scenario, you will have to send this certificate out-of-band to your trading partner’s server administrator. That person will then have to import the file you sent into his AS2 server.
Importing certificate into the authenticating server
Note: This is done on AS2 Server 2
We’ll now import that digital certificate into the authenticating server, which in our case would be AS2 Server 2. AS2 Server 2 will use this certificate to authenticate AS2 Server 1 when the latter first attempts a connection.
To import the certificate, go to Keys > Client Keys tab, click the Import button, and then Import File.
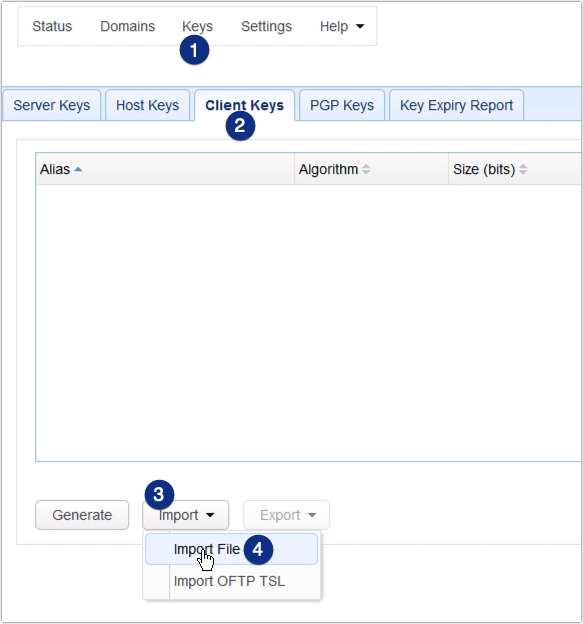
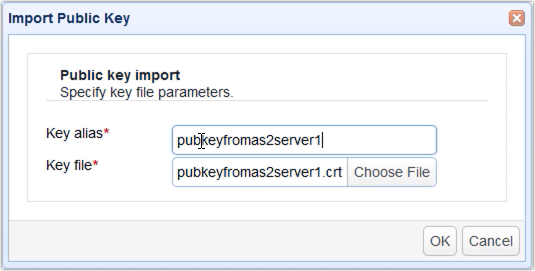
Give the public key / certificate an alias. An alias is just an arbitrary name that will be used to represent this particular key in this server’s environment.
After that, click the Browse button and then navigate to the digital certificate file. Click OK to proceed with the import process.
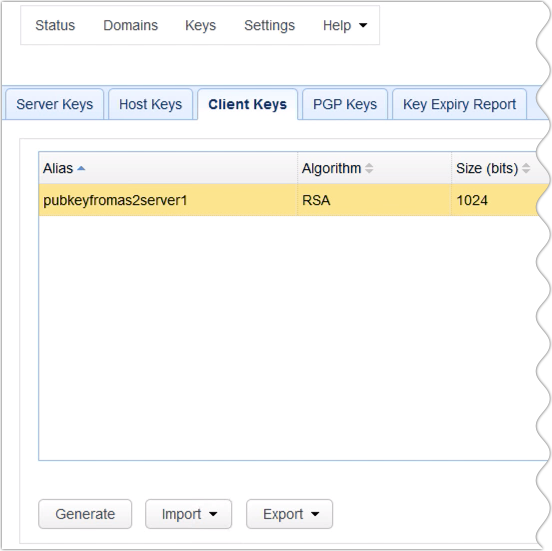
If the import succeeds, you should see the alias of your newly imported certificate under the Client Keys tab.
Enabling HTTPS client certificate authentication
Note: This is still done on AS2 Server 2
In case you didn’t know, AS2 runs on HTTP/S. AS2 servers are actually able to perform certificate-based authentication because that capability already comes with HTTPS. To be more specific about it, the capability actually comes from the SSL or TLS part of HTTPS. Thus, for all this to work, you need to make sure HTTPS is already enabled and that the server is set to require HTTPS client certificates.
For more detailed information about setting up HTTPS, read the post:
How To Set Up A HTTPS File Transfer
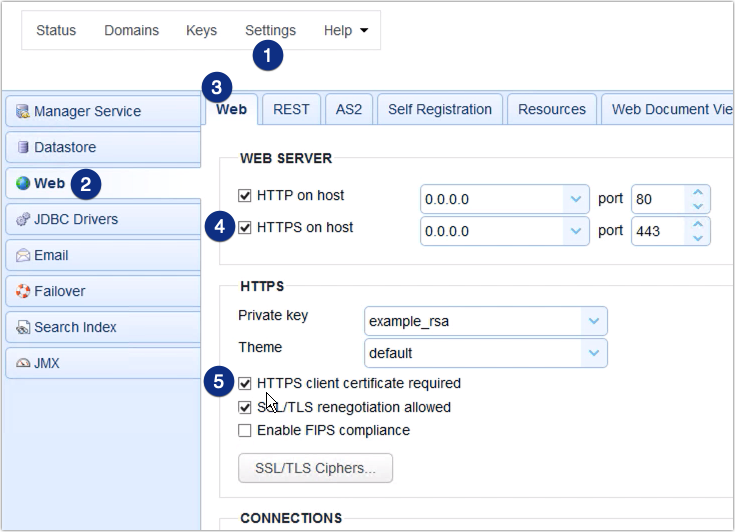
To require client certificates, go to Settings > Web > Web tab, make sure HTTPS on host is enabled, and then tick the HTTPS client certificate required checkbox. Don’t forget to click Apply.
We’re now done on the “server” side. It’s time to go back to the “client” side.
Loading up the private key unto the AS2 Trading Partner object
Note: This is done on AS2 Server 1
Now that the public key certificate has already been imported on the authenticating server’s side, it’s time to load our private key unto the client. In this case, the client will be a Trading Partner object on JSCAPE MFT Server.
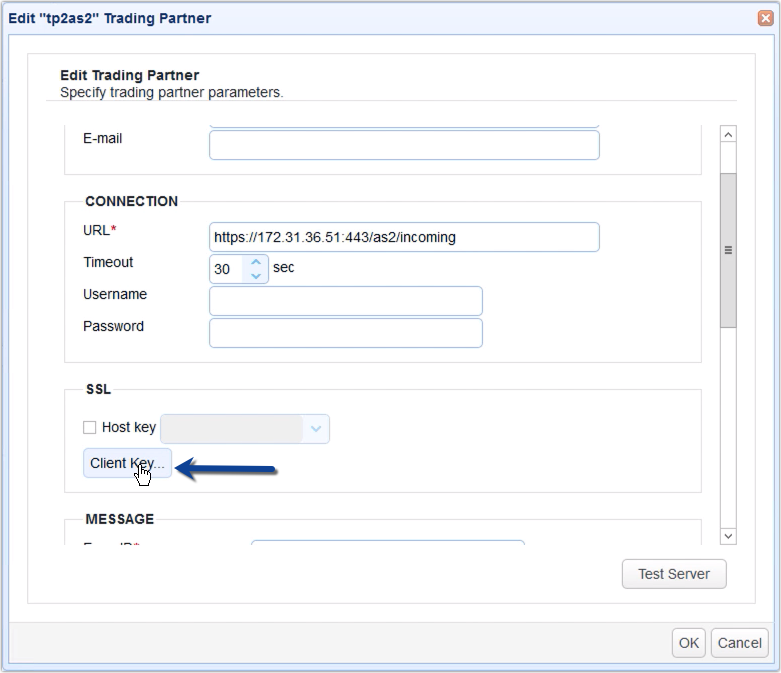
If you followed the instructions in The Quickstart Guide To Setting Up An AS2 Server, as instructed earlier in this article, you should now have a Trading Partner object ready for use. Assuming that trading partner object also points to AS2 Server 2, that should be the trading partner where you’ll load the private key. Edit that trading partner now and click the Client Key button.
When the Client Key dialog pops up, select the Use key file option and then browse to the location of the private key file. Select the key file and enter its corresponding password.
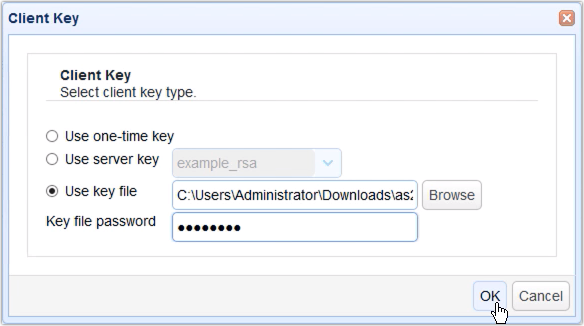
As soon as you click OK, you will have already completed the steps for setting up certificate-based authentication for your AS2 server.
Confused? Leave a comment below or on any of our social media accounts.
You might also want to read
What Is Client Certificate Authentication?