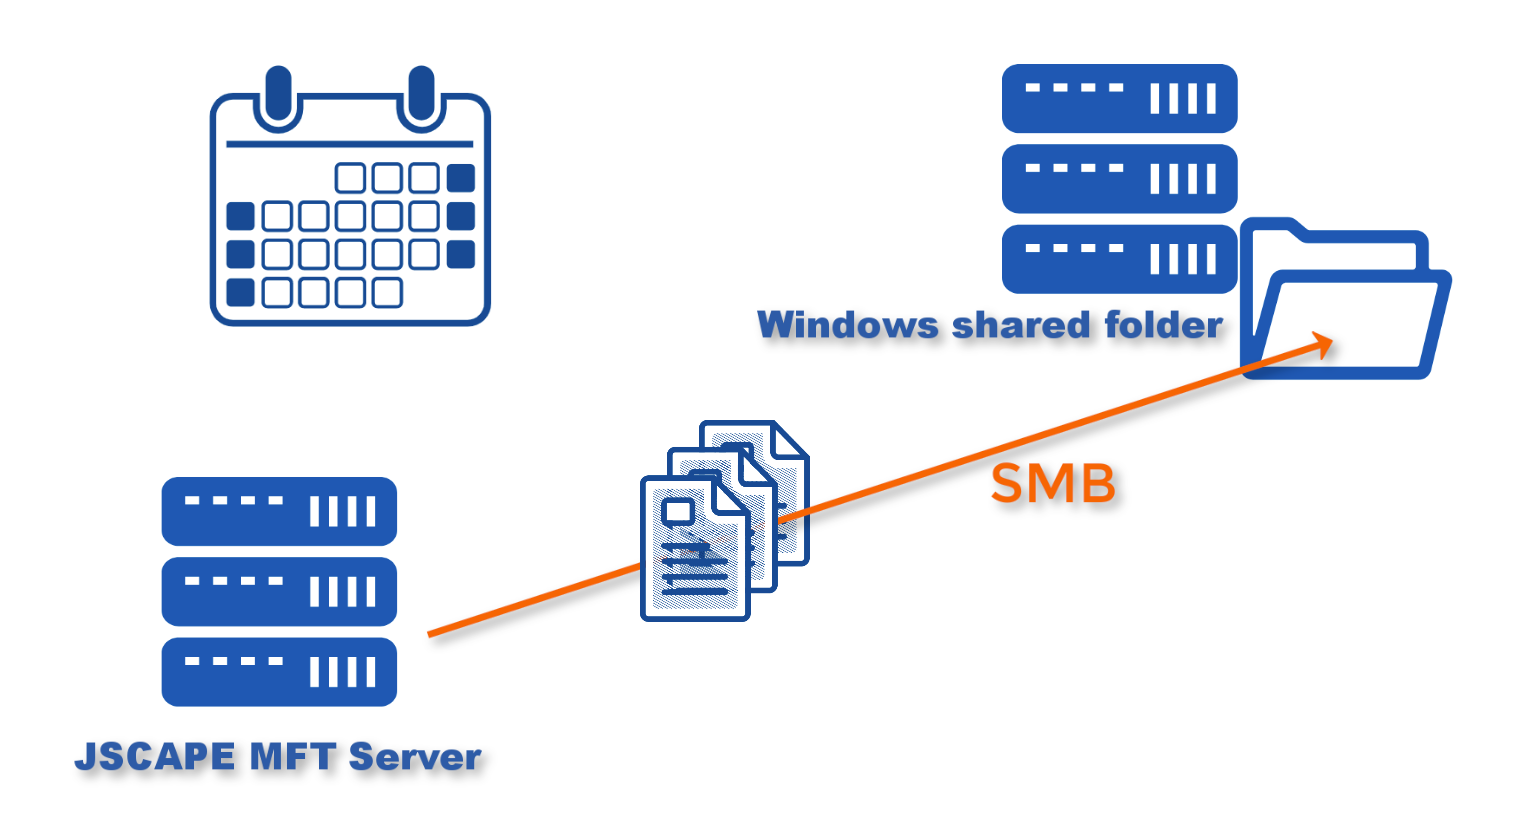
One of the most common ways of transferring data between Windows servers is through the Server Message Block (SMB) network file sharing protocol. A lot of organizations, for instance, use it for exchanging data between branch offices across a wide area network (WAN). If you want to know how to schedule an automated file transfer via Windows SMB share (or maybe a Samba share on Linux), read this post. If you want to see it in action, request a free trial of JSCAPE.
Watch the video
Would you prefer to watch a video version of this tutorial instead?You can playthe video below. Otherwise, just skip it if you wish to continue reading.
The way I’m going to do this is by using JSCAPE MFT Server. There are a number of advantages of using JSCAPE MFT Server for this purpose.
1. It’s very easy to set up using a Trading Partner object;
2. If, in addition to sending data via SMB, you also need to transfer files to other remote hosts using other file transfer protocols like FTP, SFTP, and so on, or perhaps even upload files to cloud-based storage solutions like Amazon S3, Azure Files, or Dropbox, then you can do all that using just one solution;
3. You can easily incorporate security controls like DLP (Data Loss Prevention) and OpenPGP data-at-rest encryption; and
4. JSCAPE MFT Server already supports SMB v2 and SMB v3, so you can take advantage of the benefits that come with them.
Alright, let’s proceed with the tutorial now so you can see just how easy it is to set up a scheduled automated file transfer to an existing Windows file share using JSCAPE MFT Server.
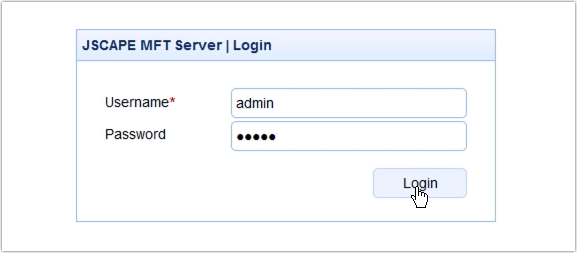
Login to your JSCAPE MFT Server Manager.
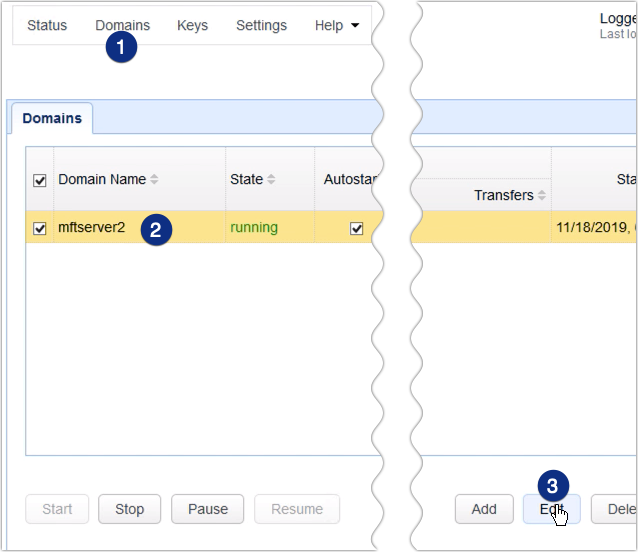
Next, go to Domains, select the domain where you want to establish the SMB connection, and click the Edit button.
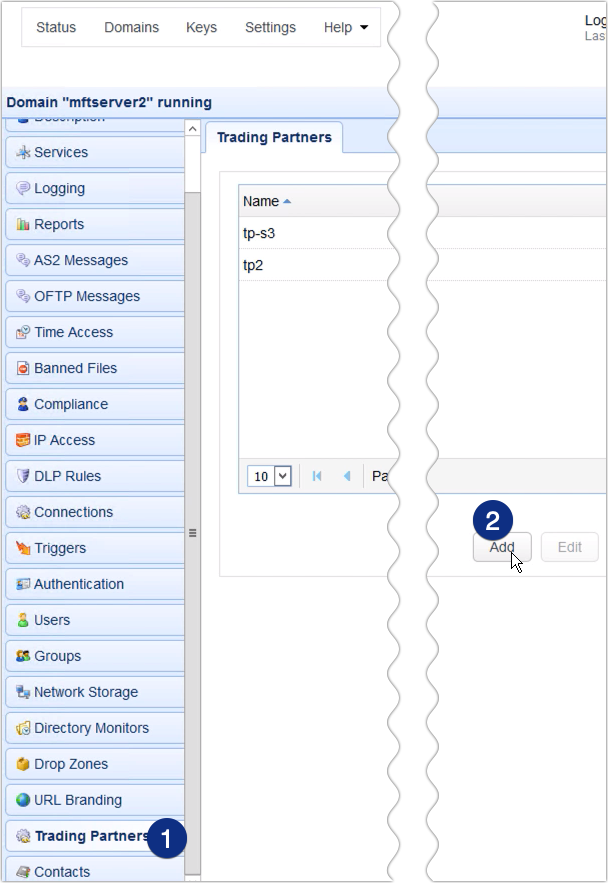
Once inside the domain, scroll down to the Trading Partners module and click the Add button.
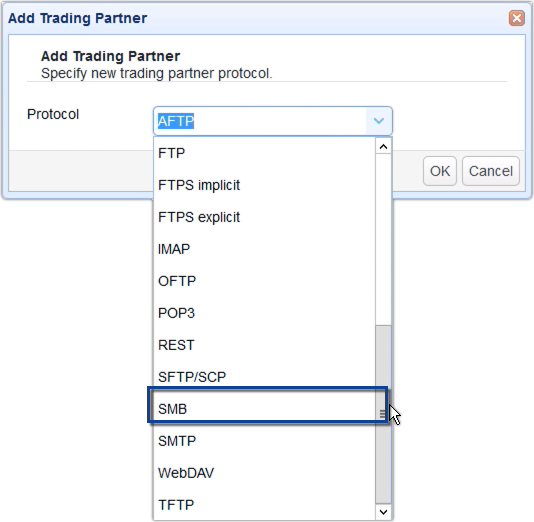
Expand the Protocol drop-down list and select SMB. Click OK to proceed.
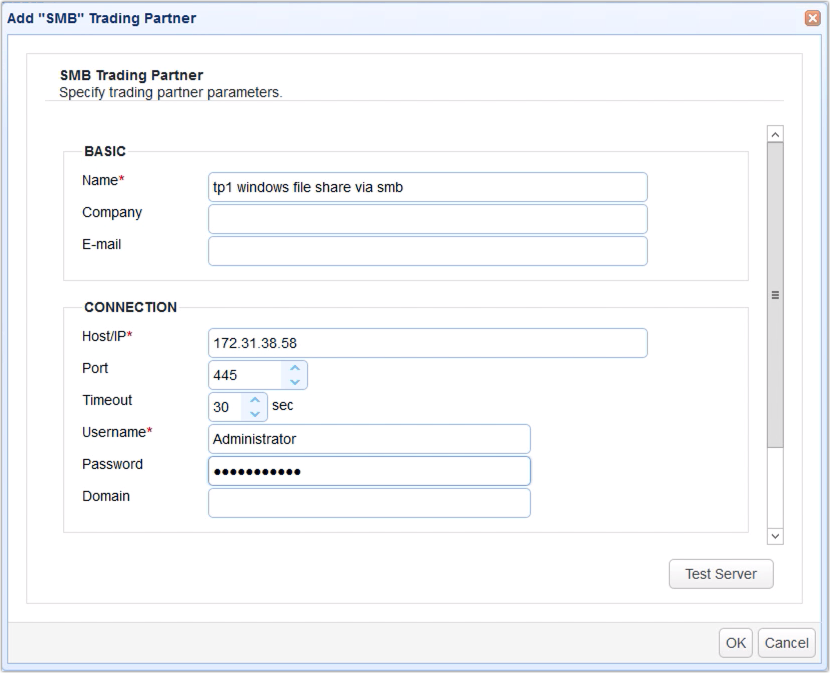
Give the Trading Partner a name, say ‘tp1 windows file share via smb’.
After that, specify the hostname or IP address of the machine that contains either the Windows file share you want to connect to or the Samba file share if it’s a Linux host. You also need to specify a valid username and corresponding password of an existing account on that host.
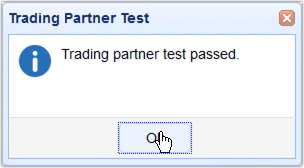
See if you can make a connection by clicking the Test Server button. If the test succeeds, click the OK button.
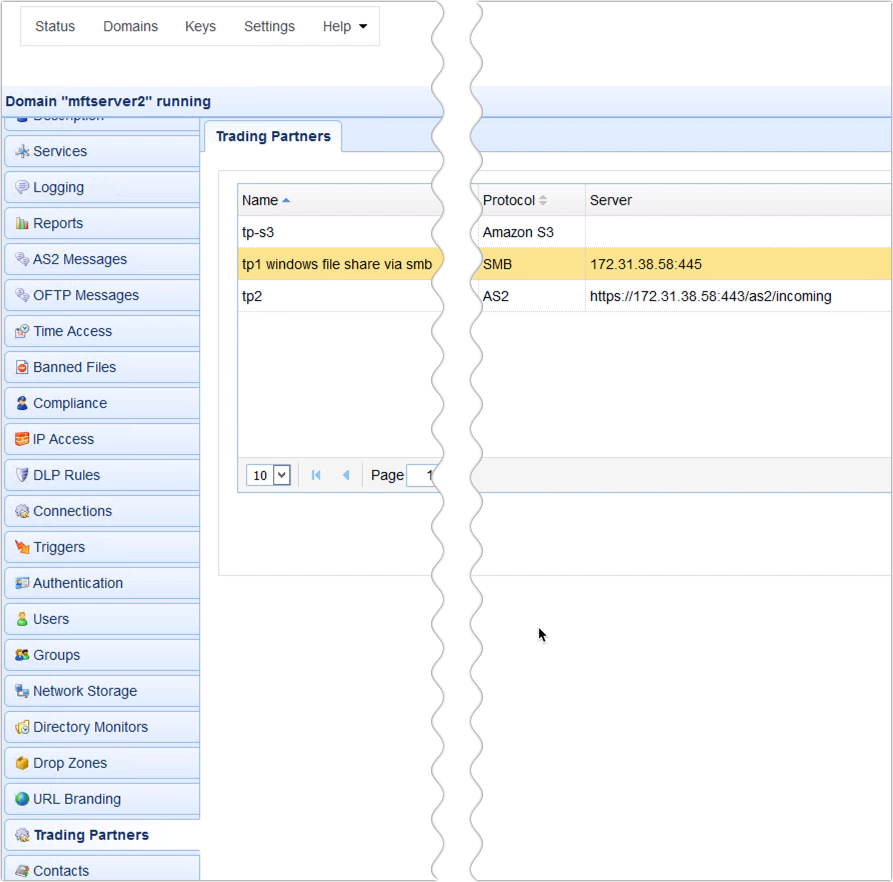
You should then see your newly created trading partner among your list of trading partners.
Now that you have your SMB trading partner, the next step is to create a trigger that would perform a scheduled automated file upload to that trading partner.
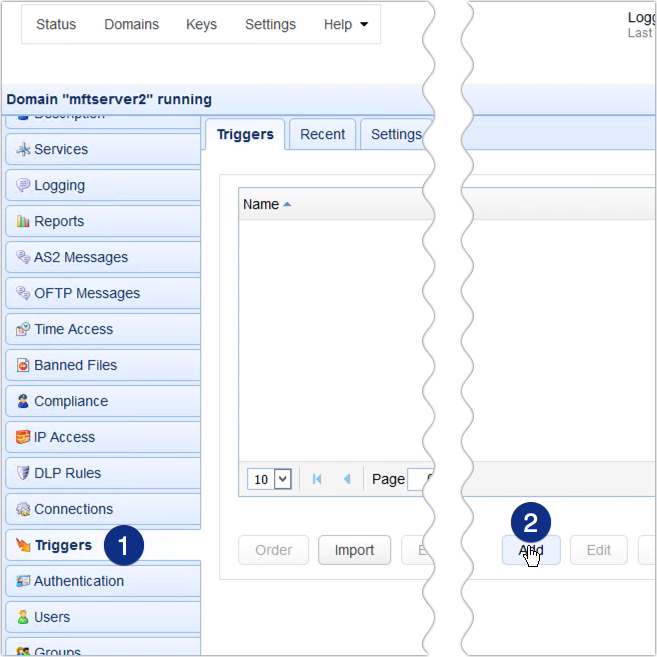
Go to the Triggers module and click the Add button.
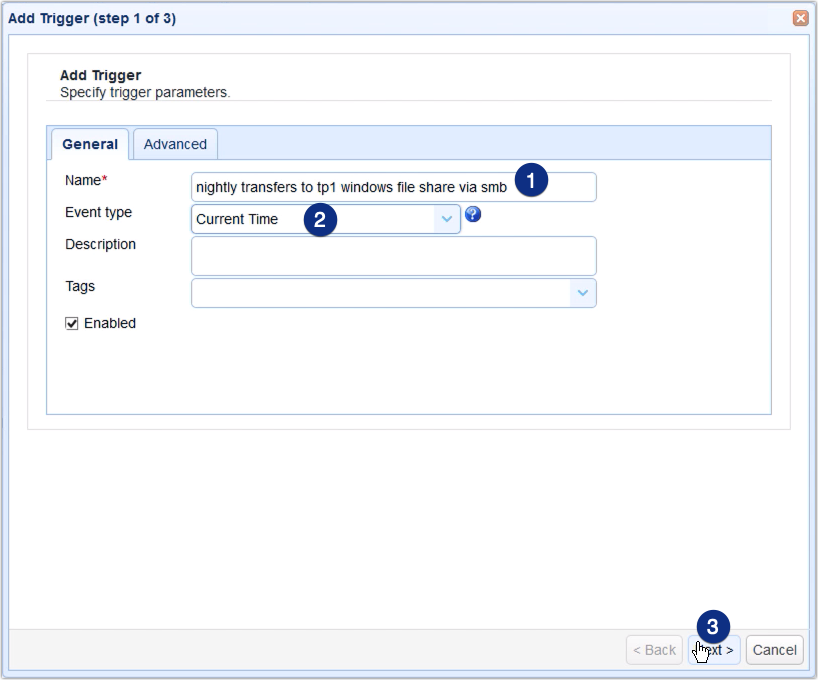
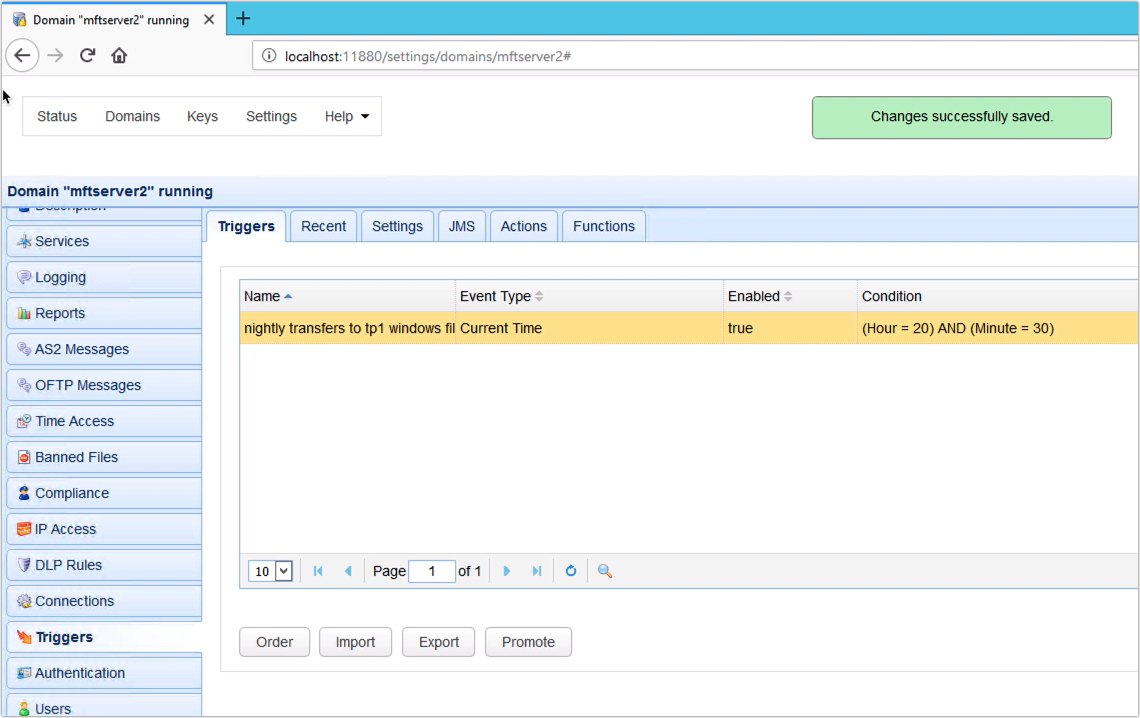
Give this trigger a name, say, ‘nightly transfer to tp1 windows file share via smb’.
Expand the Event type drop down list and select Current Time. Click Next to proceed.
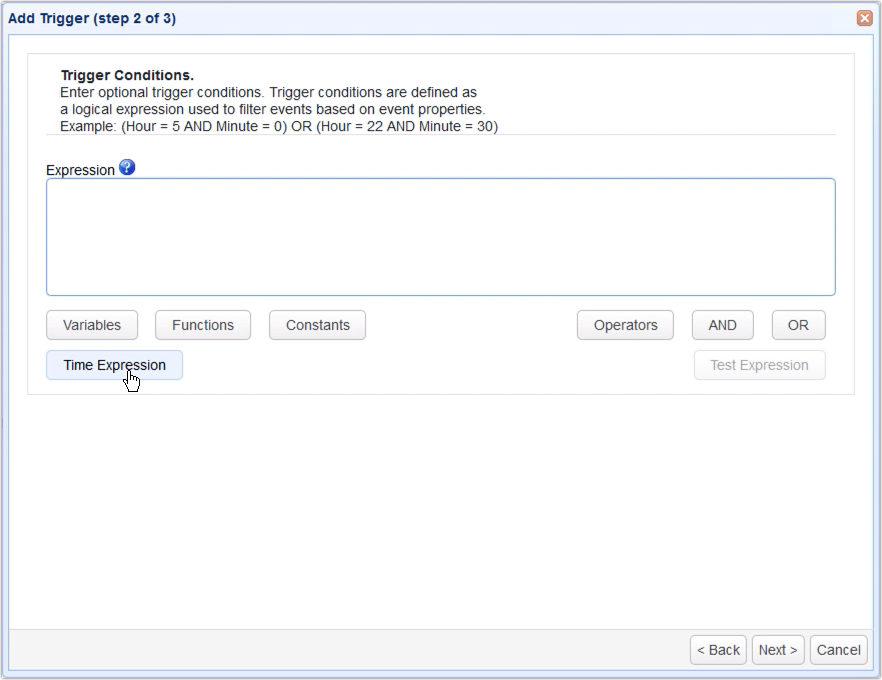
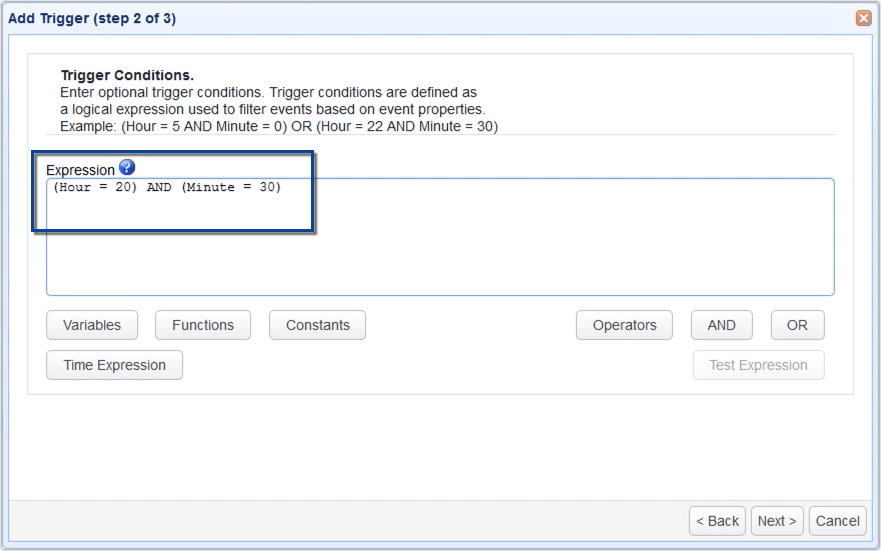
The next step is to specify a time expression that would define the schedule for the file upload. While you can enter the expression yourself, the easiest way to do that is by using the Time Expression dialog. Click the Time Expression button.
Because we want our upload to be carried out at 8:30 PM on a nightly basis, we just enter:
Hour: 20
Minute: 30
After that, click OK.
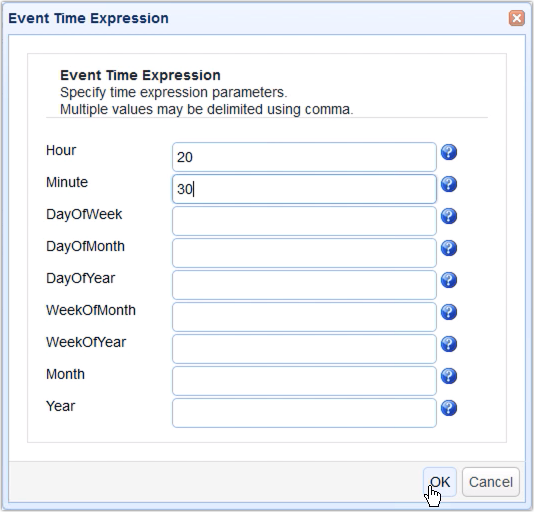
The appropriate time expression should then be automatically generated for you. Click Next to proceed.
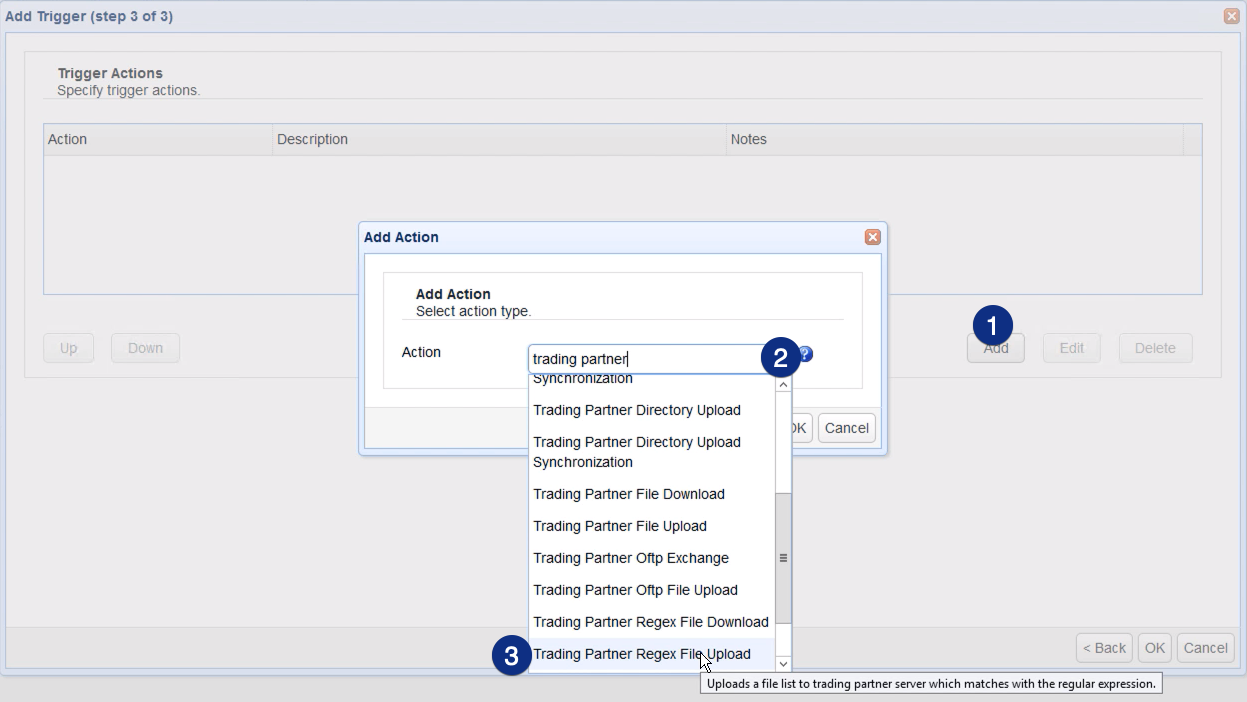
We’re now almost done. We just have to select the trigger action that would upload files to the SMB Windows file share and specify that action’s parameters. Click the Add button and select the Trading Partner Regex File Upload from the Action drop-down list. This trigger action will allow you to upload multiple files to the SMB trading partner.
Click OK to proceed.
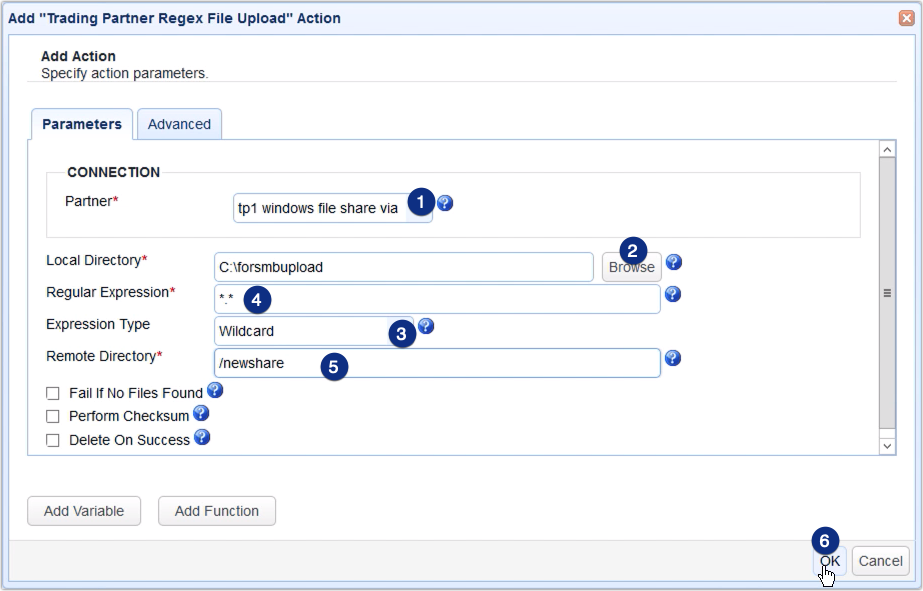
For the trigger action parameters, start by expanding the Partner drop-down list and selecting the trading partner object you created earlier.
Next, browse to the local directory where you want MFT Server to source the files that would be uploaded to the SMB file share.
After that, expand the Expression Type drop-down list and choose between Wildcard and Regular Expression. Let’s just choose Wildcard for now and then enter *.* in the Regular Expression field. With these settings, this trigger action will upload all the files found in the folder specified in the Local Directory field.
Lastly, go the Remote Directory field and enter the name of your SMB share. Note that the name is preceded by the forward slash (/).
Click OK until you’re back at the main screen.
That’s it. Now you know how to configure JSCAPE MFT Server to perform scheduled automated file transfers to a Windows file share via SMB.
Try this yourself
Would you like to try this yourself? Request the free trial of JSCAPE MFT Server now.