
In this tutorial, you’ll learn how to configure JSCAPE MFT Server so that files uploaded to it are streamed directly to Google Cloud Storage. This streaming process is completely transparent to end users, who’ll interact with the Google Storage folder as if it were a local folder on the server.
This is similar to the tutorials we did for Azure Files and Amazon S3 so you can click those links if you also wish to work with those cloud storage services.
What we want to do
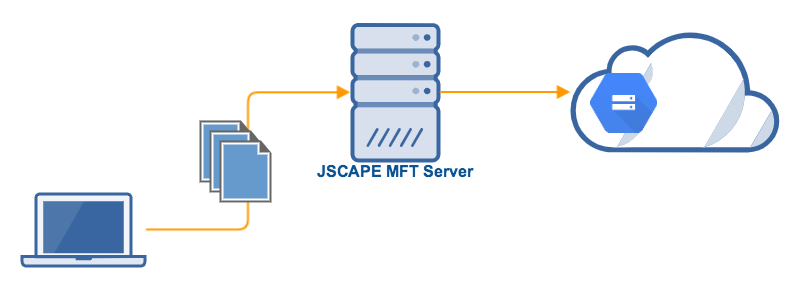
Here’s an illustration of what we want to achieve. The file transfer client on the left can represent any file transfer client, whether one that’s manned by an end user or an application that automatically uploads files to your server. From the client’s point of view, the Google Storage share will simply appear like a local directory on your server.
Prerequisites from Google Storage
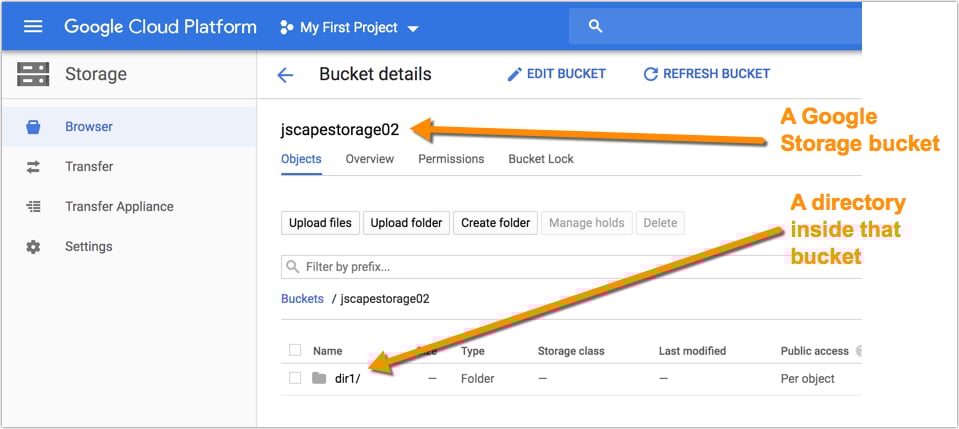
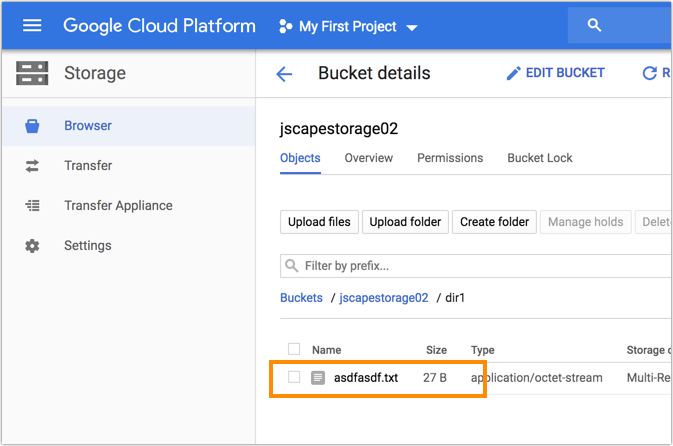
Before you start configuring anything on JSCAPE MFT Server, you need to have a Google Storage bucket ready first. The screenshot you see below is from my Google Storage Console, where I have a bucket named jscapestorage02 and a folder underneath it named dir1.
You also need to create a Google Cloud Service Account and obtain that account’s corresponding private key (a JSON file). We assume you can take care of those yourself. Click that link for instructions on how to generate that file.
Once you have all that information on hand, you can then proceed to your JSCAPE MFT Server instance to configure the settings required there.
Adding a Google Storage reverse proxy
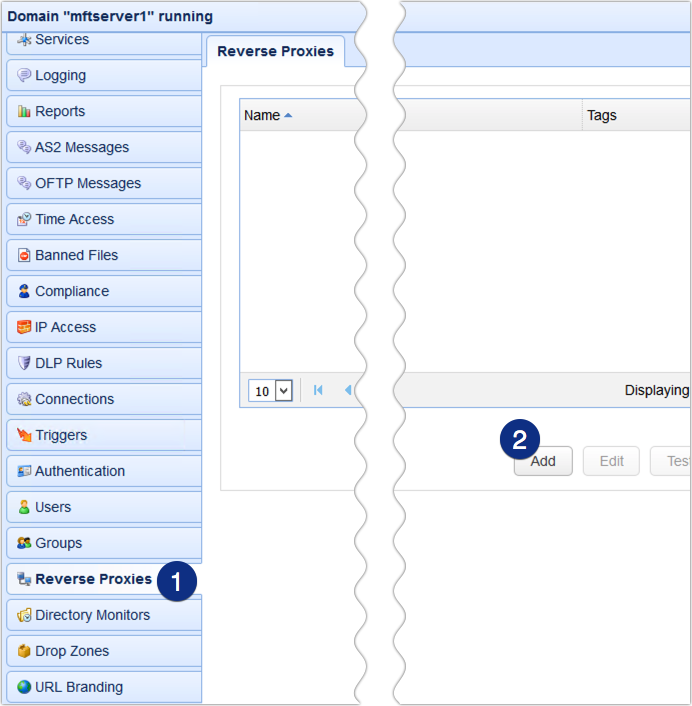
The first thing you need to do on JSCAPE MFT Server is to create a Google Storage reverse proxy. To do that, navigate into a domain, go to the Reverse Proxies module, and click the Add button to create a Reverse Proxy.
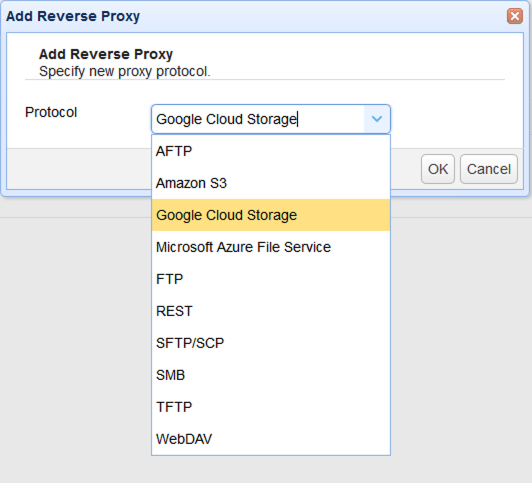
Next, select Google Cloud Storage from the Protocol drop-down list and then click OK.
Give this reverse proxy a name and then specify an authentication method. Let’s just choose ‘private key credentials’ for now. You will need the JSON file we talked about in the previous section. Click the Browse button and then select the file in question.
Since you will likely want the files to be stored in a specific folder in a Google Storage bucket, enter the path to that folder in the Remote directory field. In the screenshot below, jscapestorage02 is a bucket in my Google Storage account and dir1 is a folder under that bucket.
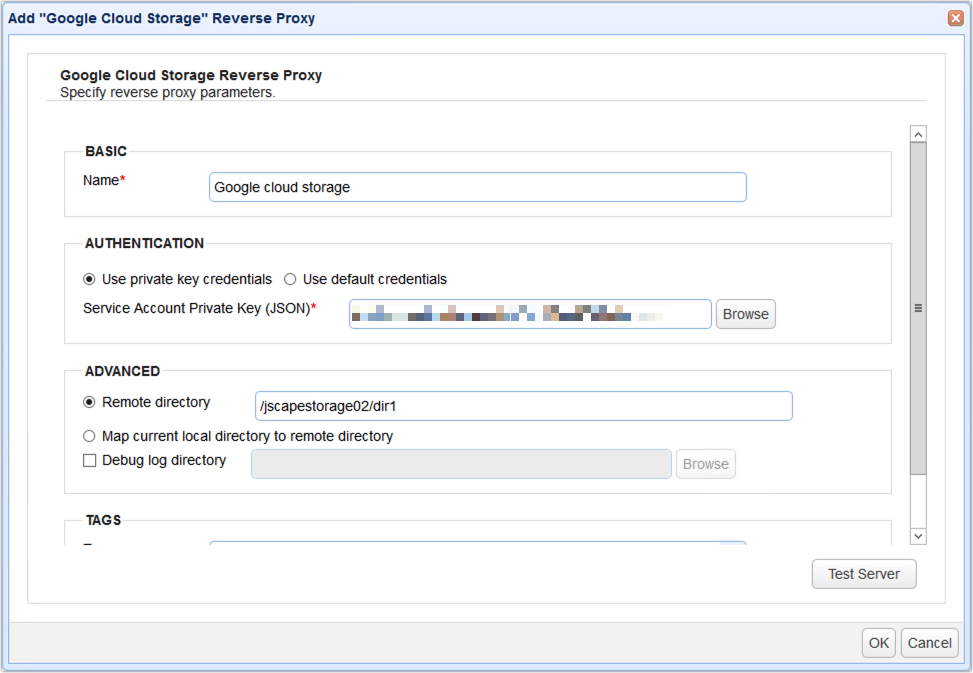
Click the Test Server button to test the connection. If the test succeeds, you may then click the OK button. If everything goes well, you should then see your newly created reverse proxy in the Reverse Proxies tab.

The next step is to map to that reverse proxy from either a user account’s virtual path or a group’s virtual path. For this example, let’s just use a user account’s virtual path.
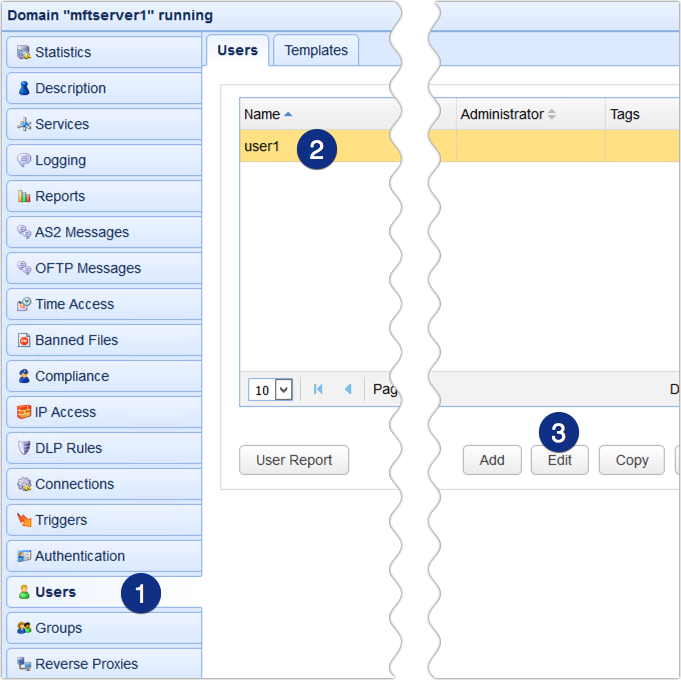
Go to the Users module and edit a user account whose virtual path you want to map to the Google Storage reverse proxy.
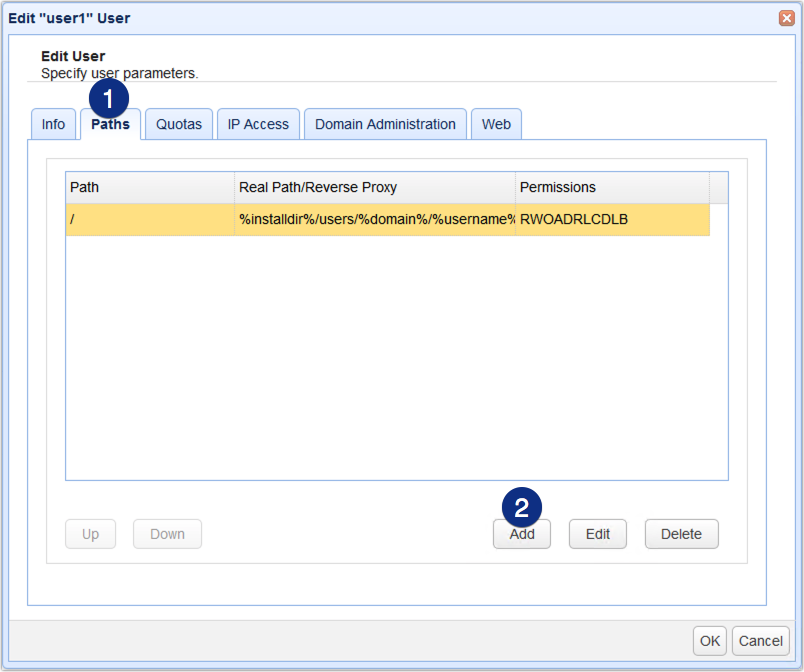
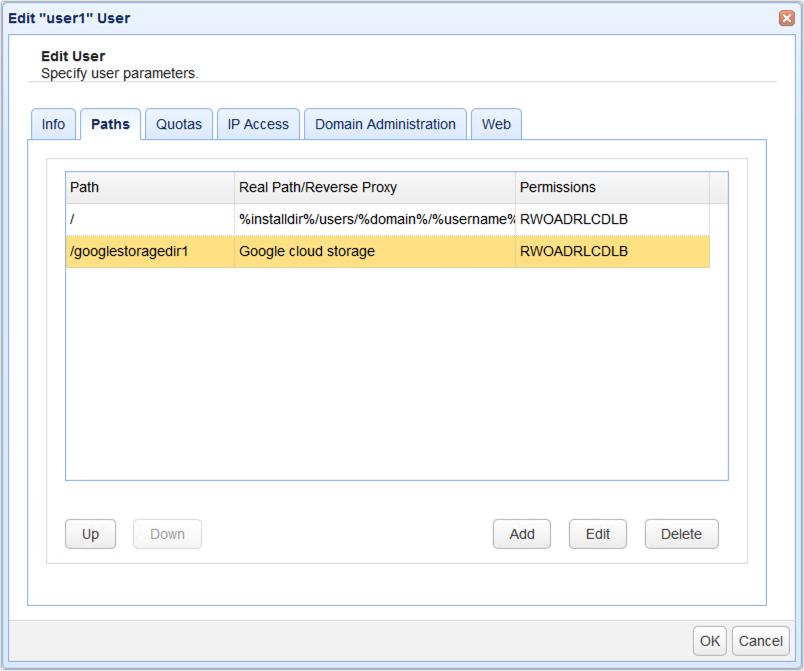
Go to the Paths tab and click the Add button to add a new virtual path.
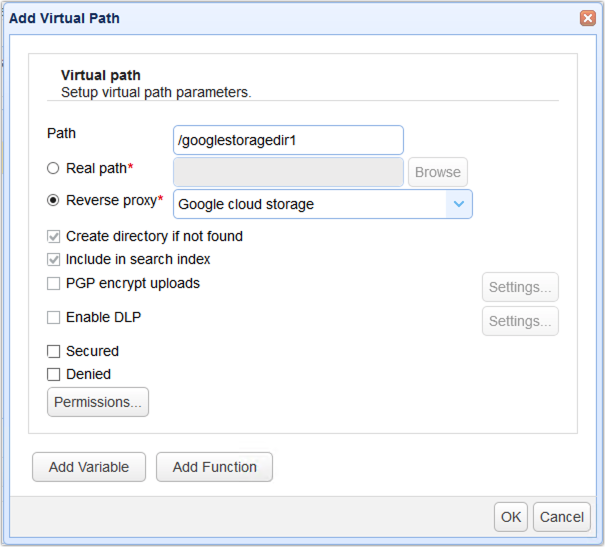
Specify the virtual path. For example, /googlestoragedir1. This will create a virtual path named googlestoragedir1 underneath the root (/) virtual path. After that, click the Reverse Proxy radio button and select the name of the reverse proxy you created earlier from the drop-down list. Click OK when done.
You should then see your newly created virtual path inside that user’s list of virtual paths. Click OK again to proceed.
You’re now ready to test this out.
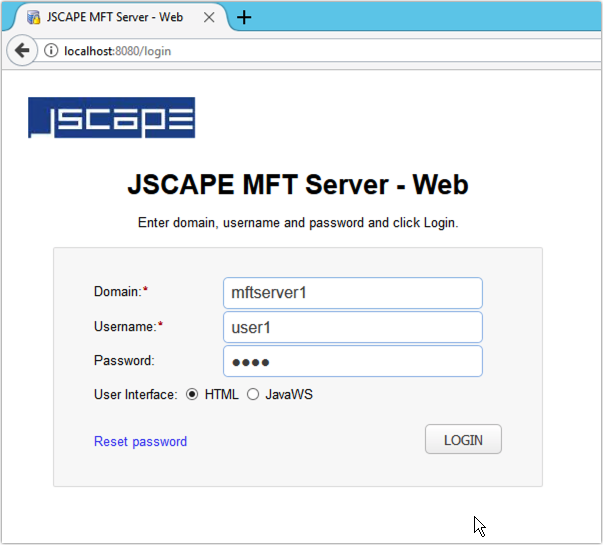
Connect to a JSCAPE MFT Server file transfer service using the user account whose virtual path was mapped to the Google Storage reverse proxy. In our example, we’re going to connect to our HTTP service using the JSCAPE MFT Server Web user interface.
So, we’re here now inside the user’s storage page and, as you can see, we have that virtual path we created earlier.
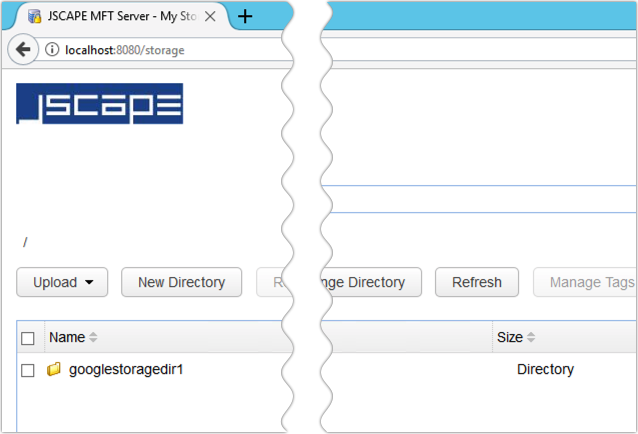
If you navigate into that directory and upload a file to it ….

And then check in the actual Google Storage directory, you’ll see that the file has indeed been uploaded there.
That’s it. Now you know how to configure JSCAPE MFT Server so that files uploaded to it are streamed directly to Google Storage.
Would you like to try this out yourself? Request the FREE trial of JSCAPE MFT Server now.

