A hypertext transfer protocol (HTTP) file transfer, which is also known as a web file transfer, is one of the most user-friendly methods of sharing files. For users to upload files or download files with an HTTP server, all they need is a web browser.
Learn the benefits of an HTTP file transfer and how you can set up one. If you prefer to configure an HTTPS file transfer, you may read the tutorial “How to set up an HTTPS file transfer”.
Why set up an HTTP file transfer?
As mentioned earlier, users just need a web browser to carry out a web file transfer. Since all major desktop operating systems, including Windows, Linux and macOS, have a web browser, users don’t have to install additional software or receive specialized training.
From an IT support standpoint, they no longer need to spend time installing, configuring or troubleshooting specialized file transfer clients in order for their user base to conduct file transfers. As a result, your IT teams can reallocate the time saved to more strategic tasks.
Moreover, because HTTP is the same protocol used for web browsing and all web-related activities, an HTTP file transfer won’t require additional firewall configurations and it is likely that the required port (i.e., port 80) will already be open on your firewall.
If your organization’s file transfer and file sharing workflows are mostly user-initiated or person-to-server and do not include automated server-to-server file transfers, HTTP file transfer should suffice. When configured correctly, an HTTP server can provide the same file transfer functionality as a file transfer protocol (FTP) server or a secure file transfer protocol (SFTP) server.
How HTTP transfer file operations work
An HTTP file transfer’s front-end user interface is essentially a web page and usually involves hypertext markup language (HTML) and JavaScript. The back-end, which handles tasks such as managing file uploads and downloads, interacting with storage systems and processing requests, can be implemented using practically any programming language, including Java, Python, Ruby, C, C++ and many others. The HTTP file transfer itself mainly consists of file transfer downloads and file transfer uploads.
HTTP file transfer download
When a user attempts to download a file from an HTTP server, the user’s web client sends out an HTTP GET request to the server. That request, which typically includes the file’s URL and the HTTP protocol version used, may look like this:
GET /files/document.pdf HTTP/1.1
Upon receiving the request, the web server checks if the file is available. If the file is indeed available and accessible, the server responds with a 200 OK HTTP status code, some response headers and the requested file. Here’s an example of a typical HTTP response:
HTTP/1.1 200 OK

Content-Type: application/pdf

Content-Length: 102400

Content-Disposition: attachment; filename=”document.pdf”
HTTP headers, such as those lines above that begin with Content-Type, Content-Length and Content-Disposition, contain metadata that describe the data being transferred and how it’s processed. This information helps the participating software applications take appropriate action.
HTTP file transfer upload
When a user attempts to upload a file to an HTTP server, the user’s web client sends out an HTTP POST or HTTP PUT request. That request typically includes the file data in the request body. Here’s a sample POST request:
POST /upload HTTP/1.1

Content-Type: multipart/form-data; boundary=—-WebKitFormBoundaryxYz

Content-Length: 1048576

——WebKitFormBoundaryxYz

Content-Disposition: form-data; name=”file”; filename=”upload.txt”

Content-Type: text/plain

[File data here]

——WebKitFormBoundaryxYz–
Upon receiving the request, the HTTP server processes the request, extracts the uploaded file and then stores the file on the server. It then sends back a response to the client. The response typically includes a status code (e.g., 200 OK) and, optionally, other relevant metadata.
Tutorial: Setting up an HTTP transfer
Now that you have a better understanding of how an HTTP file transfer works, here’s a tutorial on how to set one up using JSCAPE MFT Server by Redwood. JSCAPE MFT Server is an advanced managed file transfer (MFT) solution that allows you to set up an HTTP file transfer service in just a few steps.

1. Enable the HTTP service
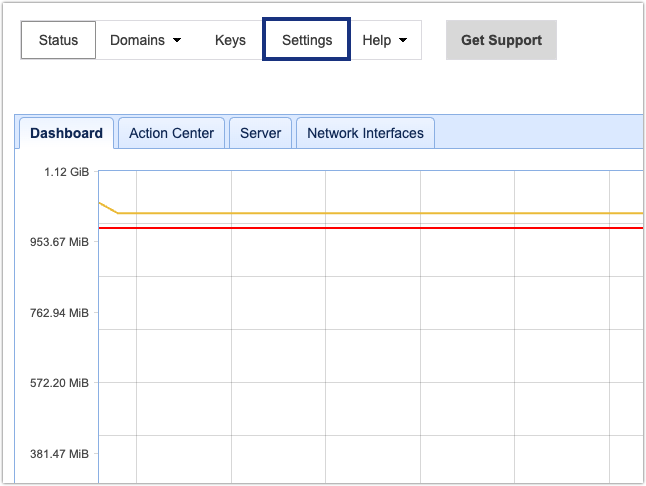
Log in to your JSCAPE MFT Server administrative user interface and then click the Settings menu at the top of the screen.
Next, expand the MISCELLANEOUS drop-down menu found on the left sidebar, and then navigate to the Web > Web tab. Tick the HTTP on host checkbox to enable the HTTP web service. As soon as you do that, JSCAPE MFT Server should automatically select 0.0.0.0 for the IP address and 80 for the port number. A 0.0.0.0 IP address means your HTTP service will be listening for requests on all available network interfaces. 80 is the default HTTP port number.
The HTTPS on host option is for hypertext transfer protocol secure (HTTPS), the secure version of HTTP. HTTPS file transfers are protected by the secure sockets layer (SSL)/transport layer security (TLS) cryptographic protocols. If you prefer to configure an HTTPS file transfer, you should read the “How to set up an HTTPS file transfer” blog.
This tutorial focuses on setting up a basic HTTP configuration, so you may leave all other settings such as the Private key, Theme, Session timeout (not shown on the screenshot) and others, as-is for now.

Important note:
Be sure to select the Apply button at the bottom-right corner of the screen to apply these changes.
By this point, you would have already enabled the HTTP service. However, you still need to specify the domain(s) where you want the HTTP service, as you may not want to enable it on all your JSCAPE MFT Server domains.
2. Add the HTTP service to a domain
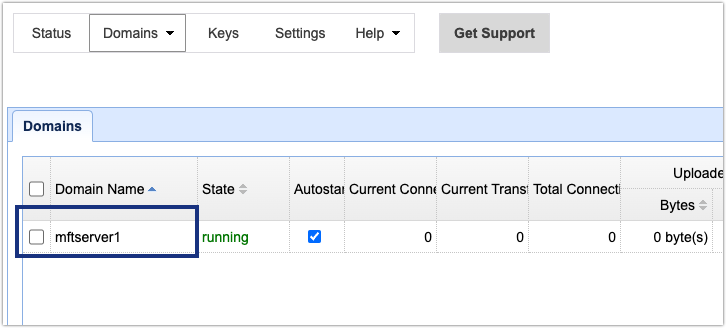
When you’re ready to proceed, navigate to the Domains screen by clicking Domains > View domains.

Next, double-click the domain where you wish to add the HTTP service. In this example, we’re adding it to the mftserver1 domain.
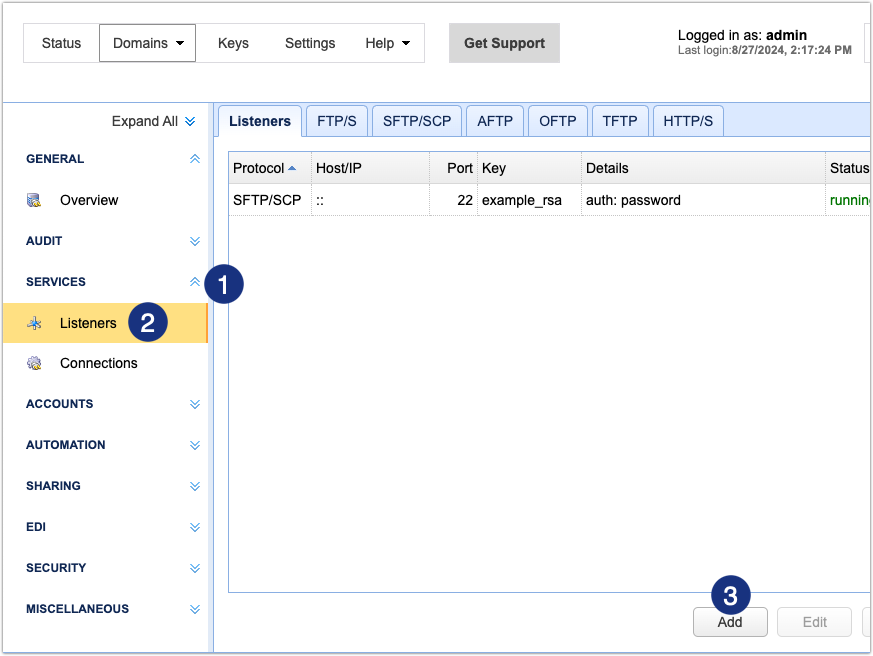
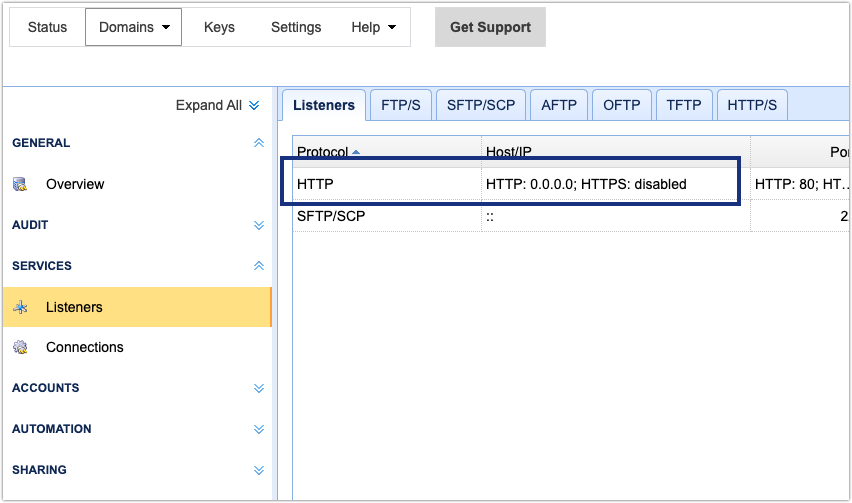
Expand the SERVICES drop-down menu and then select the Listeners submenu. Click the Add button to add a service.
Expand the Protocol drop-down list and then select “HTTP/S” and click OK to proceed.

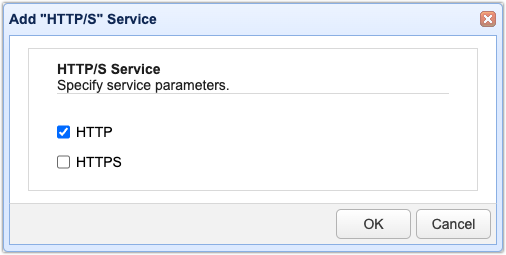
On the next screen, you should see HTTPS selected by default. Since we just want to use HTTP for now, untick the checkbox beside HTTPS and then tick the one beside HTTP instead. Click OK to proceed.
With that, the HTTP service should be automatically added to your list of service listeners.
You will need a user account to test this, so verify that you already have an existing user account by navigating to ACCOUNTS > USERS. In our example, we already have a user account with user ID “user1”.

You’re now ready to test your newly activated HTTP file transfer service.
3. Test the HTTP file transfer service using a web browser
Launch your web browser. To minimize external issues, start by launching a web browser that’s installed on the same machine as your JSCAPE MFT Server instance and then enter localhost, your machine’s IP address or 0.0.0.0 on your web browser. If this works, you can then try connecting remotely from a separate machine later, after you’re done with this initial test.
You should see the following login screen. Enter the JSCAPE MFT Server domain where you added your HTTP service. Enter your user account’s username and its corresponding password as well. Click the LOGIN button to log in.

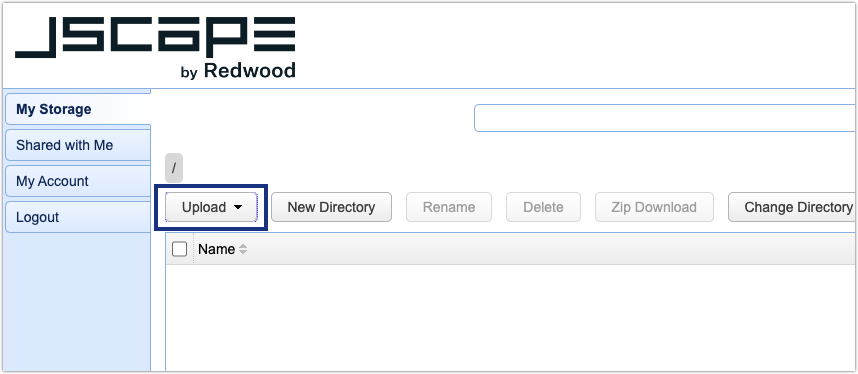
Next, you should see a screen that resembles the one below.
Notice that you can perform several tasks here. For instance, you can create a new directory, rename a file’s filename, delete a file, perform a zipped download, change a directory, view your account details and more. To test a file upload, click the Upload button.
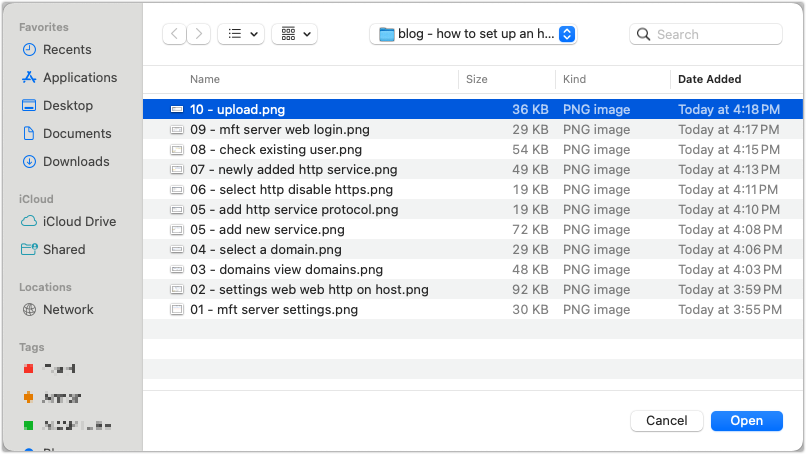
Select the local file you wish to upload and then click Open.
Barring any unforeseen issues, the file should upload successfully.
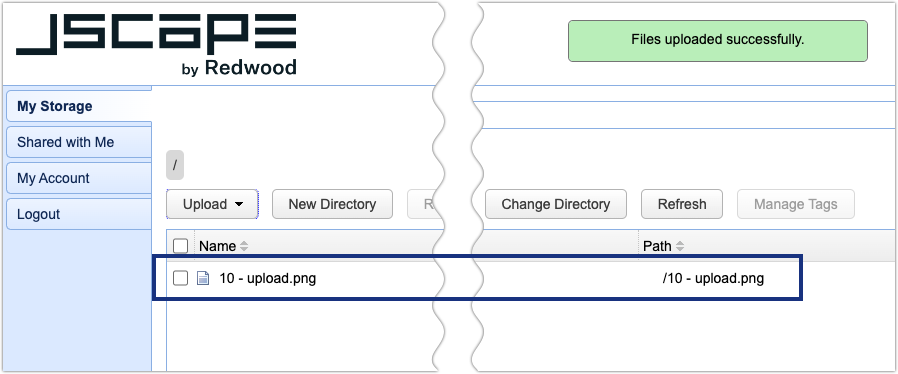
Now you have successfully set up an HTTP file transfer using JSCAPE MFT Server.
HTTP file transfer FAQs
HTTP vs. FTP file transfer: Which is better?
Both HTTP and FTP operate on top of the transmission control protocol (TCP). Thus, they both benefit from TCP’s reliability, ordered data delivery, flow control and congestion control properties. These properties make the two protocols suitable for data transfer processes. Both protocols can also transfer large files. And, unfortunately, both protocols transfer files unencrypted.
However, despite their similarities when used for file transfers, HTTP has one distinct advantage. As mentioned in this article, user-initiated HTTP file transfers don’t require specialized client applications. Users can carry out HTTP file transfers just by using a common web browser. FTP, on the other hand, usually requires an FTP client and an FTP server that supports FTP.
Web browsers used to support FTP file servers. However, for security reasons, recent versions of popular web browsers no longer do so.
SFTP vs. HTTP file transfer: Which is better?
Like FTP and HTTP, SFTP also runs on TCP. So, SFTP is similar to HTTP in that regard. However, SFTP runs on top of a secure shell (SSH) and is substantially more secure than HTTP.
Thus, SFTP inherits the security features of SSH, which include data-in-transit encryption, two-factor authentication and host authentication. None of these features are present in plain FTP. So, from a security standpoint, SFTP is better than HTTP. If you want a more secure version of HTTP, use HTTPS which uses public key and private key encryption.
Download JSCAPE MFT Server Trial

