Overview
[Last updated July 20, 2019] When your server downtimes start becoming more frequent, that probably means it’s time for some major changes. One option would be to set up a high availability cluster. If you want to know how to do that, you’ve landed on the right place. In this tutorial, we’ll guide you in setting up a high availability cluster for FTP, HTTP, SFTP, SMTP, and other TCP/UDP services.
A high availability cluster is a system consisting of two or more servers running the same type of service (e.g. all running SFTP). Its purpose is to provide network services with as little downtime as possible. A cluster can be set up using either an active-active, active-passive, or N+1 configuration (there are other configurations but these three are the most common). This tutorial only focuses on the active-active configuration.
Watch the video
Would you prefer to watch a video version of this tutorial instead? You can play the video below. Otherwise, just skip it if you wish to continue reading.
To set up this cluster we’ll be using JSCAPE MFT Gateway. MFT Gateway is a reverse proxy that also acts as a load balancer. As a reverse proxy, it provides the TCP/UDP service to external clients in behalf of the servers behind it. And as a load balancer, it distributes incoming traffic to those same servers, thereby preventing any single server from getting overloaded.
MFT Gateway with a 4-node HTTP high availability cluster
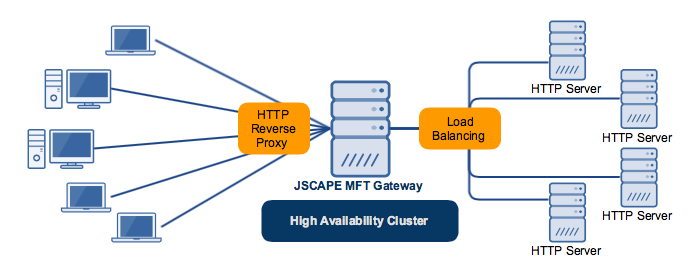
I’ll be assuming you already have existing servers running the same service and all we need to do is to bring them together into a cluster on JSCAPE MFT Gateway.
Note that those servers should have exactly the same configurations. otherwise, you’ll encounter problems along the way. The article Simplifying MFT Server Clustering and High Availability Through Global Datastores discusses how to synchronize two servers so that they can have exactly the same settings.
Another vital component in clustering is having some kind of shared storage. The article Setting Up a NAS Shared Storage for Your File Transfer Servers provides more information on the subject.
Ready to proceed with this tutorial? Let’s begin.
Install JSCAPE MFT Gateway and launch its Manager.
Adding a cluster
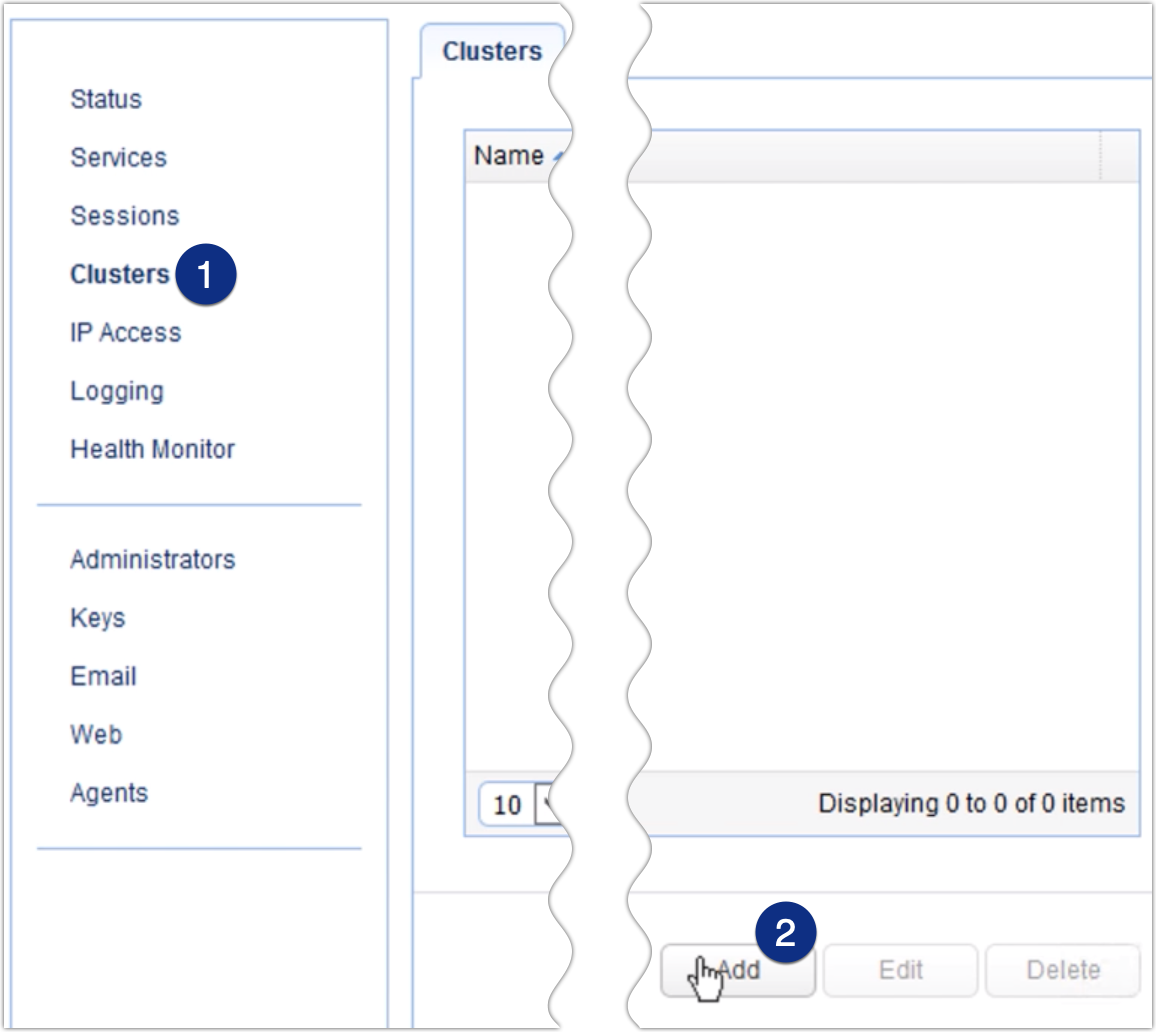
Once you’ve logged in, navigate to the Clusters menu and then click the Add button.
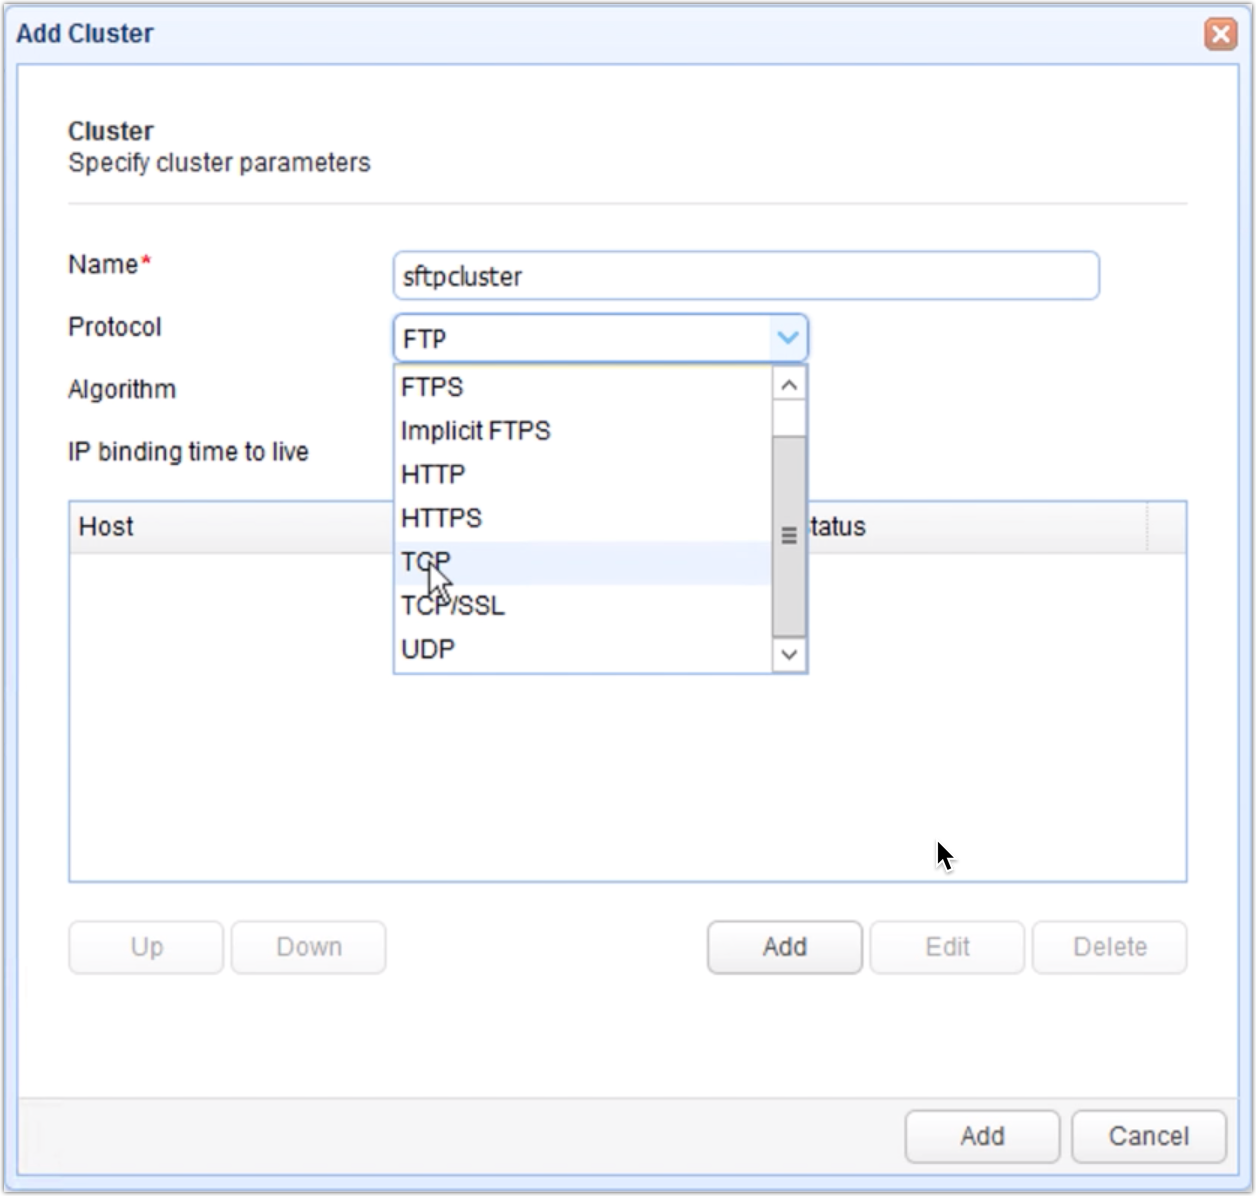
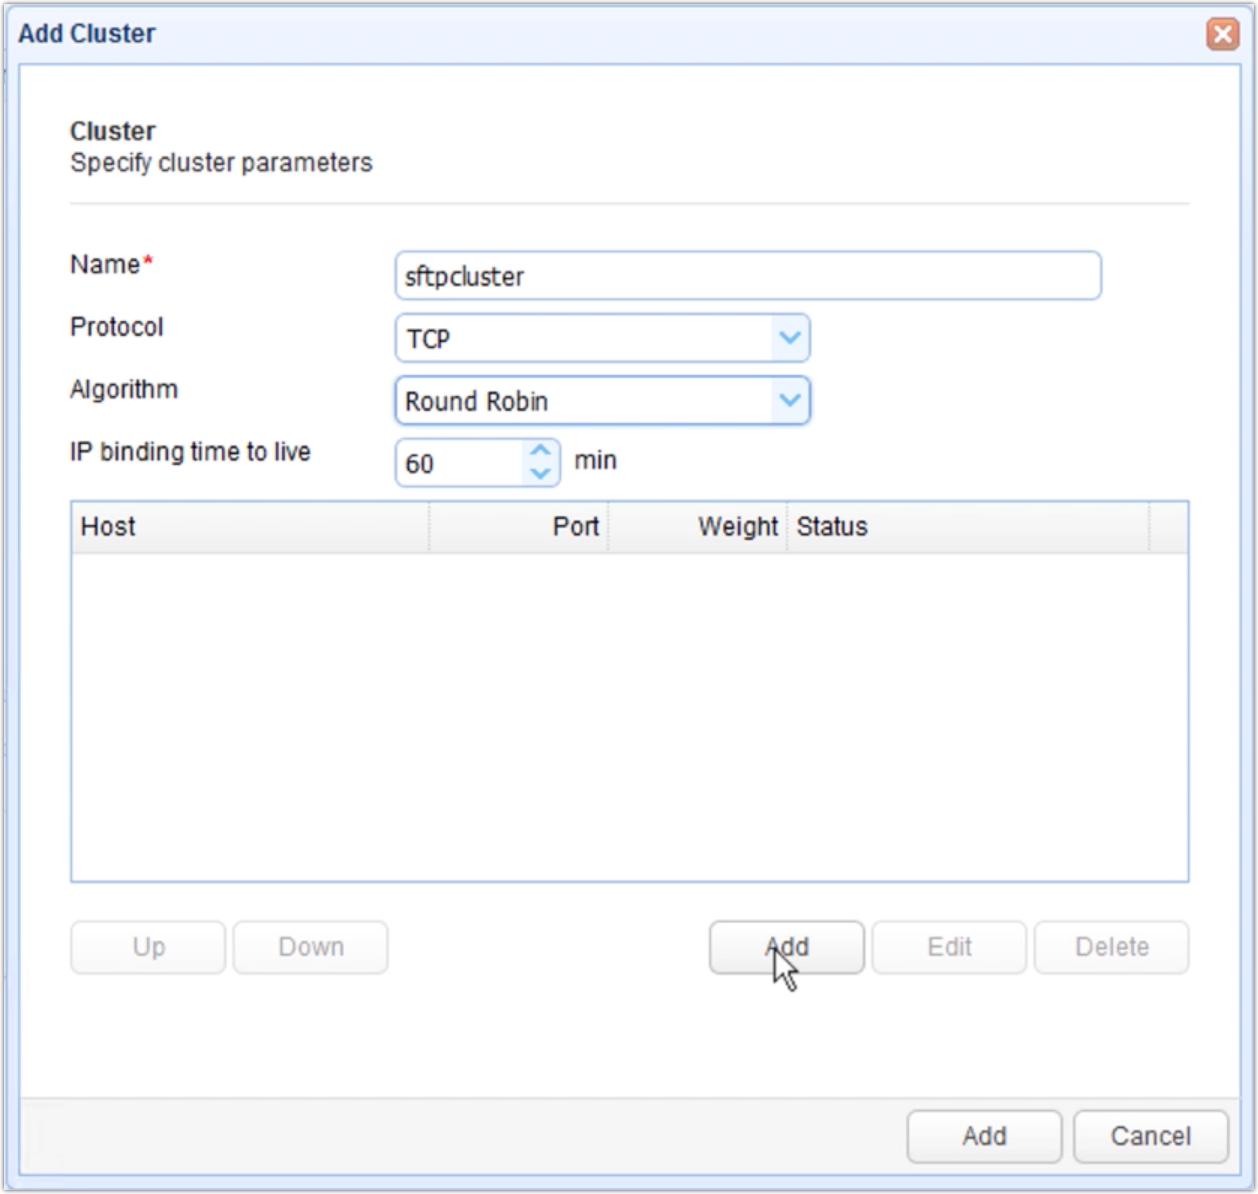
That should bring up the Add Cluster dialog. Give this cluster a name. After that, select the protocol of the service which you want this cluster to serve. So, for example, if you have a set of HTTP servers that you want to bring to together into a cluster, then you simply select the HTTP protocol.
Notice that JSCAPE MFT Gateway supports a wide range of network protocols, including: FTP, FTPS, HTTP, HTTPS, SFTP/SSH, SMTP, POP3, IMAP4, and other TCP and UDP protocols.
Note: For an SFTP cluster, please select TCP. SFTP runs on TCP, so that shouldn’t be a problem.
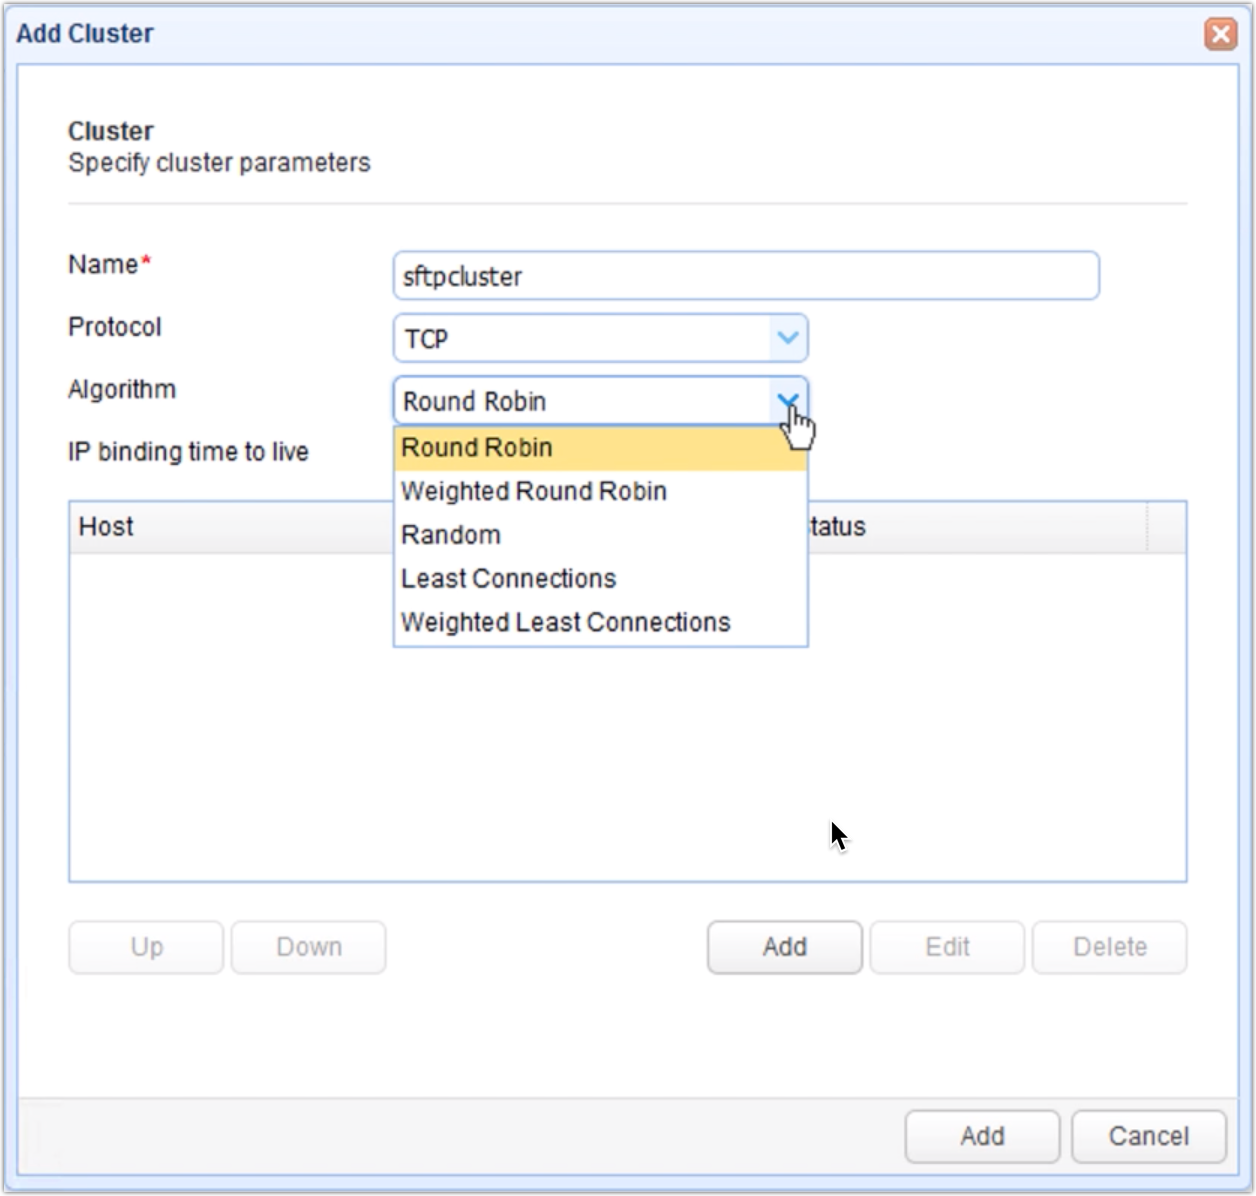
After specifying the protocol, expand the Algorithm list and select the load balancing algorithm you want to apply to this cluster. As of this writing, the supported algorithms are Round Robin, Weighted Round Robin, Random, Least Connections, and Weighted Least Connections. If you wish to know the difference between these algorithms, read the post ‘Comparing Load Balancing Algorithms‘
Adding servers to the cluster
Now it’s time to add our servers to this cluster. Click the Add button to add the first server. There are two Add buttons there. Click the first one as shown below.
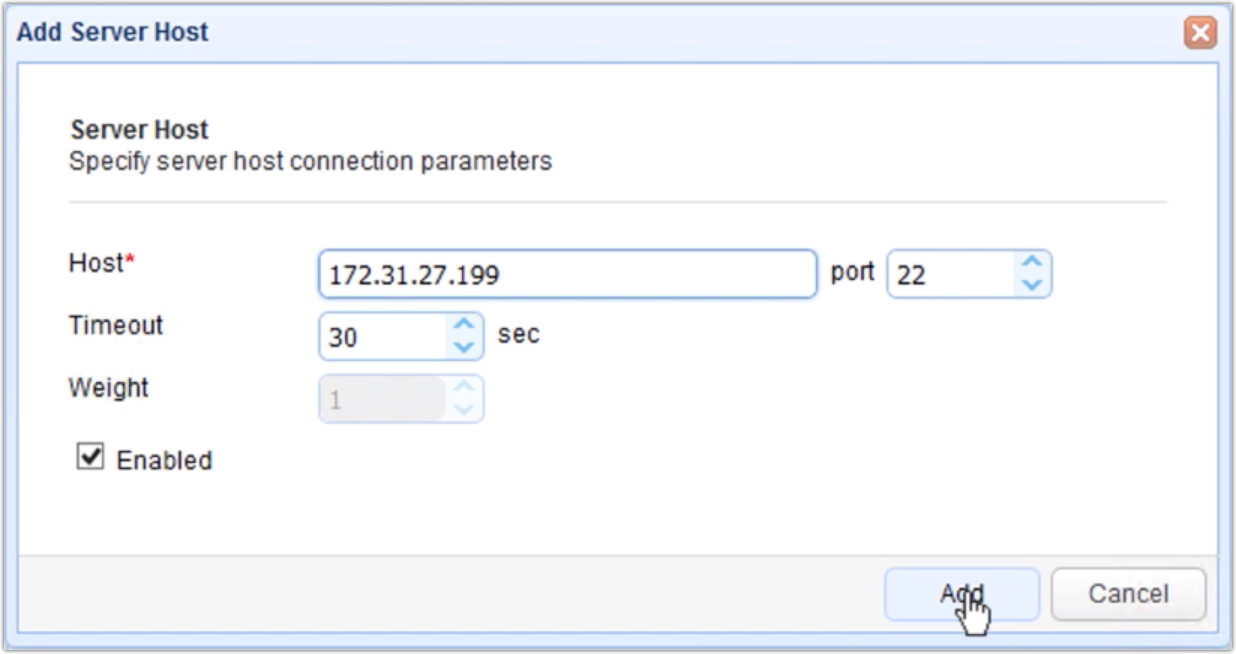
Enter your server’s IP address/hostname and select the appropriate port number. The system will automatically recommend a port number based on the protocol you selected earlier. In the case of TCP though, the system will automatically recommend port 22. Change the value if you’re using a different port number. Otherwise, leave it as is. Click Add to add that server.
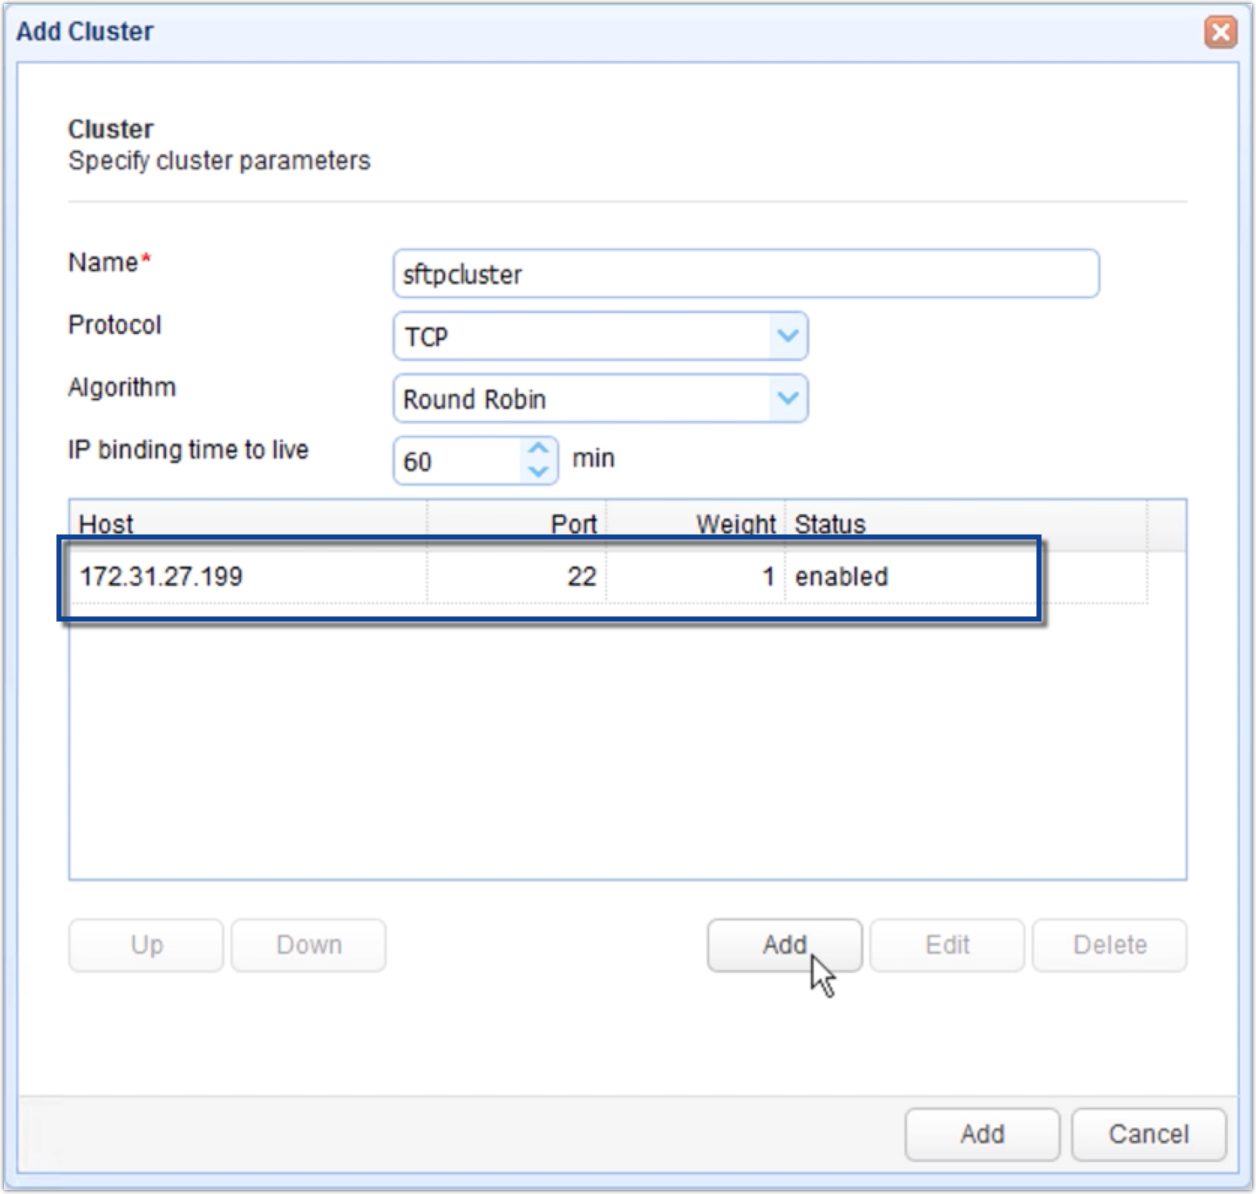
Once the server has been successfully added, it will be displayed in the list of hosts for that cluster.
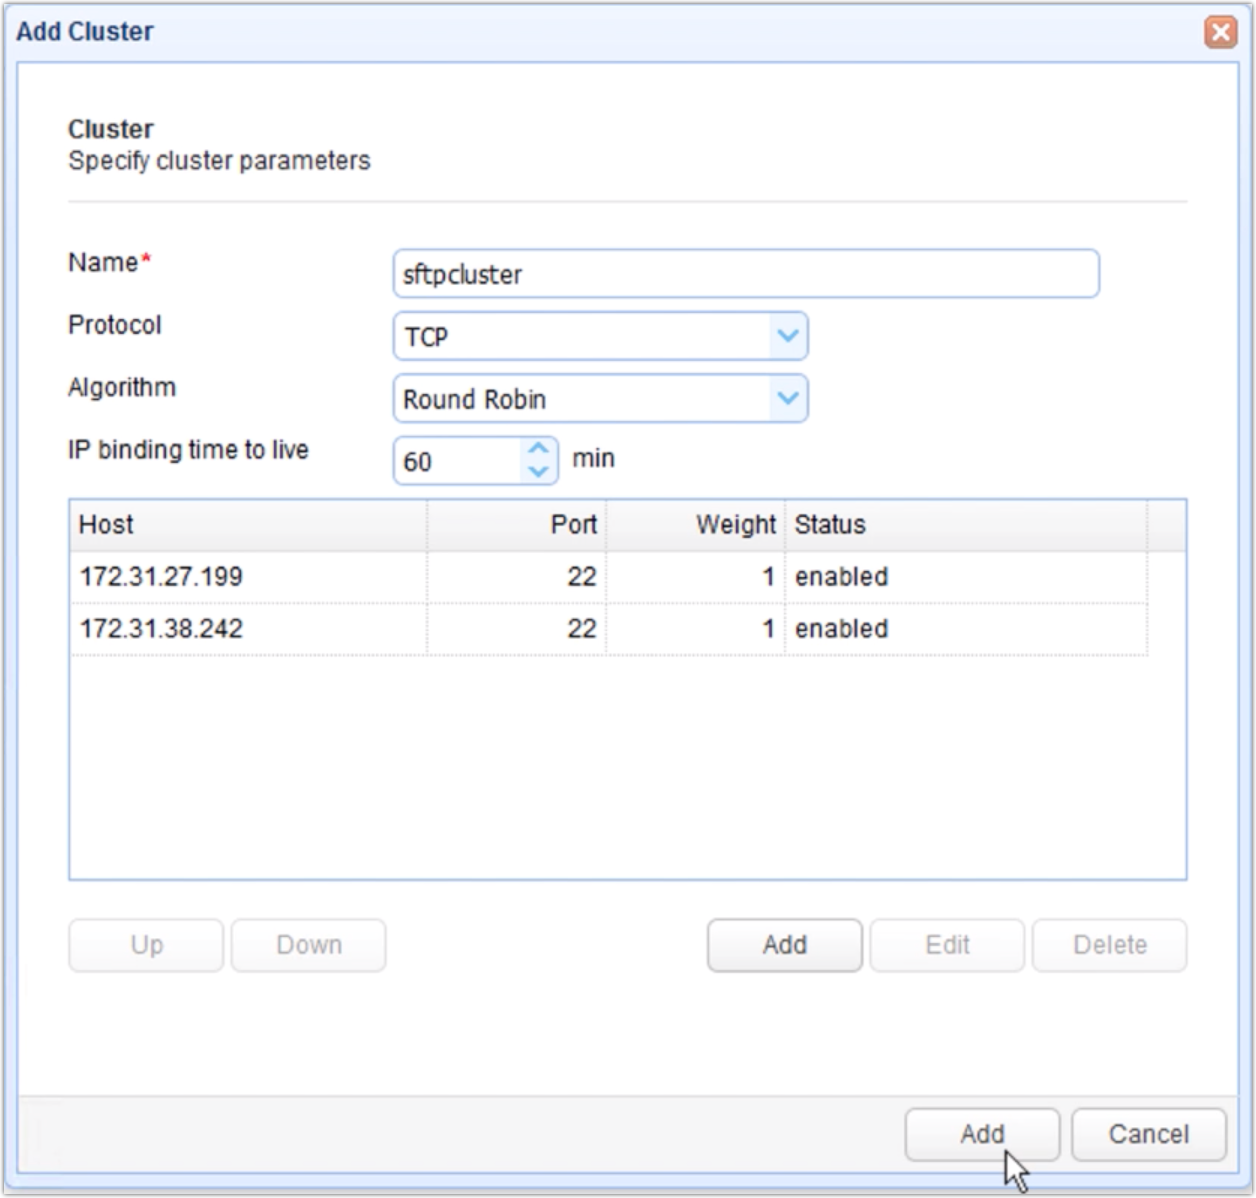
Add more servers to the cluster as needed. Here’s the screenshot of our cluster consisting of two (2) nodes.
Once you’re done adding hosts to the cluster, finalize the cluster creation process by clicking the second Add button.
>
You should then see your newly created cluster in the main Clusters panelp>
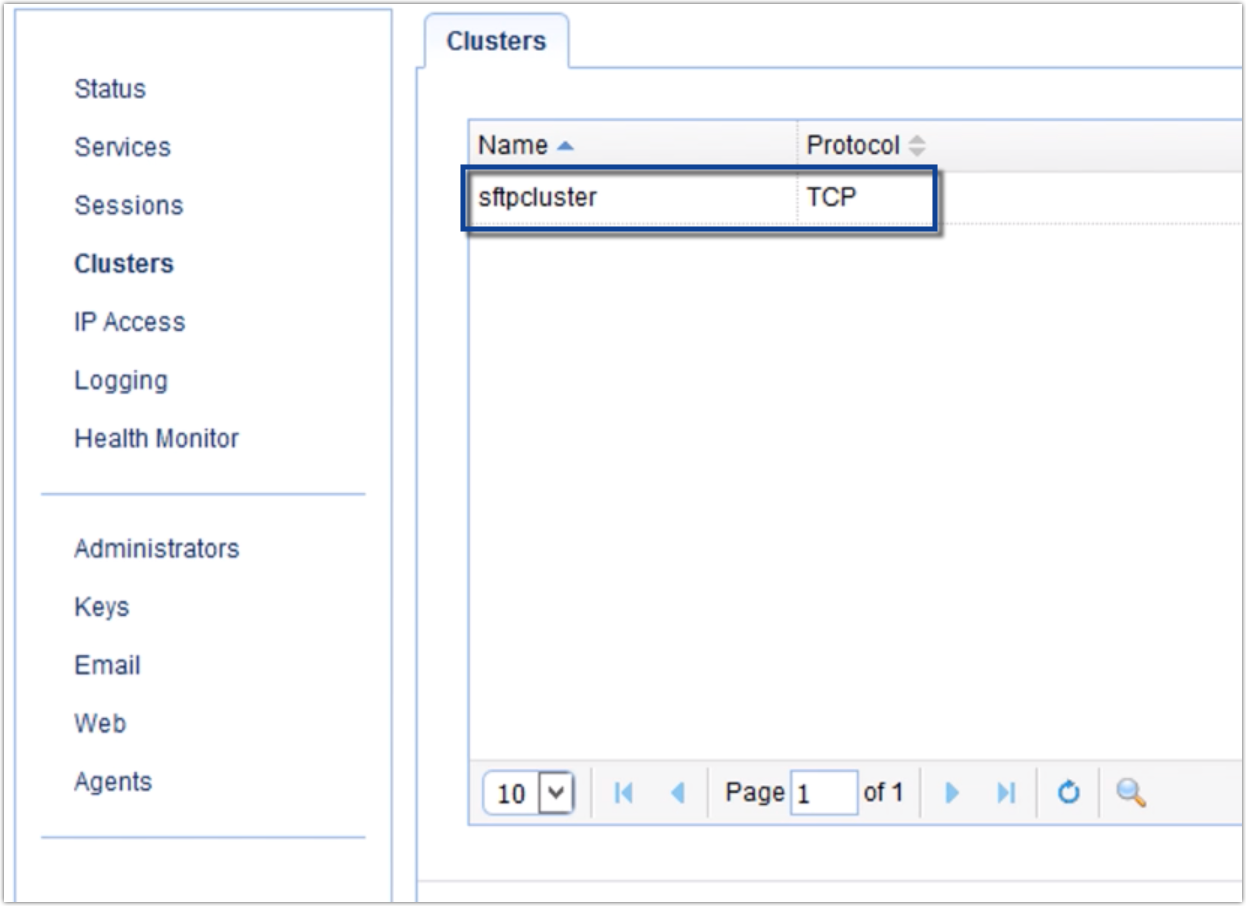
Now that you have a cluster ready, the next step would be to create a reverse proxy service that would make this cluster available to client applications.
Making the cluster available to clients
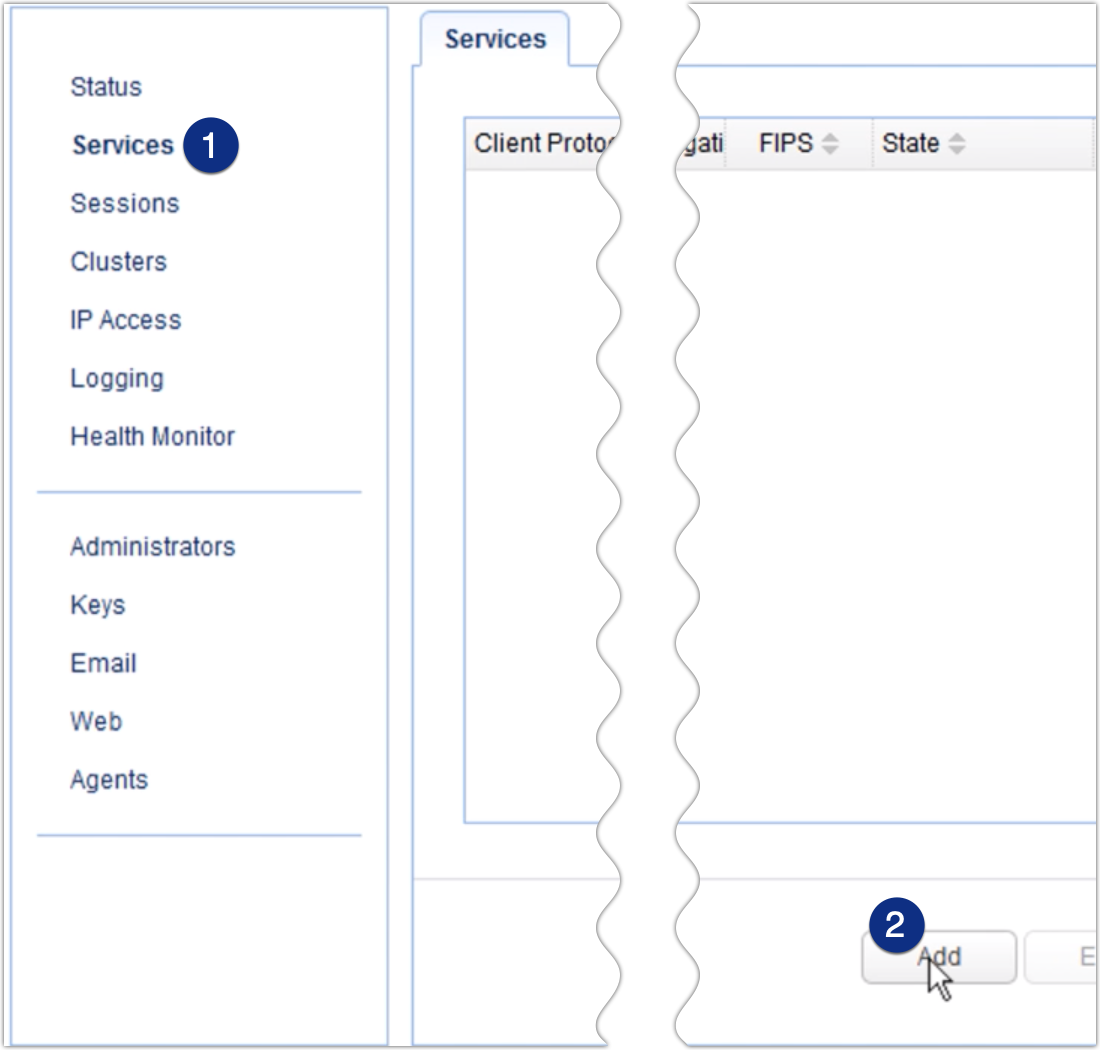
Go to the Services menu and click the Add button.
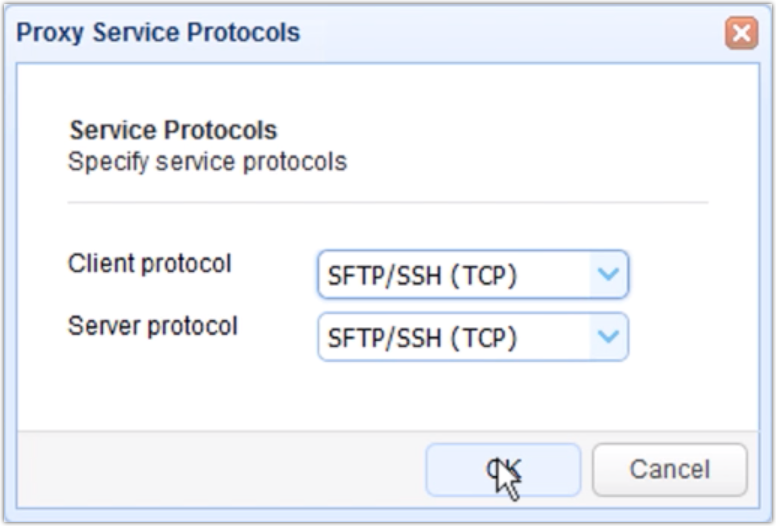
Select the client protocol for this reverse proxy service. This is the protocol clients will be using when they connect to this service. In our example, that would be SFTP.
After that, select the server protocol. This is the protocol MFT Gateway will be using when it connects to the remote hosts in the cluster. In our example, that would again be SFTP.
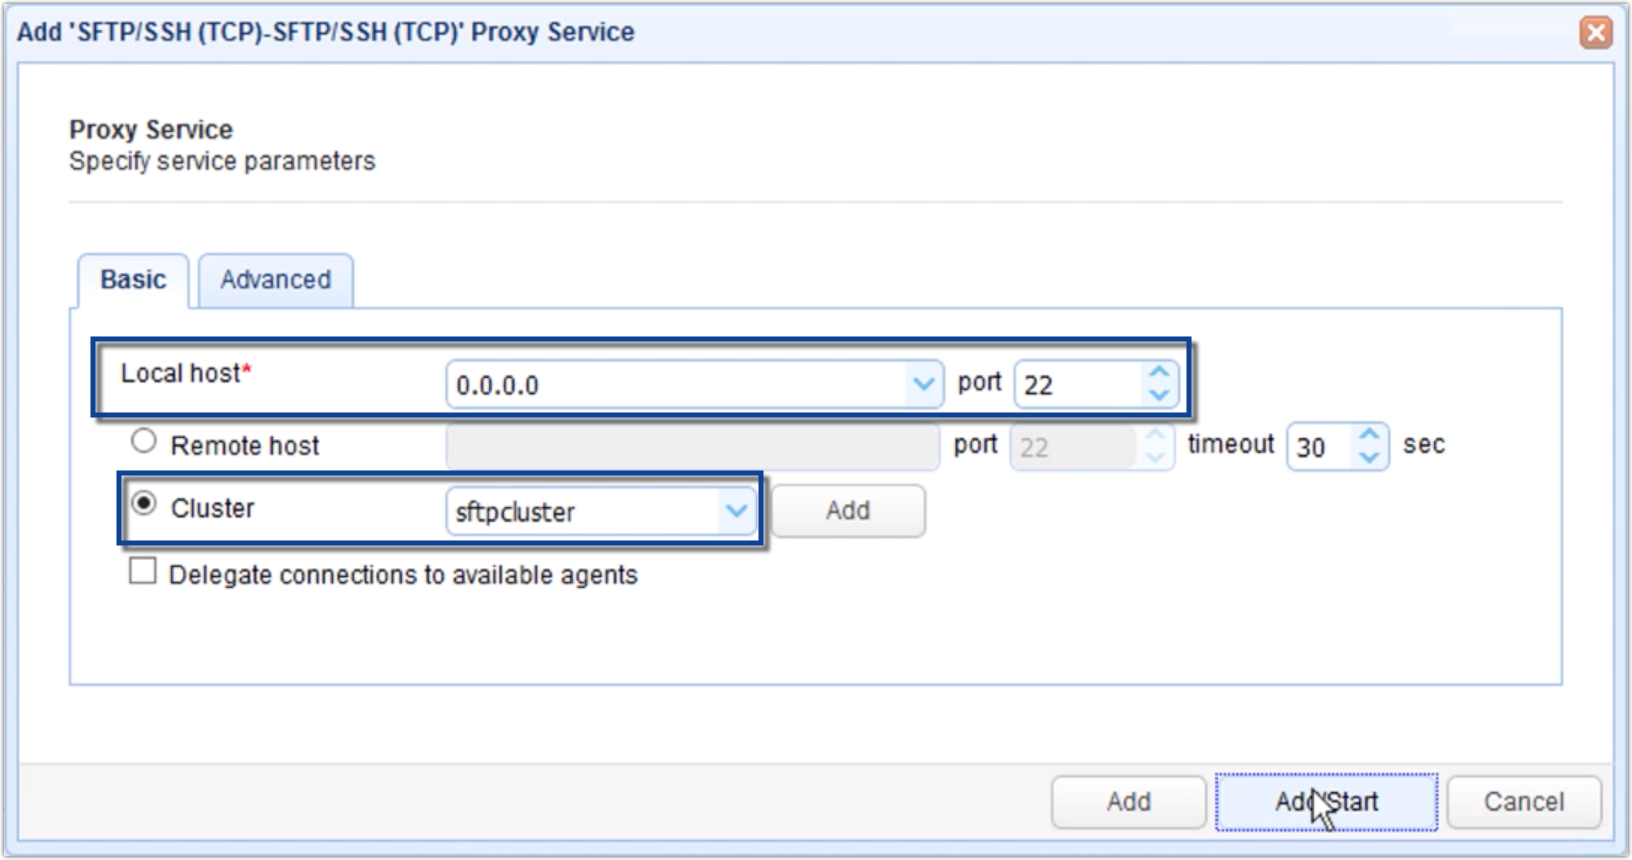
For the Local host field and port number, specify a hostname/IP address and port number on your MFT Gateway server. This will be the IP address and Port number where your MFT Gateway will be listening for client requests.
After that, click the Cluster radio button and select the name of the cluster you created earlier.
Click the Add button to create the service or Add/Start to create and then start the service.
That’s it! If you’ve been following the instructions on this tutorial, you should now have a running high availability cluster providing whatever service you created it for.
Get started
Want to try this out yourself?
Get started with JSCAPE when you request your exclusive free trial.
Recommended reading: Why UDP file transfers are up to 100x faster than TCP.


