
Configuring JSCAPE MFT Server to auto-update Kaspersky database
In Part 1 of this article, you learned how to automate virus scanning on files uploaded with JSCAPE MFT Server using the Kaspersky Antivirus 8 for Linux File Server. But of course, we know very well that new viruses are created every hour. So, your Kaspersky antivirus database has to be updated if you want it to scan effectively.
Here in Part 2, we’ll teach you how to setup your JSCAPE MFT Server for automated updates. Basically, you’ll be setting up a regular schedule for those virus database updates.
Actually, Kaspersky Antivirus 8 for Linux File Server already comes with its own scheduling feature, which also allows a user to setup a scheduled update. It’s even possible to configure Kaspersky for automatic updates during the Initial Configuration process, which follows right after installation. If you enable automatic updates that way, Kaspersky will run automatic antivirus database updates every 30 minutes.
You can use those methods if you want. We’re just providing you with another option that can be carried out on your JSCAPE MFT Server Manager.
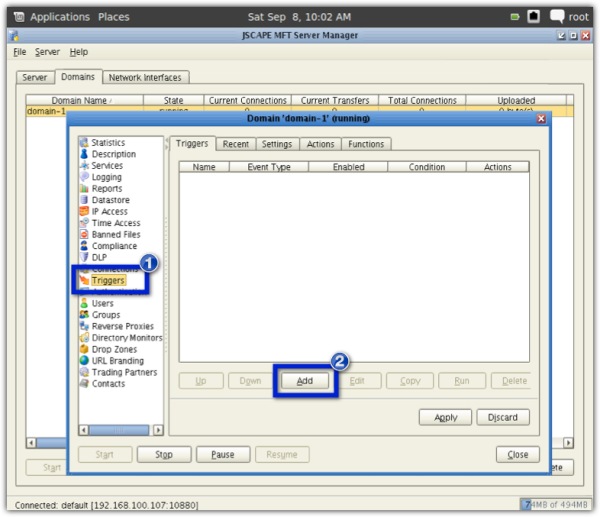
Just like in Part 1, we’ll be using triggers for this particular task. So go now to the Triggers node and click the Add button to add a new trigger.
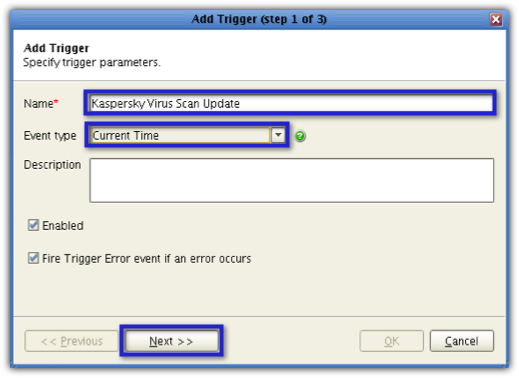
Give the trigger a name (e.g. Kaspersky Virus Scan Update). For the Event Type, select Current Time. Click Next.
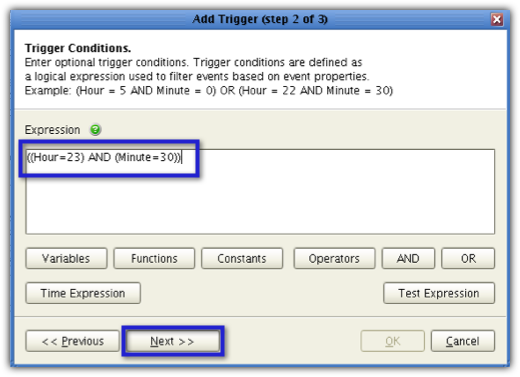
Set the condition to the time you want the auto update to execute. Base the values on a 24-hour clock. So, for example, if you want Kaspersky to perform database updates at 11:30 PM everyday, then set the condition to ((Hour=23) AND (Minute=30)). Click Next.
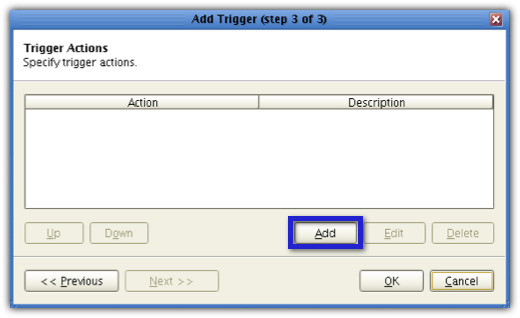
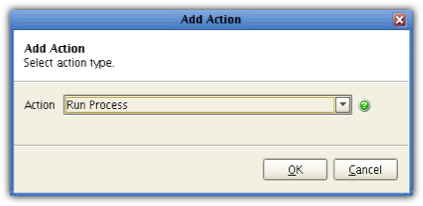
In the succeeding screen, click the Add button to add a trigger action.
Select Run Process from the Action drop-down list and then click OK.
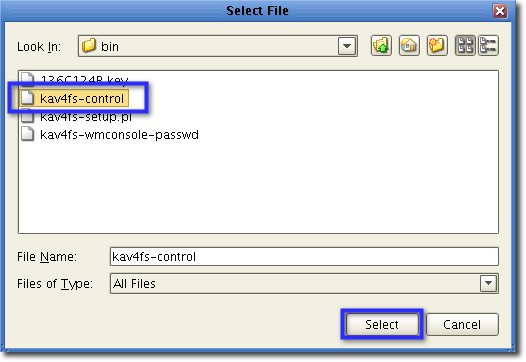
Next, click the Browsebutton beside the Programfield,
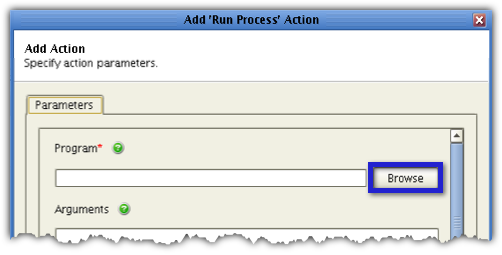
navigate to the folder that contains the kav4fs-control file and select it. Normally, you’d find it inside /opt/kaspersky/kav4fs/bin.
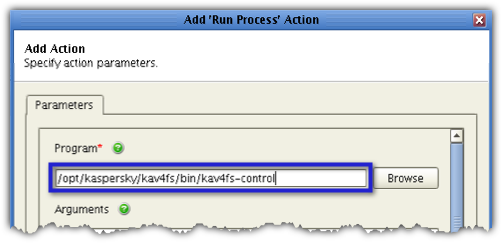
That should automatically populate the Program field like this:
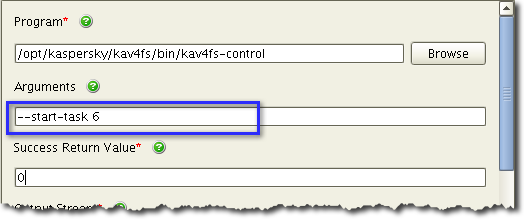
Enter this into the Arguments field:
–task-start 6
This basically starts task ID number 6, which is the ID number of the default task responsible for updating the Kaspersky database.
Leave the Success Return Value field as is.
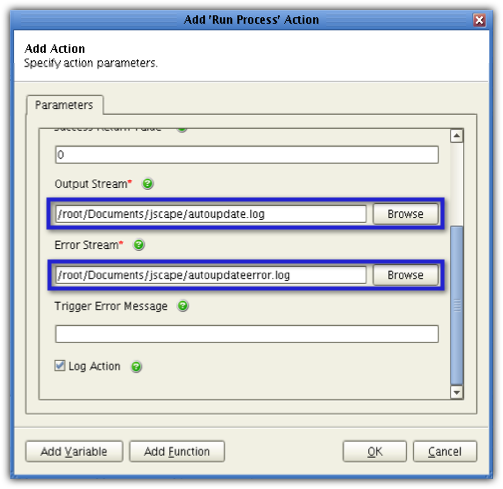
If you scroll farther down that screen, you’ll notice two fields requiring inputs. The first is the Output Stream field, while the second is the Error Stream field. You need to fill these in. You see, when the update task is run, it will generate a couple of outputs. The outputs may provide either a set of information regarding a successful run or a set of information regarding a failed run (i.e., one that has an error).
Since Kaspersky commands are normally entered in a terminal screen, the outputs are likewise generated there. However, in our case, the update command will be run in the background. Hence, you won’t be able to view the outputs on a terminal screen. Instead, you can view them later on in specially designated log files.
You can specify which log file will store the output of a successful run by specifying the file’s path in the Output Stream field. Similarly, you can specify which log file will store the output of a failed run by specifying that file’s path in the Error Stream field. To specify those paths, just click each field’s corresponding Browse button, navigate to the directory where you want to store the log file in question, give the file a name and click Select.
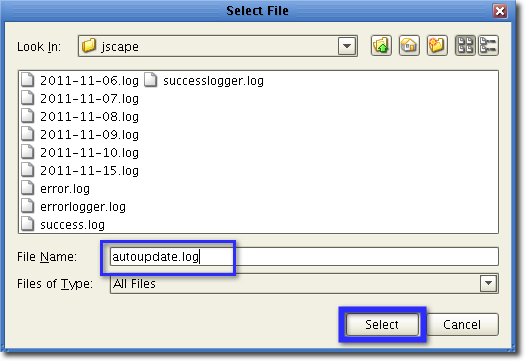
When you’re done specifying paths for the two fields, your Output Stream and Error Stream fields should look like the screenshot below. Of course, you may use a different set of file names and paths for your log files.
Finally, check the Log actioncheck box. This will enable the system to automatically record the scans into the JSCAPE MFT Server activity log. Click the OK button.
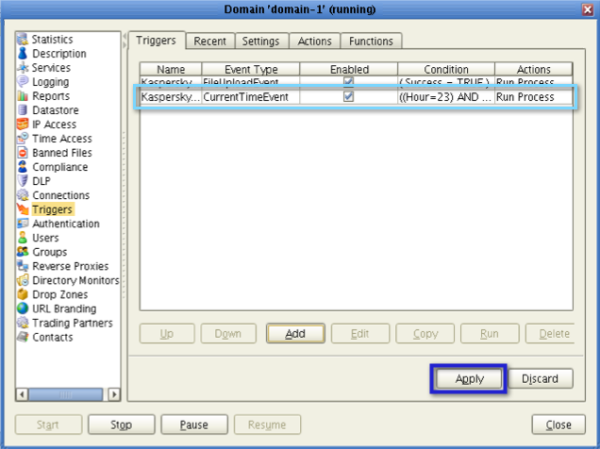
You should be able to see your newly created trigger action in the list of trigger actions for that particular trigger. Click OK.

Once you see your newly created trigger in your list of triggers, click the Apply button.
Barring any unforeseen hitches, your managed file transfer server should call this trigger and perform automatic Kaspersky database updates at 11:30 PM everyday.
To run this trigger without waiting for the scheduled time, select it and click the Run button.
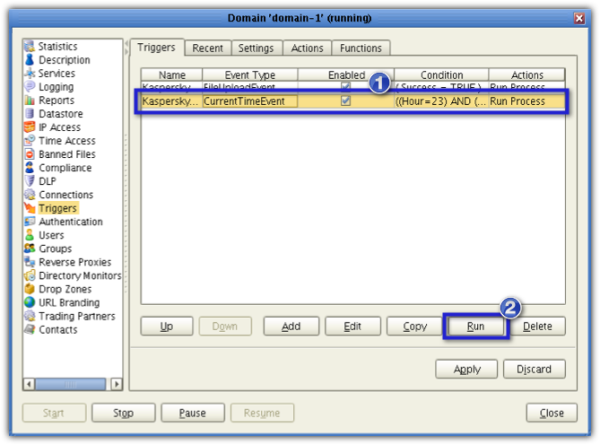
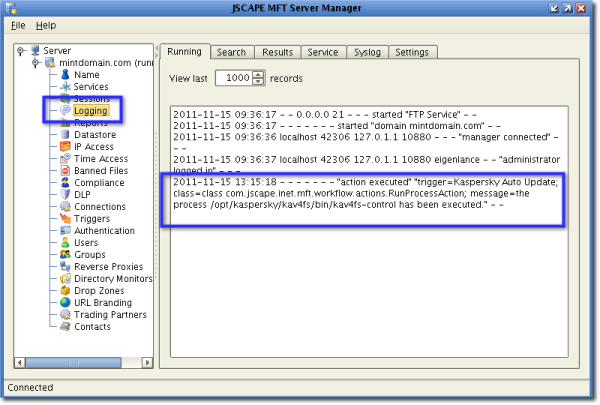
If you want to see whether the trigger actually fired, go to the Logging node and look for the relevant event there.
Note: For the steps outlined here, we are making the assumption that you have already configured Kaspersky with: the appropriate update source, i.e., Kaspersky Lab update servers or Kaspersky Administration Kit server, and the necessary proxy settings (if any).
These are all done in the terminal using a Linux root account. For more details regarding these settings, please refer to the Kaspersky Anti-Virus 8.0 for Linux File Server Administrator’s Guide.
Proceed to Part 3

