
Overview
While encryption keeps your file server data safe from prying eyes, it doesn’t provide any protection against viruses or trojans. To prevent existing files in your server from getting infected by malware that may be accompanying a newly uploaded file, you can configure JSCAPE MFT Server to work with antivirus software.
JSCAPE MFT Server can be set to call on your antivirus software to conduct a scan each time a file is uploaded to your file server. In an older post, Anthony Bryan showed you how to set JSCAPE MFT Server to perform automatic virus scanning using ClamAV. So big thanks to Anthony for leading the way! Here, I’ll show you how to do the same task when using Kaspersky Antivirus 8 for Linux File Server.
Enabling automatic scanning on newly uploaded files
In this section, I’ll show you how to configure your managed file transfer server so that it can execute a Kaspersky scan on newly uploaded files. We’re assuming you already have Kaspersky Antivirus 8 installed and that your Kaspersky database is regularly updated. If you want to know how to schedule automatic database updates using the JSCAPE MFT Server Manager, you can also find that information in Part II of this post.
In the meantime, let’s focus on the scanning part.
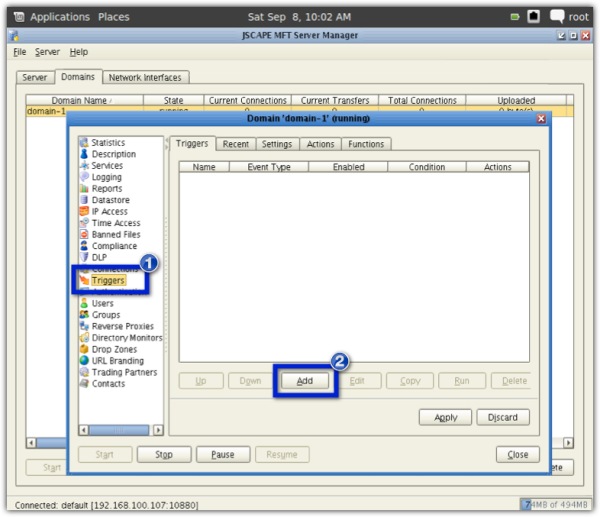
When you’re ready, open your domain from the JSCAPE MFT Server Manager and navigate to the Triggers node. Click the Add button to add a new trigger.
That should launch the Add Trigger wizard.
Enter a descriptive name for the trigger (e.g. “Kaspersky Virus Scan”). Next, select File Upload from the Event Type drop-down list. Click the Next button when you’re done.

Logically, you would only want a scan to take place when a file has been successfully uploaded. So, in the Expression box, enter (Success = TRUE), and then click Next.

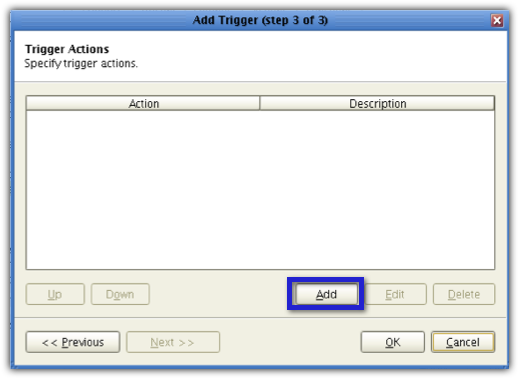
Click the Add button to create a new Trigger Action.
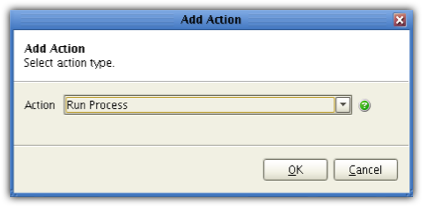
The system will then ask you to select an action type. SelectRun Process from the drop-down list and then click OK.
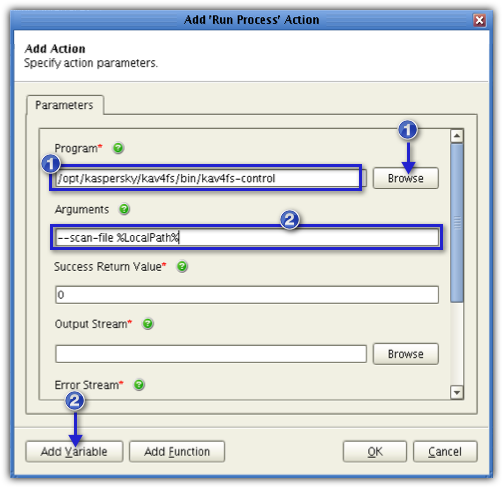
Next, enter the path of the program you want to execute into the Program field. Normally, the complete path would be:
/opt/kaspersky/kav4fs/bin/kav4fs-control
Alternatively, you can click the Browse button and navigate to the kav4fs-control program. If you do it this way, the complete path will be automatically entered into the Program field after you’ve selected the file (i.e., kav4fs-control) in question.
If you’ve been reading the Kaspersky documentation, you’ll know that the kav4fs-control command actually requires at least one argument. That is, you need to specify the file you want to scan by assigning its complete path to the –scan-file argument. This argument is typically placed right after the kav4fs-control command like this:
kav4fs-control –scan-file [path of file to scan]
In the JSCAPE MFT Server Manager, however, the argument should be placed in the Arguments field. Copy this string of text as is and paste into the Arguments field:
–scan-file %LocalPath%
Another way to do this is to click the Add Variable button and then select the variable named LocalPath.
Leave the Success Return Value field as is.
If you scroll farther down that screen, you’ll notice two fields requiring inputs. The first is the Output Stream field, while the second is the Error Stream field. You need to fill these up. You see, when the task is run, it will generate a couple of outputs. The outputs may provide either a set of information regarding a successful run or a set of information regarding a failed run (i.e., one that has an error).
Since Kaspersky commands are normally entered in a terminal screen, the outputs are likewise generated there. However, in our case, the scan command will be run in the background. Hence, you won’t be able to view the outputs on a terminal screen. Instead, you can view them later on in specially designated log files.
You can specify which log file will store the output of a successful run by specifying the file’s path in the Output Stream field. Similarly, you can specify which log file will store the output of a failed run by specifying that file’s path in the Error Stream field. To specify those paths, just click each field’s corresponding Browse button, navigate to the directory where you want to store the log file in question, give the file a name and click Select.
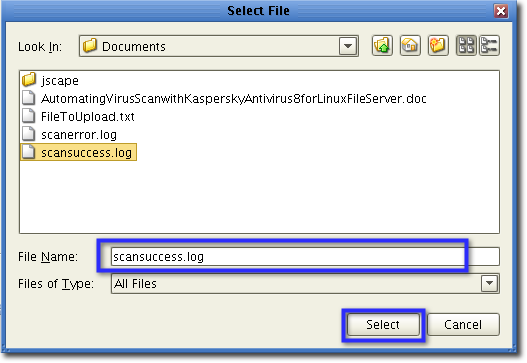
When you’re done specifying paths for the two fields, your Output Stream;and Error Stream fields should look like the screenshot below. Of course, you may use a different set of file names and paths for your log files.
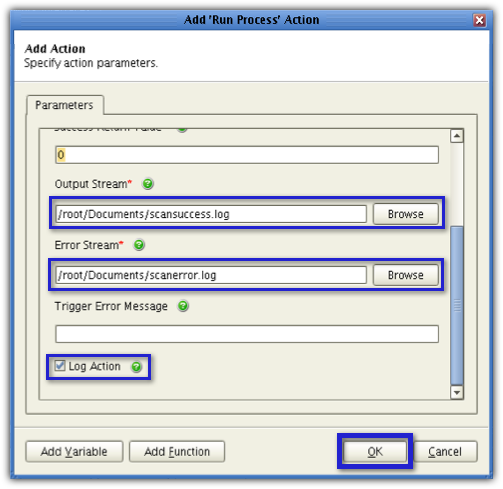
Finally, check the Log action check box. It’s found at the bottom of the Trigger Actions window. This will enable the system to automatically record the scans into the JSCAPE MFT Server activity log.
The moment you’re done with all that, click OK.
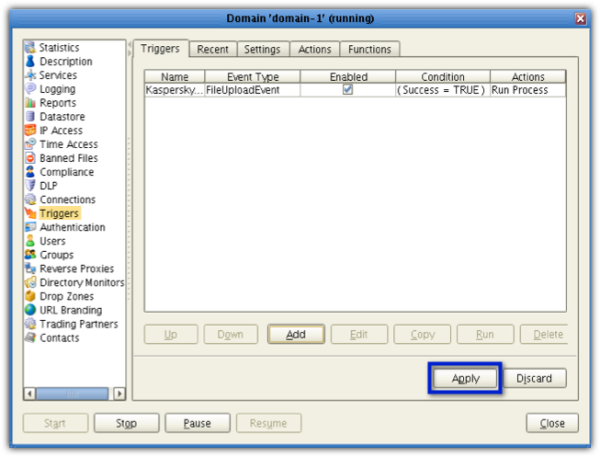
Wait until you see your newly created trigger action in the list of trigger actions, then click OK.

You’re almost done. Once you see you’re newly created trigger on the main screen, click the Apply button. Be sure you perform this last step. Otherwise, everything you configured won’t take effect.
You’re now ready to put the auto virus scan feature to the test. Fire up your favorite file transfer client. I use JSCAPE’s AnyClient, a free platform-independent file transfer clientthat supports FTP as well as major secure file transfer protocols.
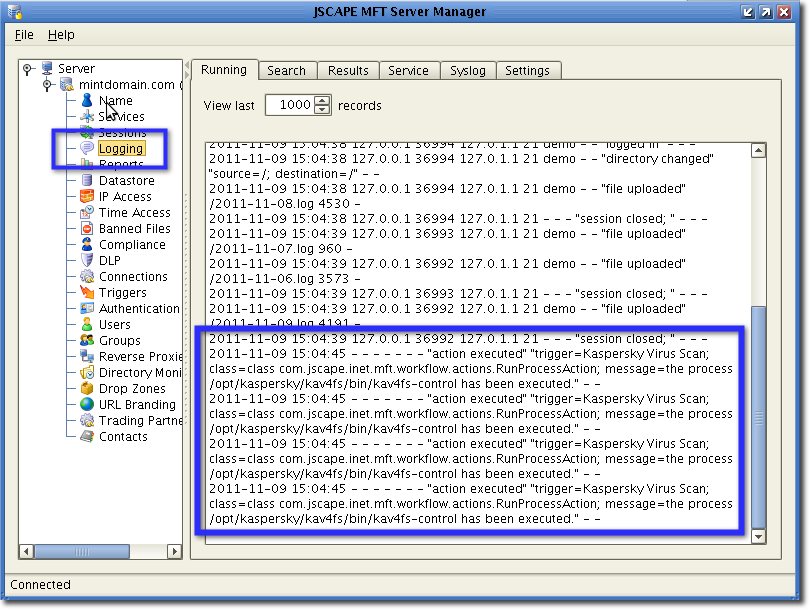
Connect to your managed file transfer server and upload a file or a group of files. After uploading, go to your JSCAPE MFT Server Manager and click the Logging node. There you’ll see the details of the upload, including the recently executed virus scanning actions.
There you have it. You now know how to configure your managed file transfer server for automatic virus scanning. But we’re not yet done here.
If you’ve ever performed virus scanning, you know that the scanning process is just half of the story. The people who make viruses always come up with new ones. For your virus scanner to be effective, its database has to be updated. In part 2 of this post, you’ll learn how to setup JSCAPE MFT Server for automatic updates.

