
Overview
We all have our favorite antivirus software, so while some of you may have immediately applied what you learned from our tutorials on automatic virus scans using Kaspersky Antivirus and ClamAV, others may have struggled to apply those tutorials to the antivirus software being used in their organization. That’s why we’ve decided to add one more similar post for another popular antivirus.
This time, we’re going to configure JSCAPE MFT Server to perform automatic virus scans on newly uploaded files using Avast Antivirus! for Linux/Unix Servers. Surely, with three examples, you’ll find it easier to apply these steps to your own antivirus program. We’re going to assume you’ve already installed Avast Antivirus on your Linux server and that, of course, JSCAPE MFT Server Manager is running and ready.
By default, Avast performs automatic updates every four hours when it can. So if your server’s connected to the Internet, chances are, you’ll have the latest virus database updates every time an upload is made. But if for whatever reason, you’d like to schedule your own auto-updates, then you can set your own auto-update schedule using the JSCAPE MFT Server Manager. You’ll have to wait for Part 2 to read the tutorial for that though.
In the meantime, let’s start configuring your managed file transfer server for auto-scanning.
Enabling Avast-powered automatic scans on newly uploaded files
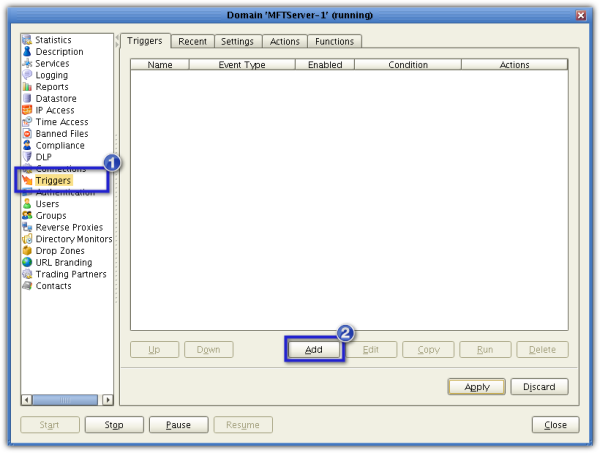
First, we need to setup a trigger that would execute an Avast virus scan in response to a File Upload event. Go now to the Triggers node and create a new trigger by clicking the Add button.
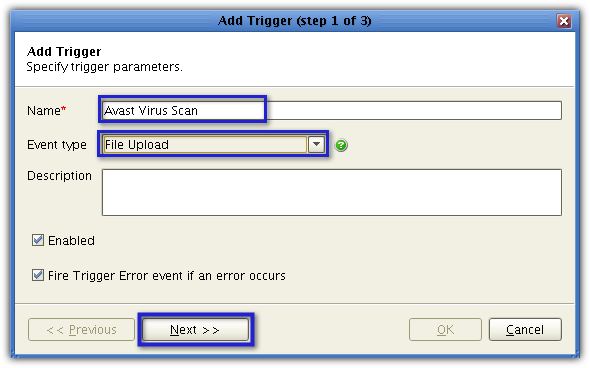
Once the Add Trigger wizard launches, give the new trigger a name (e.g. Avast Virus Scan).
From the Event Type drop-down list, select File Upload. Click Next when you’re done.
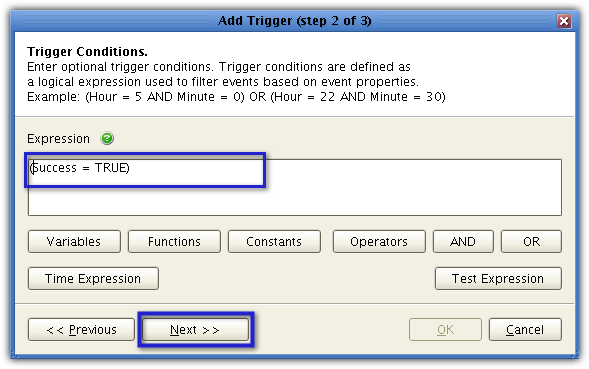
You will now need to enter a trigger condition. Trigger conditions are logical expressions, so they evaluate to TRUE or FALSE. In our case, we would like the trigger to execute only if the file upload event was successful. So, enter (Success = TRUE) in the Expression box. After that, click Next.
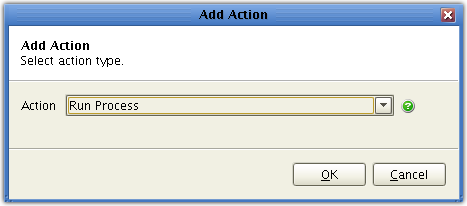
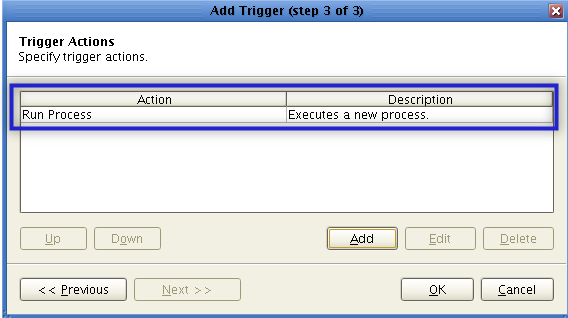
It’s time to add the trigger action that would execute after a file upload is found to be successful. This action is going to be directly responsible for the actual virus scanning. Click Add to start creating the trigger action.
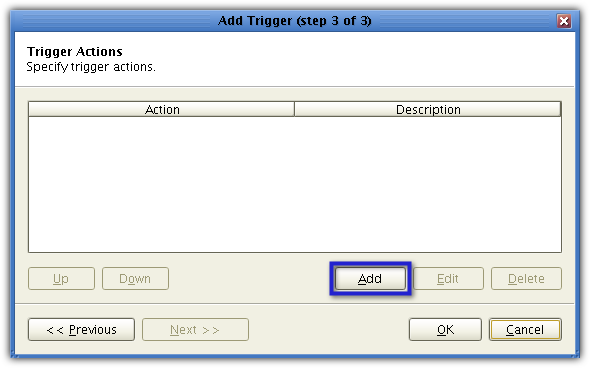
In the JSCAPE MFT Server environment, the action we are going to execute is known as a Run Process action. Select that action from the Action drop-down list.
You’ll then be asked to specify that action’s parameters.
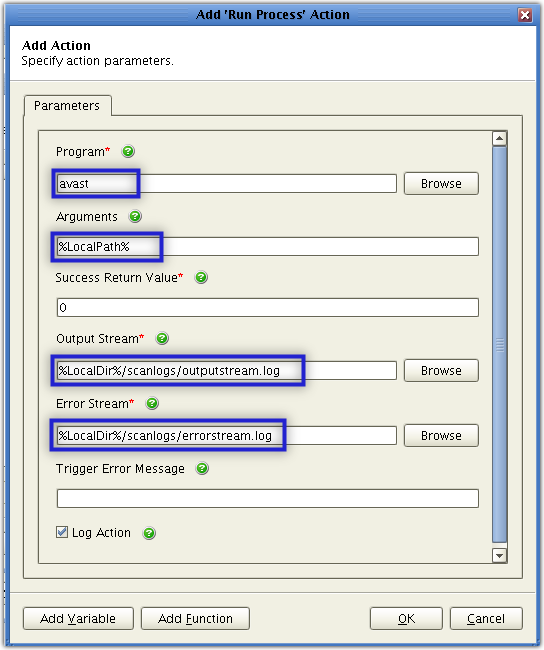
Start by entering the path of the specific program you want to execute into the Program field.
The Avast program responsible for command-line scanning is also called avast (it used to be avastcmd) and is usually installed in the /usr/bin directory. Therefore, the complete path should be:/usr/bin/avast.
However, because /usr/bin is normally included in the $PATH environment variable, you should be able to run avast from any directory. In other words, entering avast all by itself (instead of ‘/usr/bin/avast’) should suffice.
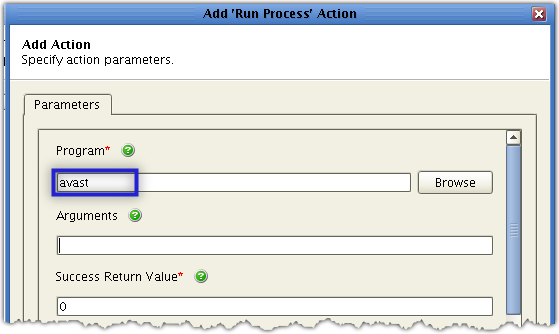
Of course, if your avast program is in another location, you should change the path accordingly.;
Next, you need to enter the arguments required by the virus scan program. For Avast, you will only need one argument for this purpose, and it is the path of the file you want to scan. Thus, you need to specify the path of the newly uploaded file. That should be easy because a ;trigger with a File Upload event type will automatically capture the path of the uploaded file and store it in the variable named %LocalPath%.
Therefore, all you would need to do is enter %LocalPath% into the Arguments field.

Leave the Success Return Value field as is.
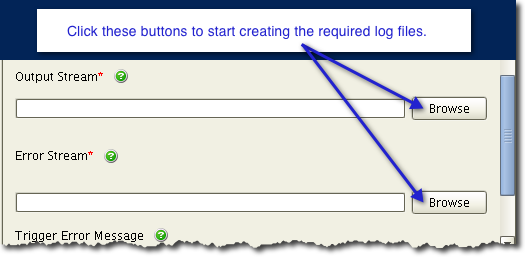
There are two more fields that would require inputs: the Output Stream field and the Error Stream field. If you’ve ever tried scanning a file on the command line, you know that an output is always generated right after the scan.
The output may contain information such as the number of files scanned, whether the file is infected or not, and so on. On the other hand, if an error is encountered, then an error notification will be displayed as output. Unfortunately in this case, your automatic virus scan will be taking place in the background. As a result, you won’t be able to see those outputs.
That’s why JSCAPE MFT Server allows you to specify log files in which the Output Stream and Error Stream (if ever there is any) will be written. You can then view the contents of these files later on if you want.
To assign a log file that will store the output of a successful run, just enter the file’s path in the Output Stream field. Likewise, you can assign a separate log file that will store the output of a failed run by entering that file’s path in the Error Stream field.
If you’re creating this trigger from an installation of JSCAPE MFT Server Manager that’s on the same machine as the JSCAPE MFT Server itself, then you can specify the location of both log files using the Browser button as shown below.
To specify the paths to those files, just click each field’s correspondingBrowsebutton, navigate to the files in question, and click Select
Here’s a sample of an Output Stream log file being created:
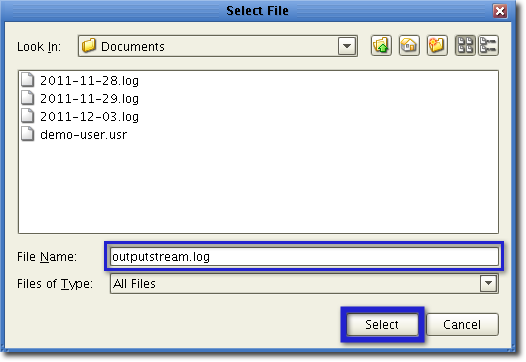
JSCAPE MFT Server will then automatically fill the Output Stream and Error Stream fields with the desired paths.
However, if you’re creating this trigger from a remote installation of JSCAPE MFT Server Manager (see figure below), you will have to enter the paths yourself.
In my case, I decided to use the JSCAPE MFT Server variable %LocalDir%, which takes the value of the parent directory of the uploaded file. To separate the resulting log files from the uploaded files, I created a subdirectory named scanlogs and inserted that name between %LocalDir% and each log filename. So in effect, my entries looked like this:
For the Output Stream: %LocalDir%/scanlogs/outputstream.log
and
For the Error Stream: %LocalDir%/scanlogs/errorstream.log
Here are the entries in full:
After clicking OK, wait until you see your newly created trigger action in the Trigger Actions list box. The moment it appears, click OK.
This will take you back to the JSCAPE MFT Server Manager main screen. Your newly created trigger should now be visible from the Triggers node. Don’t forget to click the Apply button!

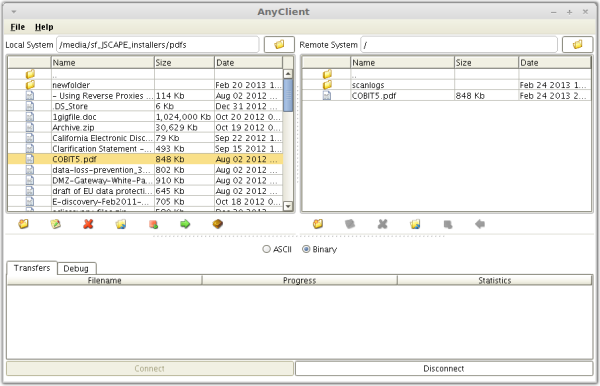
You’re now ready to put your auto-scanning feature to the test. Fire up your favorite file transfer client (That would be AnyClient for me), and upload a file to your secure file transfer server.
Here’s a screenshot of a successful AnyClient upload of a file named “COBIT5.pdf”.
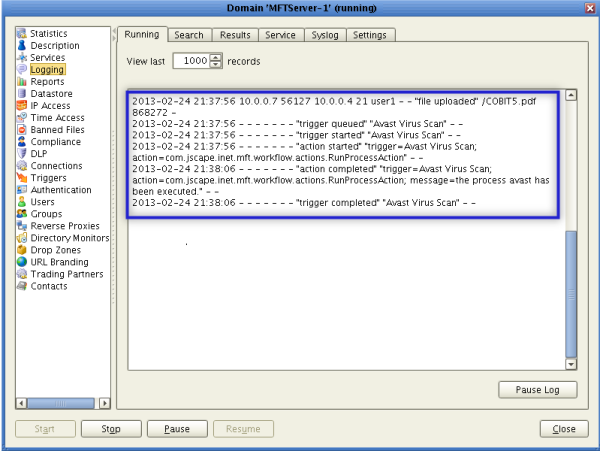
Now, here’s a part of my JSCAPE MFT Server log showing the successful upload and the subsequent virus scan.
If you tried this at your end, you might want to view the Output Stream log file. If your scan was error-free, you should see something like this:

That should be all you need to do.
In part 2, I’ll show you how to schedule auto-updates of your Avast virus database using JSCAPE MFT Server. In the meantime, have a nice day!

