
In this tutorial, we’re going to show you how to install JSCAPE MFT Synchronizer Agent on a Windows host. Agents are used in cases wherein the remote host that you would like to synchronize with your host via JSCAPE MFT Synchronizer doesn’t have any running file transfer service whatsoever. So, there’s no FTPS, no SFTP, not even, plain FTP, or any other file transfer protocol for that matter.
Agents have much smaller computing resource footprints and lower maintenance requirements than a full blown file transfer solution, so it’s really more practical to use if all you really need to do is push or pull a bunch of files to or from that remote host.
Now, before you can use any instance of MFT Synchronizer agent, you need to make sure that:
- You already have an agent object on your MFT Synchronizer instance that would later on correspond to the agent you’ll be installing on the remote host, and
- You already have the agent service enabled
So let me demonstrate how to set those up first.
Watch the video
Would you prefer to watch a video version of this tutorial instead? You can play the video below. Otherwise, just skip it if you wish to continue reading.
Do this on the MFT Synchronizer side
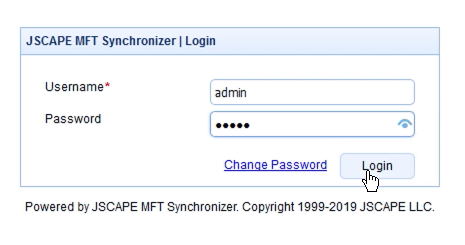
The first thing we’re going to do is login to our MFT Synchronizer Manager.
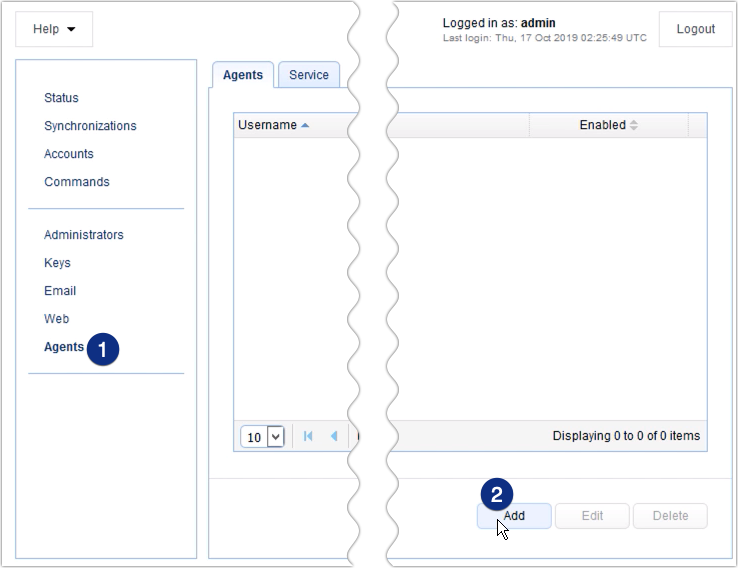
 After that, we go to the Agents module and then add an agent.
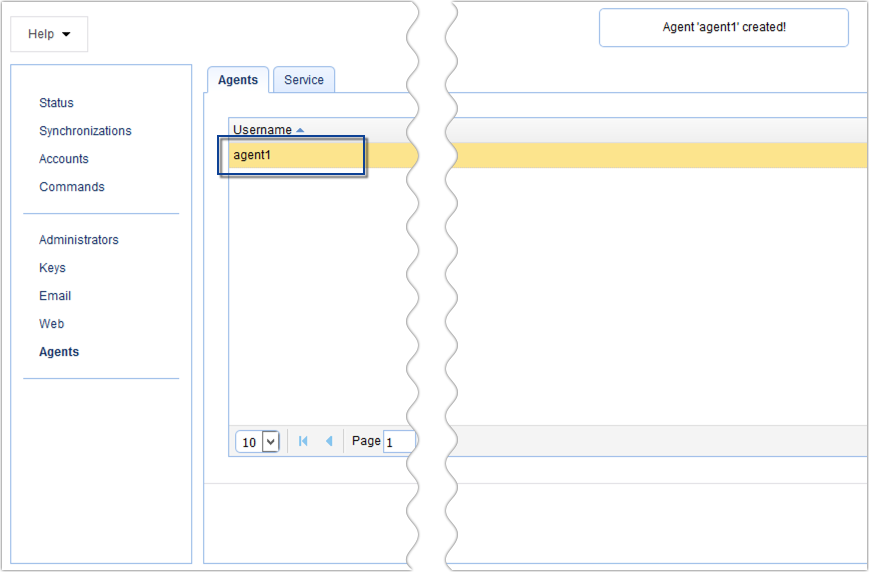
We then enter login credentials for this particular agent. So, let’s add a username and let’s call this ‘agent1’. Next, let’s give it a password and then repeat that password to confirm.
Now, remember, these values should match the values that you will later on enter into your agent username and agent password parameters when you install the agent on the remote host. Once you’ve taken note of that, you can now click Add.

So there, our agent has just been created.
Now that we have an agent object, our next step is to enable the agent service. So we go to the Service tab, and then just click Edit.
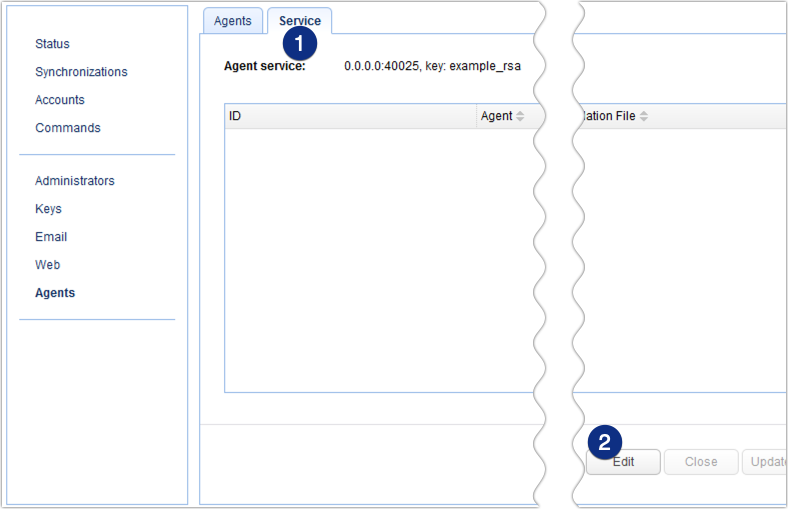
Once, the Agent Service Configuration dialog appears, we can then specify the Agent Service parameters. First, we tick the checkbox to enable the service.
And then we specify an IP address this service will be listening on. Let’s just select 0.0.0.0, which means the service will be listening on all available network interfaces
Next, for the port number, we just retain 40025, which is the default port number the service will be listening on. You can change that if you want but let’s just leave that as is. Take note of that port number, as you’ll be needing that once you set up your agent at the remote Windows host.
You can also select a key, which will be responsible for encrypting communications between MFT Synchronizer and the remote agent. You have the option to generate a new key or import an existing key, and you should really use one of these two options once you deploy MFT Synchronizer in a production environment. But for now, let’s just leave the key to its default value.
Since we’re all done here, let’s click Save.

And there you’ll see the agent service configuration has been updated, which means our agent service is starting to listen for incoming agent requests. But right now, we don’t have any agent on a remote host yet, so let’s add one to our remote Windows host.

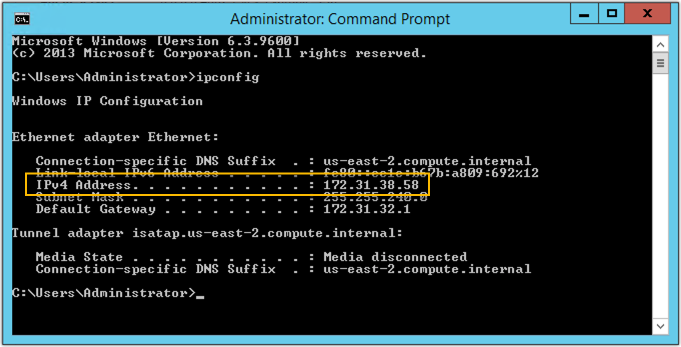
But before we do that, we need to obtain the IP address of this machine we’re currently working on, i.e. the IP address of our MFT Synchronizer service. Just launch a command prompt and run ipconfig. In our case, the IP address is 172.31.38.58
Do this on the host that will run MFT Synchronizer Agent
So now, we can head out to our remote Windows host and install our MFT Synchronizer Agent. We need to download the agent installer first, so launch a web browser and go to www.jscape.com.

Go to Products > JSCAPE MFT Synchronizer > Download
Fill up the form and then click Download
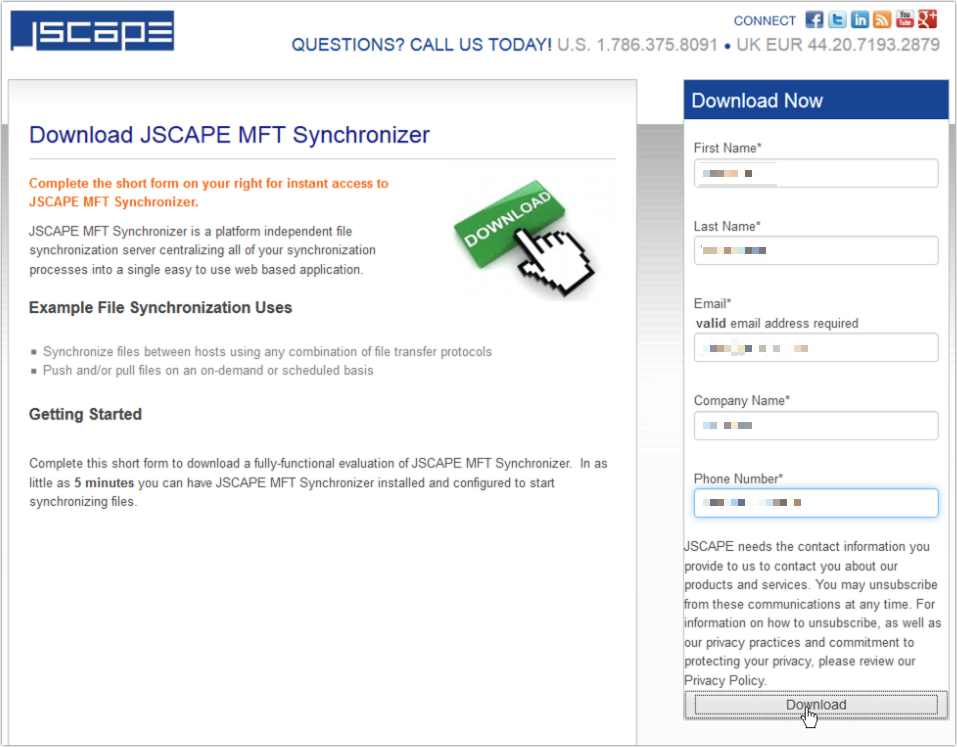
You’ll then be brought to the MFT Synchronizer download page, where you can see the different installers for different platforms. Since we’re using a 64-bit Windows Server, let’s download the 64-bit Windows installer.

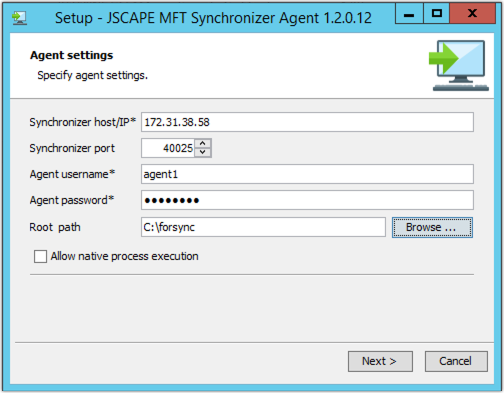
Once the installer has finished downloading, double-click it to launch and then follow the instructions on the screen until you get to the Agent settings dialog.
Here, you need to enter the:
Synchronizer host/IP – this is just the IP address of our MFT Synchronizer service. In our case, that would be 172.31.38.58
Synchronizer port number – The default is 40025. Of course, if you changed that on the server side, you should also change that here
Agent username – In our case, that would be ‘agent1’
Agent password – This is the agent’s corresponding password.
Root path – Specify the folder where MFT Synchronizer will be pulling files from or pushing files to. Just click Browse and point to that folder (or create a new one and point to it). That should fill up our Root path field.
There’s a checkbox labeled ‘Allow native process execution’. You’ll need to tick that checkbox if you want this agent to run native commands. But we won’t be running any native commands for now, so let’s just leave that as is. Instead, let’s click Next to proceed. And then click Finish to finalize the installation process.
After you click the Finish button, this MFT Synchronizer agent will launch automatically in the background and attempt to connect to your MFT Synchronizer installation using the parameters you specified earlier.
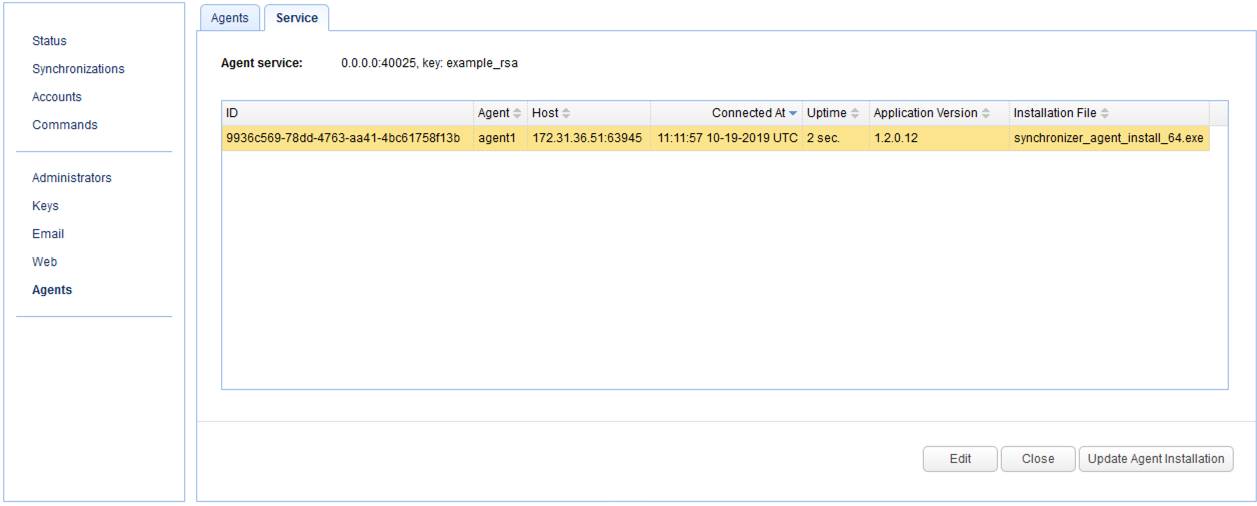
So, if we go back to our MFT Synchronizer instance, we should see a new entry under the Service tab representing the newly installed agent on our remote Windows host. We can also view pertinent information about that agent, like the IP address and host number of the Windows host, the time the agent successfully connected with MFT Synchronizer, the version of the MFT Synchronizer agent, and the type of installation file.
That’s it. Now you know how to install JSCAPE MFT Synchronizer Agent on a Windows host.
If you wish to try this out yourself, you may download the FREE, fully-functional Starter Edition of JSCAPE MFT Synchronizer now.

