
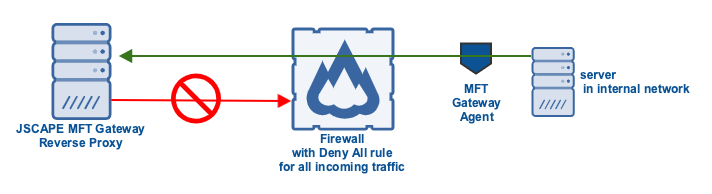
In this post, we’ll walk you through the steps of installing the JSCAPE MFT Gateway Agent on a Windows machine and adding that agent on MFT Gateway. Delegating network requests to an agent can come in handy if the Windows box running a service you want to create a reverse proxy for is located behind a firewall that doesn’t allow any connections from external sources.
Watch the video
Would you prefer to watch a video version of this tutorial instead? You can play the video below. Otherwise, just skip it if you wish to continue reading.
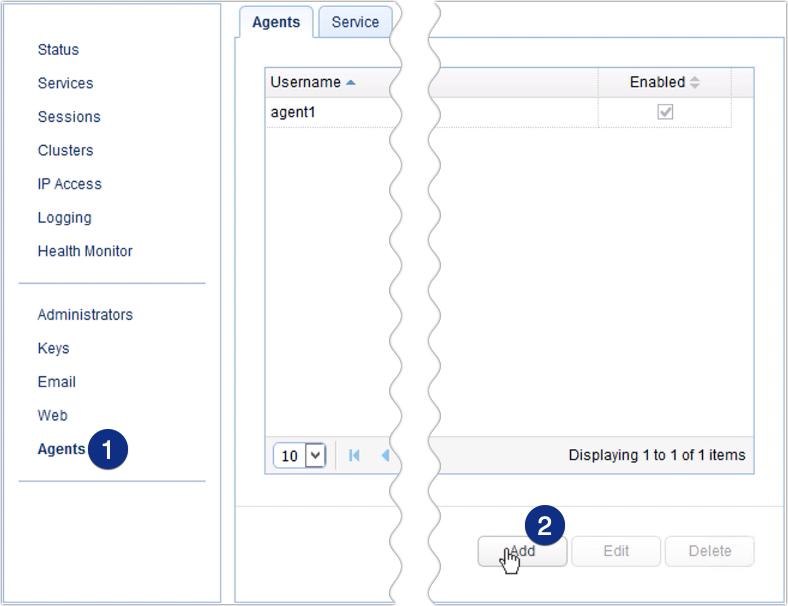
Before we install the agent software, we need to create login credentials for that agent on the JSCAPE MFT Gateway server. JSCAPE MFT Gateway will use those credentials to authenticate the agent when the latter connects from a remote host. To create agent login credentials, just go to the Agents module and click the Add button.
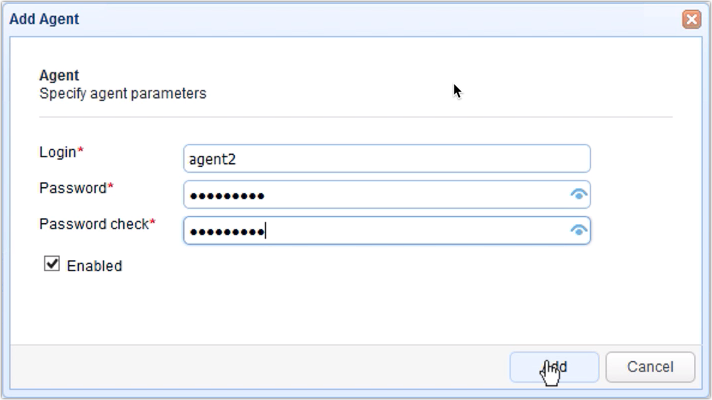
That should bring up the Add Agent dialog. First, we need to specify a login name. If you noticed, we already have an existing agent named agent1. So, let’s just call this new agent login agent2. That’s just an arbitrary name, so you can call your agent using any notation that can help you manage your agents more efficiently. After assigning a login name to the agent, create a password for that login. Enter the password twice and then click the Add button.
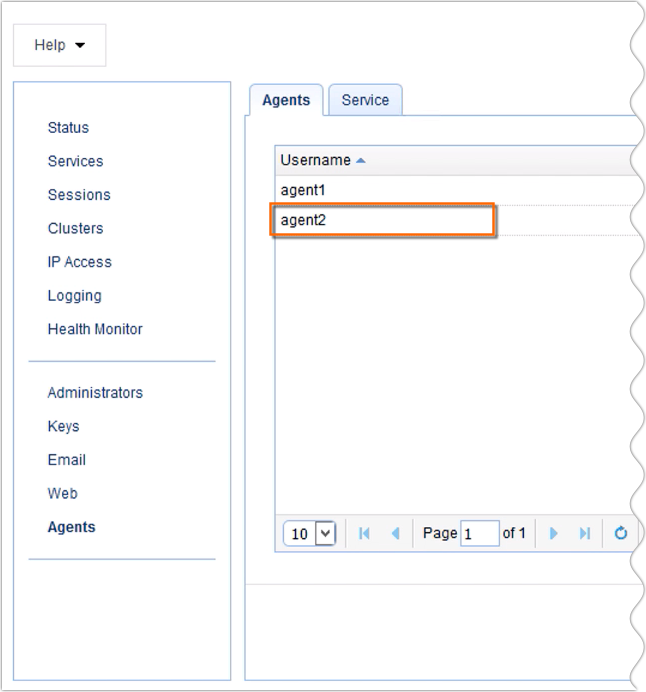
If everything goes well, we should then see our newly created agent login in the Agents tab.
The next step is to enable the agent service. To do that, we go to the Service tab and click the Edit button. Actually, the screen you’re seeing here is already showing an enabled agent service. You can even see it detecting an active agent named agent1 that’s been running for about 63 hours now. But let’s just go ahead and click the Edit button to see what parameters need to be configured when you first enable the agent service.

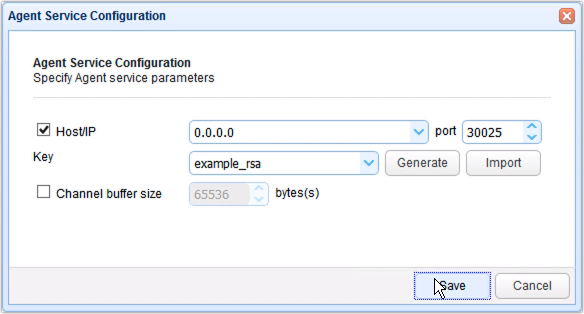
So, here, in the Agent Service Configuration dialog, the basic service parameters that need to be set are the Host or IP address and port number. This will be the IP address and port number the agent service will be listening on. We also call this the control channel. In our example, we’re just using 0.0.0.0 for the IP address, which means the agent service will be listening on all available network interfaces on the machine running our MFT Gateway instance. We’ve also left the port number to its default value — 30025.
As for the rest, let’s just leave those as is. In a production environment, though, you will want to replace that example_rsa key with your own key. But for now, let’s just leave that unchanged. Click Save to commit the changes.
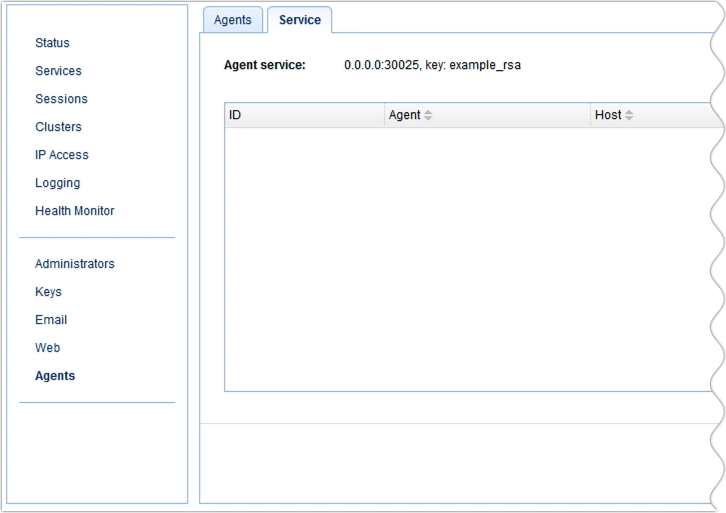
If you just enabled your agent service and don’t see anything under the Service tab, don’t worry about that. That’s just because you haven’t installed an agent yet. The reason you saw an agent named agent1 earlier was because we already installed that agent on a remote host and it has already connected to MFT Gateway. In the succeeding steps, we’ll show you how to install an agent on a Windows host and have it connect to our agent service.
A newly created agent service when there is no agent connecting to it.
Let’s now head to our Windows host and install our agent there.
Note:MFT Gateway Agent requires Java to run. If your Windows machine doesn’t have Java on it, kindly install Java first. In addition, if you’re using Oracle Java, you may have to install the JCE Unlimited Strength Jurisdiction Policy Files. There’s no need to install those files if you’re using OpenJDK, as it already has them enabled by default.
The first thing is to download the MFT Gateway Agent Windows installer onto our host. Just fire up a web browser on your Windows host and go to www.jscape.com > Products > Managed File Transfer > JSCAPE MFT Gateway > Download > [fill up the form] > click Download
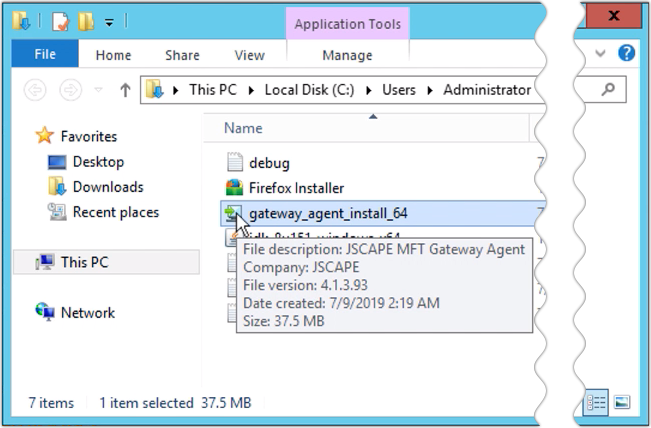
Once we see the list of installers, we simply click the link to the appropriate Windows installer. There’s a 32-bit installer (gateway_agent_install.exe) and a 64-bit installer (gateway_agent_install_64.exe). Choose the installer that suits your version of Windows.
As soon as the download completes, we can then double-click the downloaded installation file to run the installation wizard.
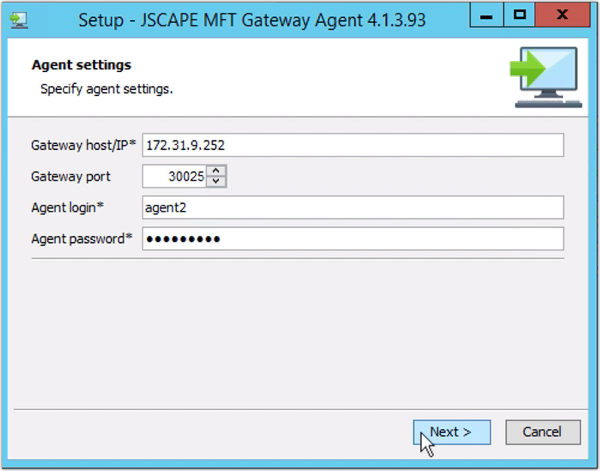
Most of the instructions are similar to what we see during a regular Windows application installation, so let’s just skip those. But once we get to Agent settings screen, we need to enter the IP address of the host running the MFT Gateway instance. Note that it’s not going to be 0.0.0.0. That IP address only made sense when we were setting things up on the MFT Gateway side. But once we direct the agent to the MFT Gateway control channel we really need to enter a specific IP address.
So, in our case, that IP address happens to be 172.31.9.252. That’s the IP address of our MFT Gateway host and that’s what we’re going to enter into the Gateway host/IP field. For the Gateway port field, we just enter the port number 30025, as that was the port number we used when we set up our control channel earlier.
Lastly, we also enter the agent login name and password, and click Next. In the next screen, we click Finish to conclude the agent installation process.
To verify that our agent can connect successfully to MFT Gateway, we head back to our MFT Gateway Manager and go to the Agents > Service tab. The second agent listed below is our newly installed agent, so that means our agent can connect without any problems.
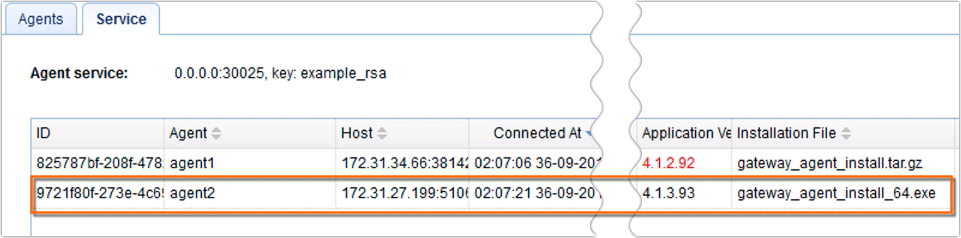
One thing you might have noticed is that, these agents don’t have the same version. The one in black text, which corresponds to our newly installed agent, is running on version 4.1.3.93, while the one in red, which is on version 4.1.2.92. This means that the agent whose version number is in red doesn’t have the exact same version as the MFT Gateway server. That could be a problem. We’ll talk about that in our next post, so stay tuned for that.
In the meantime, you’ve just learned how to install the JSCAPE MFT Gateway Agent on a Windows host.
Would you like to try this out yourself? Download a FREE Starter Edition of JSCAPE MFT Gateway now.

