

JSCAPE MFT Server makes it easy to strengthen secure file transfers with OpenPGP encryption and decryption. But before you can protect your files with this cryptography method, you need to create the necessary public/private key pairs. In this post, we'll introduce you to three ways of doing that.
Option 1: Using The Key Manager
The Key Manager is a module that's only accessible to your system administrator. If you want your end users to generate PGP key pairs (private keys and public keys) themselves, use Option 2. When PGP keys are generated via the Key Manager, those keys can be used anywhere in the system for encrypted messages and are typically used in conjunction with triggers. This is how you would carry out this particular PGP key creation process.
Login to the JSCAPE MFT Server Manager and go to the Keys menu.
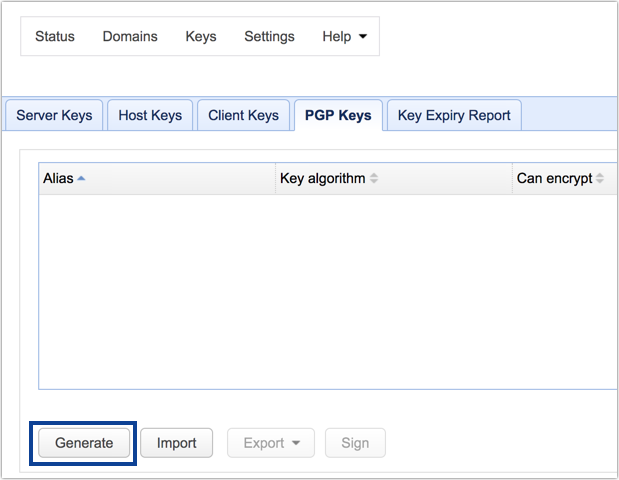
Navigate to the PGP Keys tab and then click the Generate button.
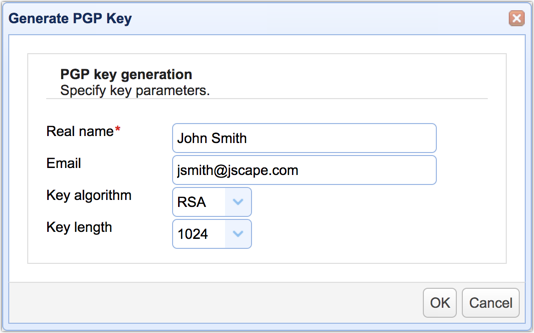
Enter the following information:
Real name - This should be the full name of the key pair owner, e.g., John Smith.
Email - An email address owned by the key pair owner, e.g., jsmith@jscape.com.
Key Algorithm - The encryption algorithm you want to use. The options are RSA and DSA. If you want to compare these two, read: Which Works Best for Encrypted File Transfers - RSA or DSA?
Key Length - The length of your encryption key. Longer is stronger. However, for longer keys, you may need to install the JCE Unlimited Strength Jurisdiction Policy Files. Need insights for choosing key lengths? Read Choosing Key Lengths for Encrypted File Transfers.
Click the OK button.
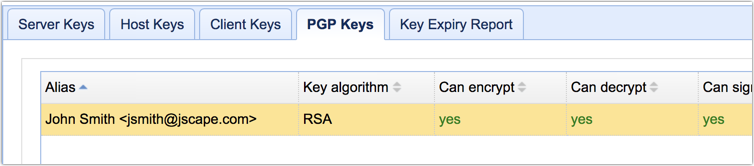
If all goes well, you should then see your newly generated key along with some pertinent information, including the key algorithm, key capabilities (can encrypt, decrypt, sign, etc.), and the key's unique fingerprint.
Option 2: Through The User's Web Interface
This option is suitable for situations where you would like users to generate PGP keys on their own. These keys can be used only to encrypt files uploaded to virtual paths that are accessible to the user and have PGP encryption enabled. Assuming you're a user, this is how you would generate your PGP keys.
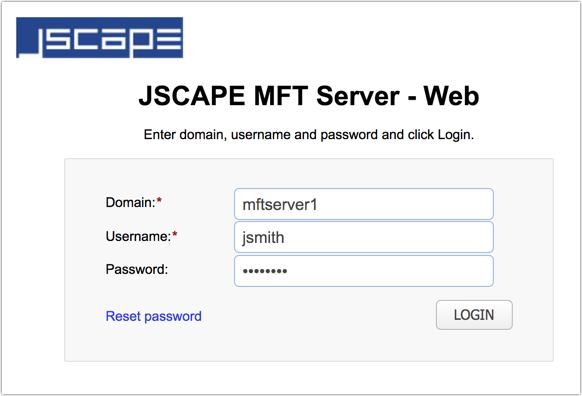
Login to your JSCAPE MFT Server's web interface.
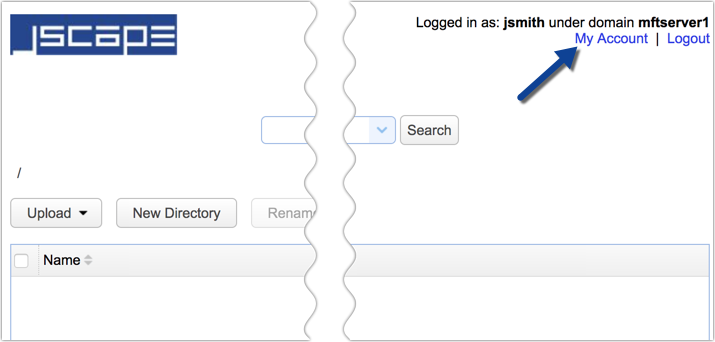
Once inside, navigate to My Account.
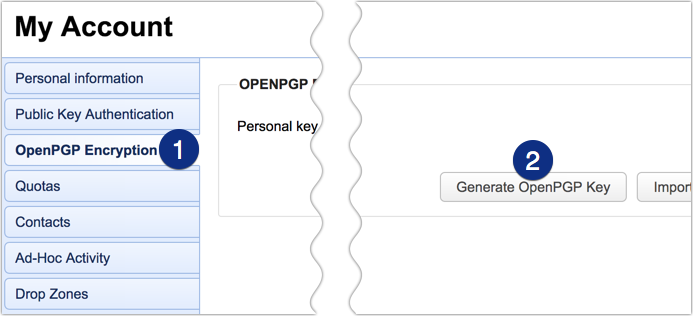
Next, scroll down until you reach the OpenPGP Encryption section. Click the button that says "Generate OpenPGP Key".
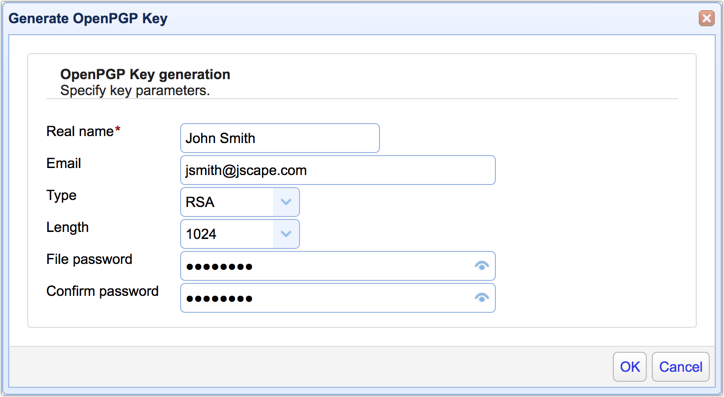
Enter pertinent information:
Real name - Your full name.
Email - An email address that you own.
Type - The encryption algorithm you want to use. The options are RSA and DSA. If you want to know more about them, read: Which Works Best for Encrypted File Transfers - RSA or DSA?
Length - The length of your encryption key. Longer is stronger. However, you may need to request that your system administrator install the JCE Unlimited Strength Jurisdiction Policy Files. Need insights for choosing key lengths? Read Choosing Key Lengths for Encrypted File Transfers.
You may also optionally enter a file password to add a layer of protection to your key file.
Click the OK button.
Once the key creation process is completed, a file will be downloaded to your local system. This file is your PGP private key, which you'll use to decrypt any file that's been encrypted by this key's corresponding public key.
Ready to see how easy and secure OpenPGP key management can be with JSCAPE MFT Server? Schedule a live demo with us today and explore all the robust features our server has to offer.
Important: Make sure you place the file in a safe location and remember where you put it. Otherwise, you won't be able to decrypt files encrypted by that private key's corresponding public key. Once you return to the main/My Storage screen, you'll notice a new directory named .pgp under your home directory.
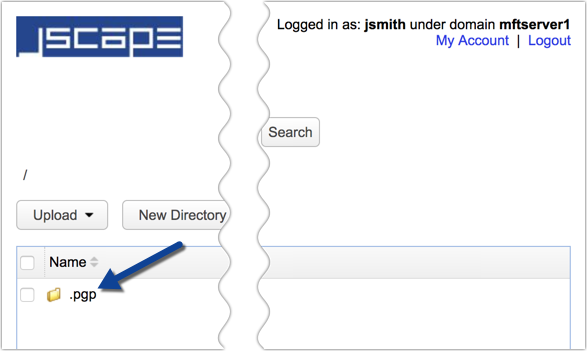
Then if you navigate into that directory, you'll also see a file named key.pub. This file is your private key's corresponding public key and will be used to encrypt files uploaded to virtual paths you have access to once PGP encryption is enabled. Remember that only one PGP public key may be associated with each account. Generating a new key pair or importing a new public key will overwrite the existing public key file.
Option 3: Using A Third-Party PGP tool
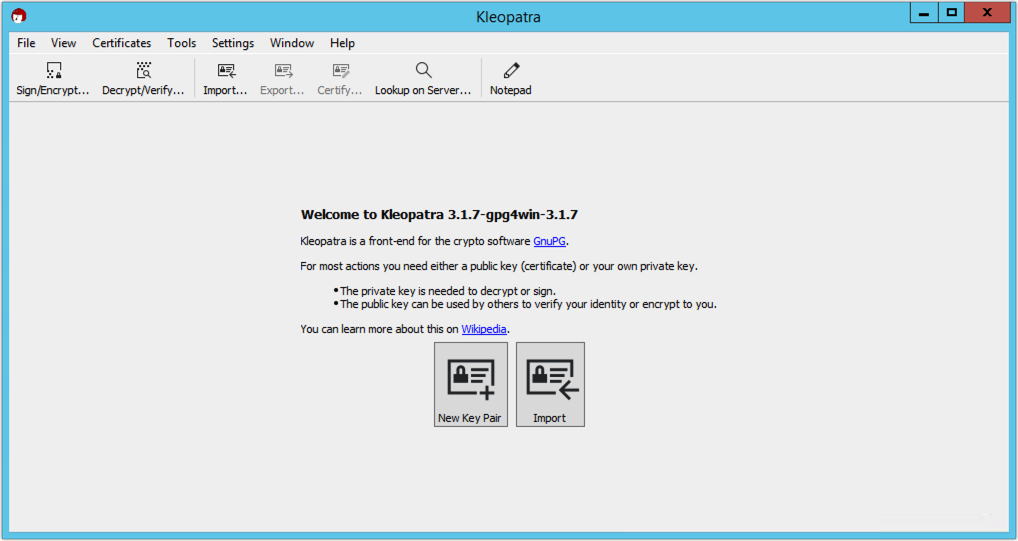
Lastly, you can use any reliable PGP key generator (GnuPG for GPG, GPG4Win, etc). One of the tools I recommend is GPG4Win. It comes with a GUI named Kleopatra. Here's how you use Kleopatra to generate keys.
Launch the app and click the New Key Pair button.
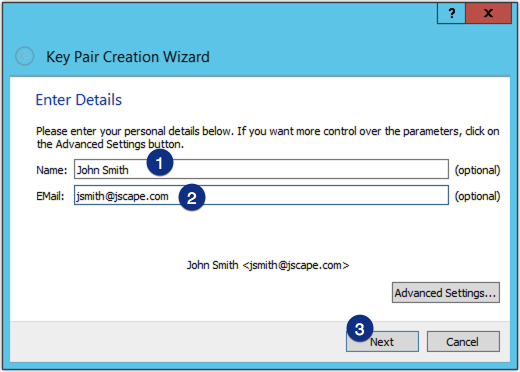
Specify user personal details like a name and a corresponding email (for the user ID). Click Next to proceed.
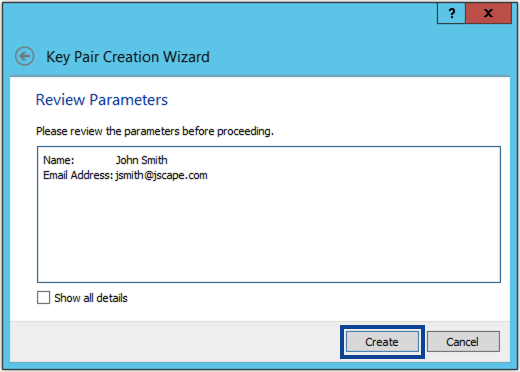
Review the parameters and if everything looks good, click Create.
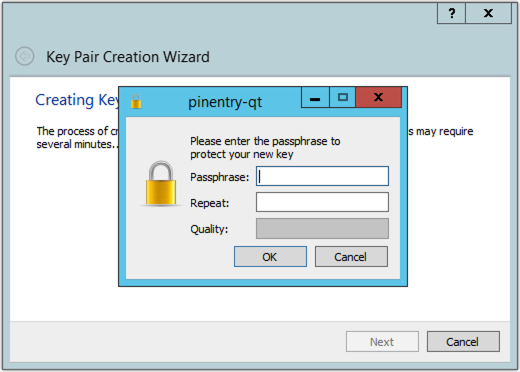
You will then be asked to enter a passphrase to protect your key file. Specify a passphrase and then click OK.
Important: Write down or print this passphrase and then place it in a secret location. You'll need it when you import your private key to the server.
Once the wizard indicates the key generation process was successful, click Finish.
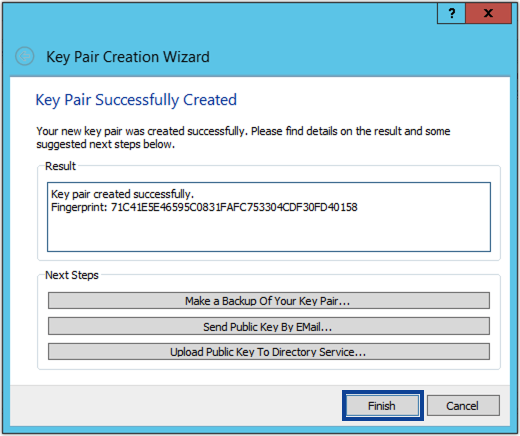
You should then see your newly created key pair on the main screen.
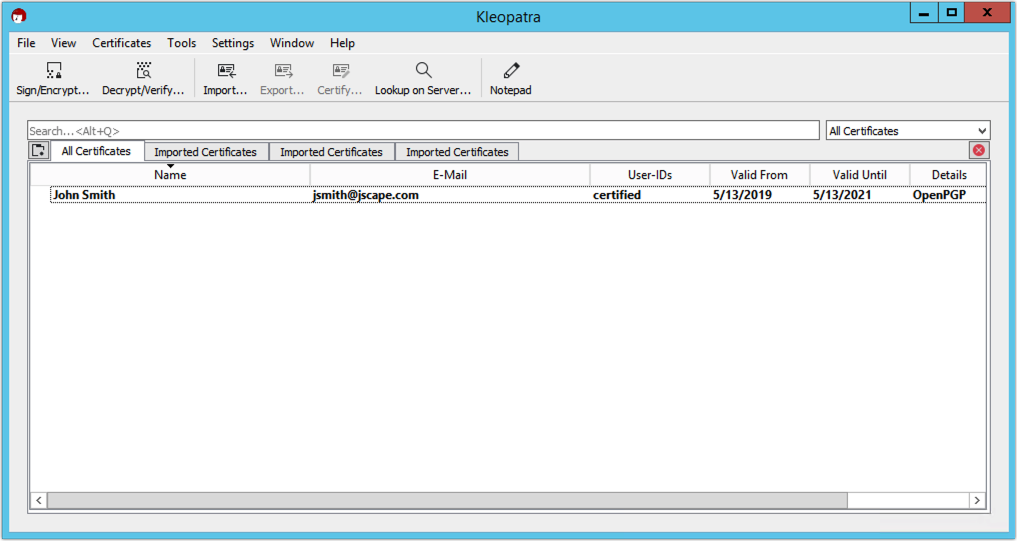
To export a key, right-click on the newly created item and click on Export (to export the public key) or Export Secret Keys (to export the secret key).

Once you have acquired the exported file(s), you can then import those into your JSCAPE MFT Server instance. If you scroll back to the screenshots we showed you in the first two options, you'll notice there's a button/link for importing.
In some tools, the exported file will contain both the public PGP key and the private PGP key. If you try to import that file into JSCAPE MFT Server, you may get an error because the server will only look for one key at a time (public or private). This is usually a problem only if what you want to import is the secret key or private key, which (in some cases) might contain both the public and private/secret key. Importing the public key doesn't pose any problems because when you export the public key on most tools, the exported file will only contain the public key, not the complete keyring.
To solve the problem when importing private keys into JSCAPE MFT Server, just open the exported file with a text editor and delete the entire public key block. After that, you can import the file as normal.
Now you know three ways of generating PGP keys for encrypting and decrypting files.
Get Your Free Trial
Would you like to try this yourself? JSCAPE MFT Server is platform-agnostic and can be installed on Microsoft Windows, Linux, Mac OS X and Solaris, and can handle any file transfer protocol and multiple protocols from a single server. Additionally, JSCAPE enables you to handle any file type, including batch files and XML.
Related Content
Two Ways To Generate An SFTP Private Key
Setting Up SFTP Public Key Authentication On The Command Line