

Overview
In this post, you'll learn how to set up a web-based file transfer service using JSCAPE MFT Server. A web file transfer will allow your users to perform file transfers without having to install a file transfer client. To upload or download files, they'll just need to fire up their favorite Web browser like Firefox, Chrome, Safari, Internet Explorer, or Edge, enter the web server's URL, and login to the interface.
This article was updated on June 11, 2018
Web file transfers typically employ the HTTP or HTTPS protocols and hence are virtually immune to most firewall issues.
To follow this article, you'll need a running installation of JSCAPE MFT Server with at least one existing user account and a client computer running your favorite Web browser.
Ready? Let's begin a web-based file transfer:
Enabling HTTP on your host
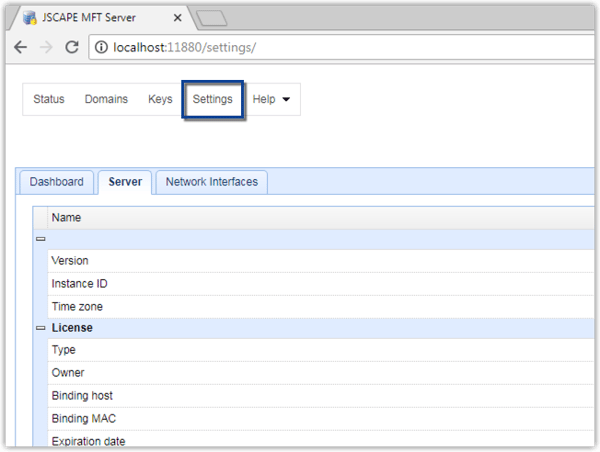
The first thing you'll have to do is to enable HTTP on your server. To do that, go to the Settings menu.
Next, select the Web module and then navigate to the Web tab. After that, select either HTTP on host and/or HTTPS on host. HTTPS file transfer sessions are encrypted using SSL, which can protect your data from malicious individuals who may intercept your connection and carry out nefarious acts such as man-in-the-middle attacks.
If you're going to make your server accessible from the Internet, then we strongly recommend you use HTTPS. If you're going to deploy your server in an extranet, intranet, or LAN but expect sensitive data to be transferred through it, then we still recommend HTTPS. So, yes, in any production environment, just use HTTPS.
HTTPS requires more settings than HTTP. So for this tutorial, let's just use HTTP first. But if you really want to learn how to set up an HTTPS file transfer service now, follow that link.
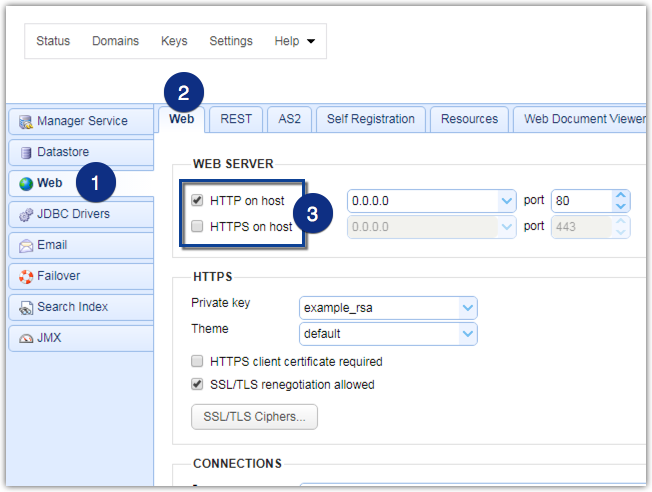
To follow this example, just select HTTP on host for now. Click the Save changes button (not shown on the screenshot) when you're done.
Note: If you just configure the server up to this point, you'll be able to connect to it and see the login screen. You can even enter values into the fields on that screen but that's about it. You won't be able to login to the server.
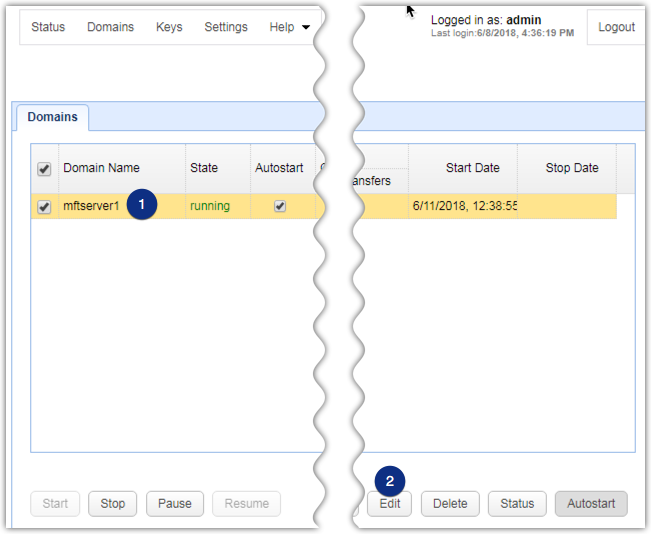
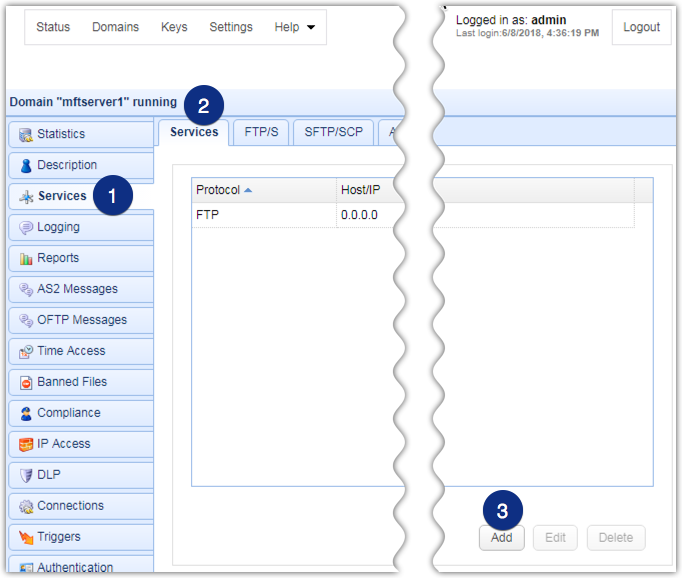
Activating the HTTP service on the desired domain
In the main screen, go to the Domains tab and double-click the domain whose HTTP service you want activate. Note that, if you're using the starter edition, you can only have one domain on your host.
In our example, let's say we want to activate the HTTP service of the domain named "mftserver1", so we double-click that. Alternatively, you can select the domain and then click the Edit button.
Next, go to the Services module. Click the Services tab and then the Add button.
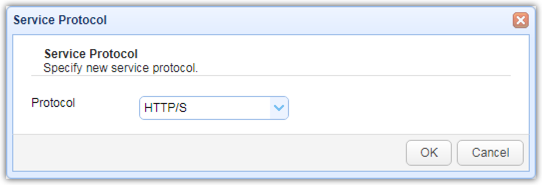
Once the dialog appears, select HTTP/S from the drop-down list. Click the OK button when you're done.
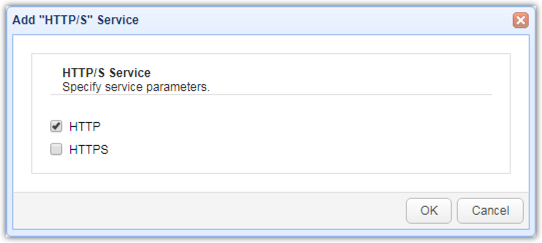
Since we just want to activate the HTTP service on this domain for now, tick the checkbox labeled HTTP and then click OK.
That's it. If you've already created a user on this domain, you can now head straight to your client computer and fire up your favorite Web browser.
Using your browser to connect to the Web file transfer service
On your Web browser, just enter the IP address or host name of your web server on the URL box. This should load up the login screen as shown below.
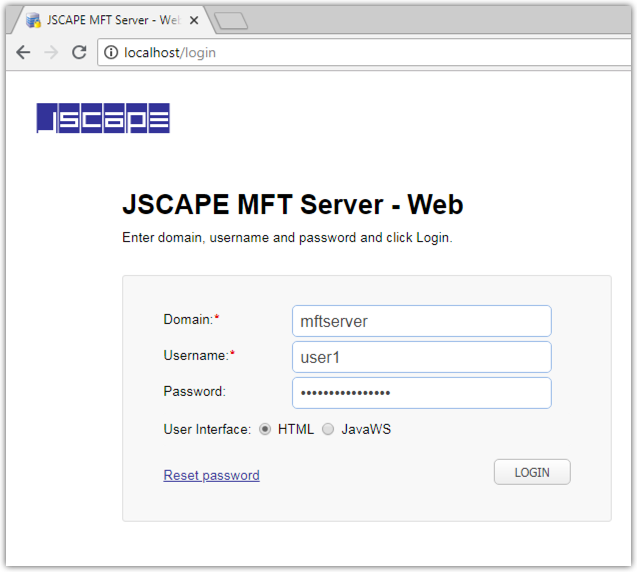
As shown on the screenshot, we've already entered the appropriate Domain, Username, and Password on the fields provided. Please do so as well and then click the Login button when you're done.
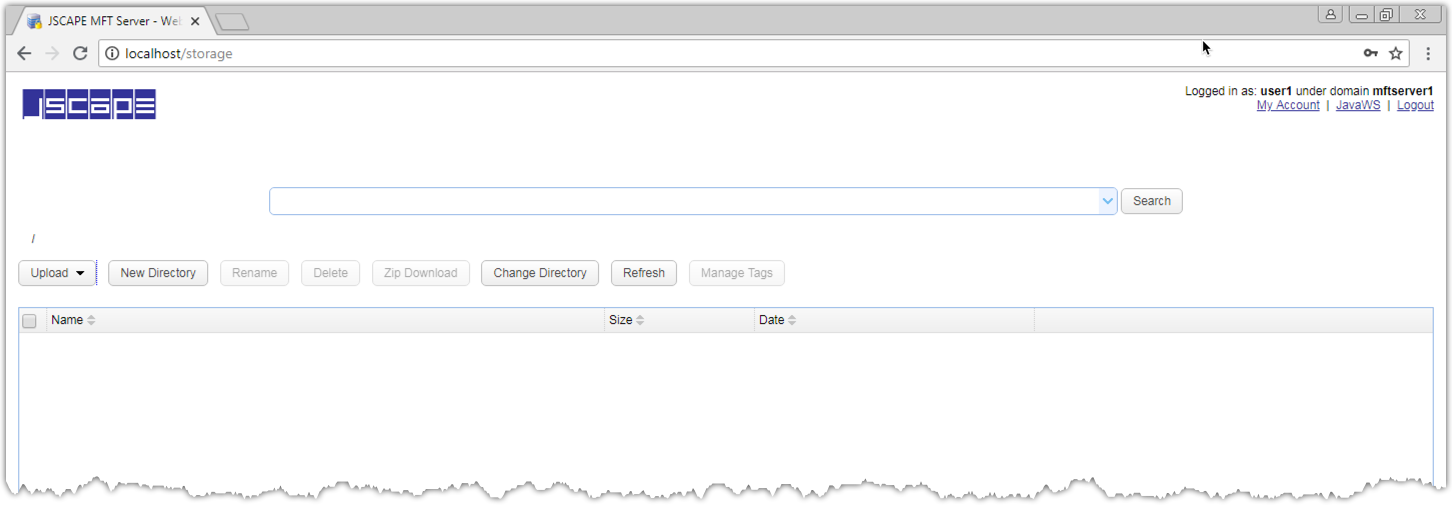
If you're able to login successfully, you should then be brought into the Web file transfer service environment.
If you want to provide your own logo (shown as "JSCAPE" on the screenshots above), you can actually do so. Please read this page of documentation for instructions.
As you can see from that last screenshot, the things you can do in a web file transfer session are similar to what you normally do when you FTP a file.
For instance, you can upload files, download files, create directories, delete directories, delete files, navigate to a different directory, and rename a directory. In JSCAPE MFT Server, you can even tag documents, search for strings of text, preview documents on the document viewer. or email files. We can discuss all these on separate blog posts but at least you now know what needs to be done if you want to set up a web-based file transfer.
Get Started
If you haven't tried website file transfers out yet and want to do so now, simply download the FREE evaluation edition of JSCAPE Managed File Transfer Server and follow the instructions on this article. Enjoy!