
Overview
In a previous post, we talked about typical situations that call for server to server file transfers. We’re pretty sure some of you want to know how they’re actually set up, so we came up with this blog post. In this article, we’ve outlined all the necessary steps you need to take to set up a server to server file transfer.
Let’s get started.
1. Use a fully capable file transfer server
Strictly speaking, a server to server file transfer should be automated. Meaning, after the initial set up, it should run on its own, without human intervention. In fact, the benefits of automation, i.e., enabling tasks to be completed on time and devoid of human errors, are the main factors driving companies to engage in server to server file transfers.
Incidentally, most of these companies use automated file transfers to exchange business-critical data. Hence, they understandably also want these exchanges to be:
- Secure – They don’t want their data to be vulnerable to attacks or accidental data loss.
- Fast – They want even large file transfers to complete at the soonest time possible.
- Reliable – They want the data to be unaltered throughout the transmission.
- Auditable – If something does go wrong, they want the capability to dig into the details.
- Flexible – If the other party prefers a particular secure file transfer protocol, they want to easily adapt.
- Manageable – They don’t want to perform confusing configurations or (worse) write sophisticated code just to do the initial set up.
- and most of all,
- They prefer all these conditions to be met by one solution. In other words, they want to minimize (or totally eliminate) customized scripts and avoid purchasing other third-party solutions to meet all those requirements.
A managed file transfer server can easily satisfy all these conditions. That’s why we’re going to use one for this tutorial. Specifically, we’ll be using JSCAPE MFT Server.
We won’t talk about the installation and initial configuration of the server itself on this post. For those discussions, I suggest you read the following:
Installing JSCAPE MFT Server on Linux (Debian) – this is a video
Installing JSCAPE MFT Server – Linux RPM (Fedora) – this is a video
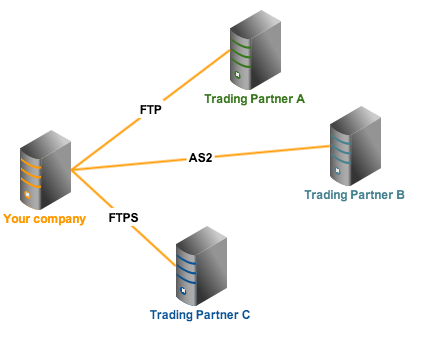
Of course, since what you want is a server to server file transfer, the company you’ll be exchanging files with (a.k.a. your trading partner) should also have a running file transfer server. Each trading partner may have their own file transfer protocol preferences. So the more trading partners you have, the more likely you’ll need to support different protocols.
JSCAPE MFT Server supports several file transfer protocols/technologies, including:
So as long as your trading partner is using any of these commonly used protocols, you’re good to go.
2. Request access to your trading partner’s server
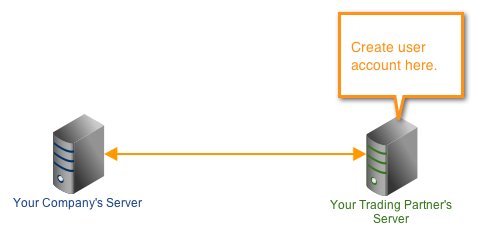
Once you’ve got your own managed file transfer server on hand, the next thing you need to do is to access your trading partner’s file transfer server.
In order to have authorized access to your trading partner’s server, you would need to have an account there. Ask your trading partner to grant you a user account. Once your account has been created, your trading partner should be able to provide you your login credentials (i.e., username and password), the IP address/hostname to connect to, and the corresponding port number of their file transfer service.
Basically, your managed file transfer server will be using those user login details to connect to your trading partner’s server. For the purpose of this blog post, let’s assume those details are:
- username: youraccountontrdngpartner
- password: password
- IP address: 10.0.0.3
- port number: 21
If you’re both (you and your trading partner) new to this and both of you would like to consider using JSCAPE MFT Server, instructions for creating a user account can be found in part 3 of Setting Up a Linux FTP Server.
Note: From here on, we’ll no longer be doing anything on your trading partner’s side. All configurations are going to be performed on the server at your end.
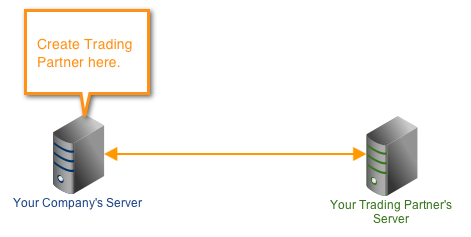
3. Create a Trading Partner
The next step will be carried out on your JSCAPE MFT Server. It involves creating what is called a “Trading Partner”. A Trading Partner is really just a JSCAPE MFT Server object that holds information pertinent to a particular trading partner’s file transfer service (e.g. login credentials, IP address, port number) as well as some information regarding the trading partner itself (e.g. name of company, email address of contact person).
The use of Trading Partners can significantly reduce key-ins because every time a particular trading partner’s information is needed in JSCAPE MFT Server, its corresponding Trading Partner object can simply be called into play. This will be more evident to you once we talk about Triggers.
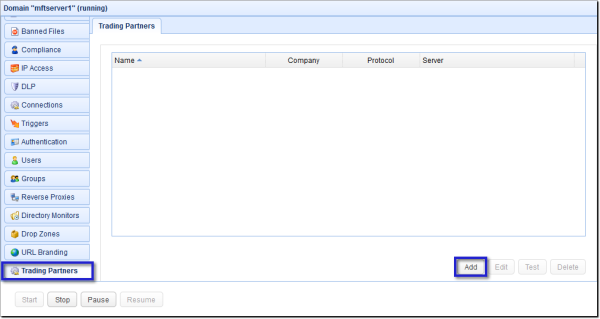
To create a Trading Partner, launch the JSCAPE MFT Server Manager and then navigate to the Trading Partners module. Next, click the Add button.
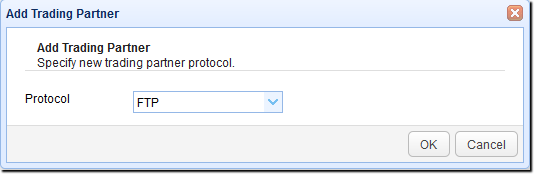
When the next screen pops up, select the file transfer protocol you and your trading partner will be using for your transactions. For our example, let’s just use FTP. Click OK when you’re done.
In the succeeding screen, fill up the following fields:
- Name – Assign a name to this Trading Partner (e.g. TradingPartnerA). This will be the name you’ll be using when referring to this trading partner within the JSCAPE MFT Server environment.
- Company – Enter the company name of this trading partner. e.g. Company A
- E-mail – Enter the email address of this trading partner’s contact person. e.g. [email protected]
- Also enter the user account connection/login details assigned to you by your trading partner. Note these are the same details we talked about earlier. The fields you’re supposed to fill up include the following:
- Host/IP – The hostname or IP address of your trading partner’s server. e.g. 10.0.0.3.
- Port – The port number of the file transfer service on your trading partner’s server. e.g. 21
- Timeout – Just leave this to the default, i.e., 30 sec.
- Username – The username assigned to you. e.g. youraccountontrdngpartner
- Password – That username’s corresponding password. e.g. password
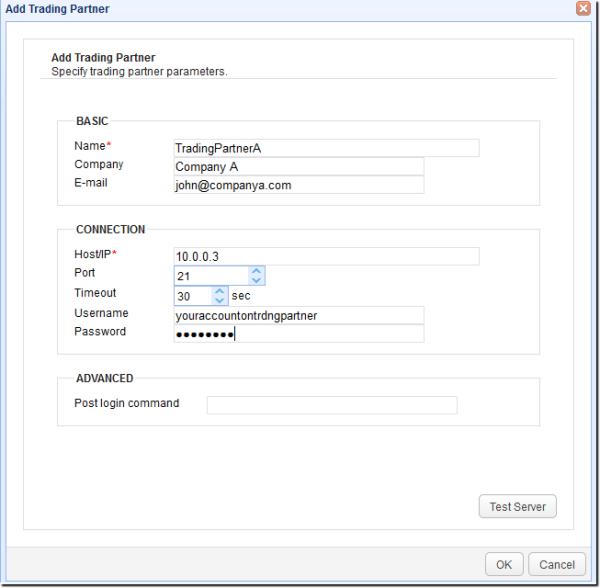
If your trading partner’s file transfer service is already operational, you may click the Test Server button to check whether you can connect to it.
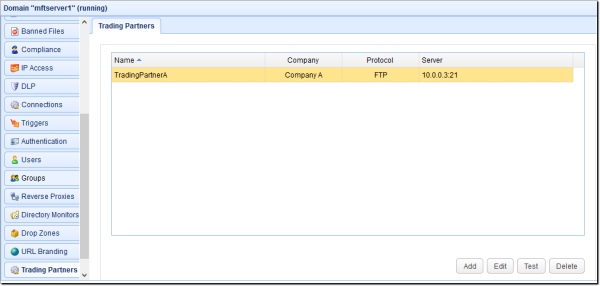
Assuming everything goes well, click the OK button. You should then see your newly created Trading Partner. Let’s now put that to use.
4. Set up automated file transfers
The final step is to configure your managed file transfer server to perform automated file transfers when certain events occur or conditions are met, such as when:
- A scheduled time arrives;
- A specified directory changes;
- A particular file has been uploaded;
- A DLP rule has been matched;
- A particular file has been renamed; etc.
In JSCAPE MFT Server, this can be achieved through the use of Triggers. Let me show you how to set one up now.
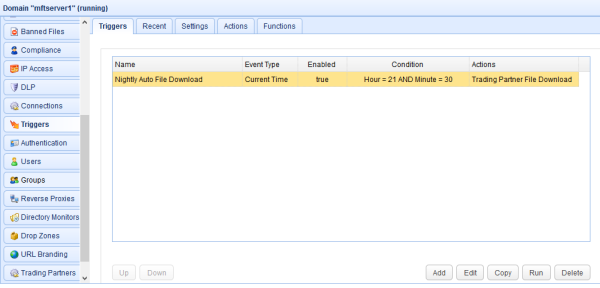
This sample trigger will prompt our server to download a specific file from our trading partner’s server at 9:30 PM in the evening, every evening. Scheduling an automated file transfer to run after office hours, when the network is virtually free, is a very efficient way of utilizing network resources. During the day, you can devote your network to time-sensitive transactions. And then at night, you can use it for scheduled batch processes.
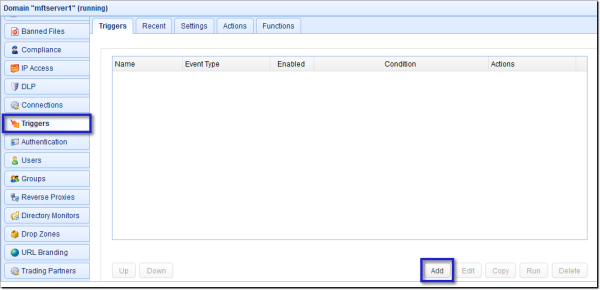
To create a trigger, navigate to the Triggers module and create a new Trigger by clicking on the Add button.
You’ll then be asked to specify some trigger parameters.
Assign a Name for this trigger. Use something descriptive, like “Nightly Auto File Download”. Next, expand the Event type drop-down list and choose Current Time. Leave all the other parameters as is for now. Click the Next button to proceed.

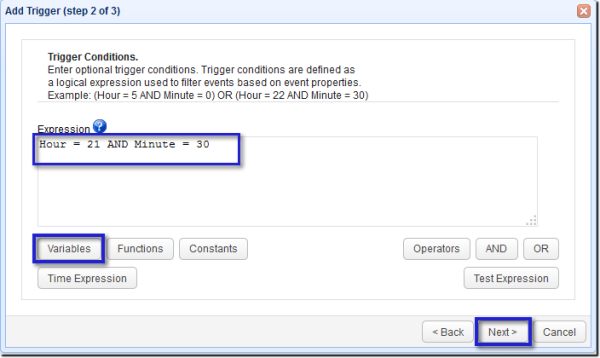
On this screen, you’re supposed to enter some optional Trigger Conditions. If you assign a trigger condition to a trigger, the Trigger Condition will have to be evaluated first before any Trigger Action (which we’ll discuss shortly) can execute. Basically, the Trigger Action will only execute if the condition is satisfied.
Since we want the file transfer to run every evening at 9:30, then we set the condition using the logical expression:
Hour = 21 AND Minute = 30
‘Hour’ and ‘Minute’ are variables, which can be selected from a list by clicking the Variables button. As soon as you’re done, click the Next button.
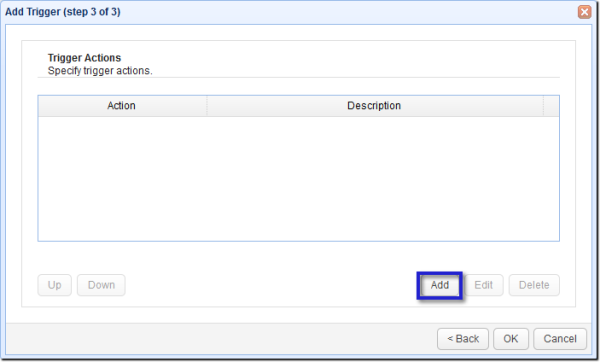
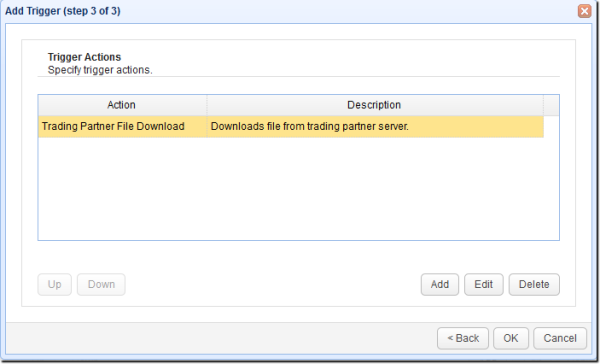
Now you’re ready to add a Trigger Action to this trigger. The trigger action is what the managed file transfer server will do once those trigger conditions are met. In other words, as soon as it’s 9:30 (which is essentially our trigger condition), what ever trigger action we assign to this trigger will then execute.
To create a Trigger Action, click the Add button.
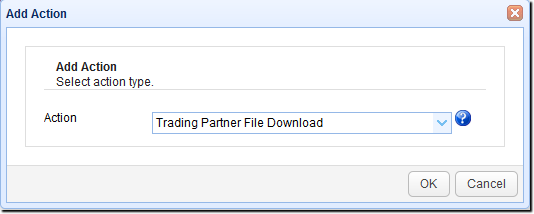
JSCAPE MFT Server already has a list of trigger actions you can choose from. In this case, because you want to download a file from your trading partner, Select Trading Partner File Download. Click OK.
You’ll then be asked to specify parameters for the trigger action you just created. For the purpose of this post, we just need to specify the following:
Partner – This is the Trading Partner Name you assigned to your trading partner.
Remote File – This is the path of the file to be downloaded. Note that this path is on your trading partner’s server. I am assuming that the file we want to download is found in our account’s home directory, so I’m just using the forward slash (/) to denote that directory. I have then appended the file’s filename (filetodownload.txt) to it.
Local File – Once the file has been downloaded, you can automatically assign it a new name if you want. In our example, the file will be automatically renamed to “downloadedfile.txt” upon download. And since I just want it to be stored in our admin’s home directory, I just used the forward slash to indicate that.
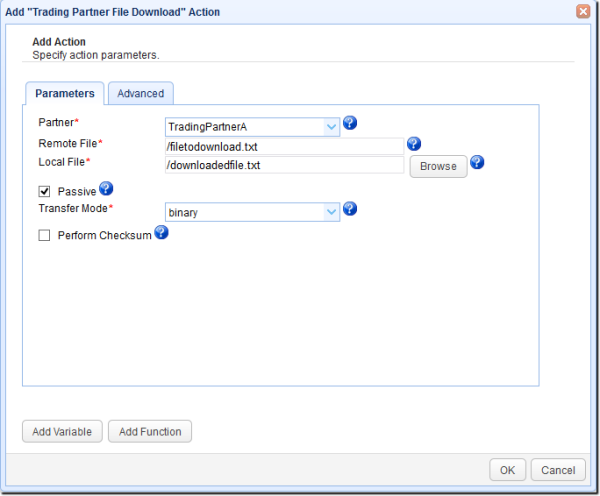
If you’re managing your JSCAPE MFT Server locally, you can easily navigate to your desired download target directory by clicking on the Browse button. Note that this process (i.e., using Browse) won’t work if you’re managing your server remotely, i.e., from another computer, as shown below. If you’re managing remotely, you’ll have to be familiar with the directory structure of your server and type in the path manually like we did.
Click OK when done.
Once you get back to the list of Trigger Actions, click OK again.
You should be back at your MFT Server’s main screen. Notice that your newly created trigger has already been added to the Triggers module. Click Apply to make those settings take effect.
Where to go from here
That’s it. Now you know how to set up a server to server file transfer. I suggest you download the FREE, fully-functional evaluation edition of JSCAPE MFT Server and follow the steps outlined on this tutorial. Explore the Trigger module. It already includes many built-in Event Types and Trigger Actions that fit common automated file transfer scenarios.
Request a JSCAPE MFT Server Trial.

