

Overview
In our previous post, we showed you how to use two triggers to upload a second file only if the first upload succeeded. Here's a shorter way to do it.
You can actually perform the same task using only one (1) trigger. Let me give you an example. Let's say you've set up a scheduled file transfer that performs an SFTP file upload. For those who don't know how to do that, here are the basic steps.
1. Add a new trigger that uses the Current Time event type
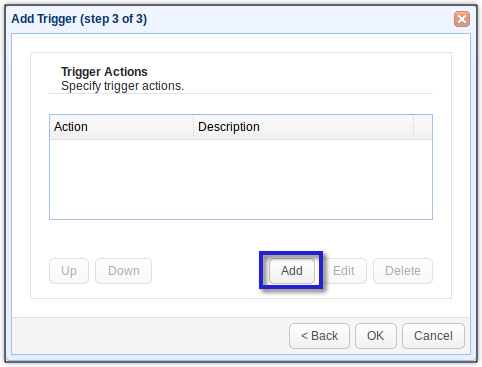
Go to Triggers > Triggers tab, and then click the Add button.
![]()
Next, give the trigger a name and then select Current Time from the Event type drop-down list. Click Next to proceed.
![]()
2. Specify when you want the scheduled file transfer to run
Let's say we want our scheduled file transfer to execute every Friday at 8:30 in the evening. To set that up, enter this into the Expression box of the Trigger Conditions dialog.
(Hour = 20) AND (Minute = 30) AND (DayOfWeek = 5)
If this doesn't make sense, I encourage you to read the article:
Benefits of a Scheduled File Transfer and How To Set One Up
![]()
Click the Next button to proceed.
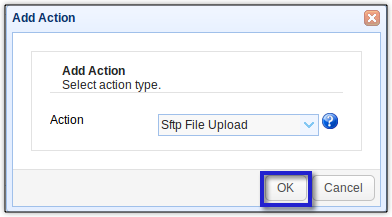
3. Add a file upload trigger action for the first file
The next step would be to choose a file upload trigger action that would upload the first file. For this example, let's just use the SFTP File Upload trigger action.
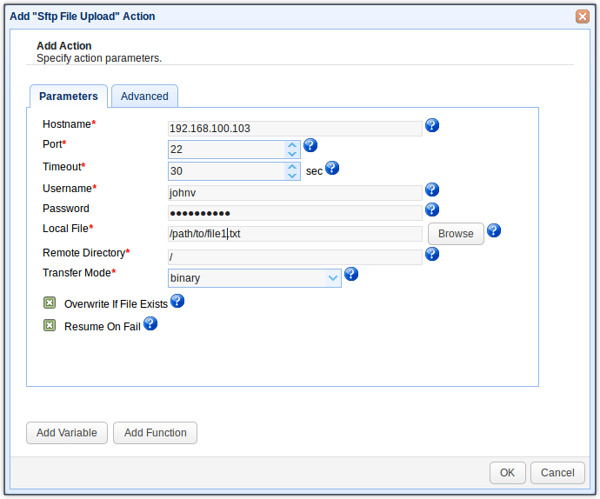
Had you previously created a trading partner, you wouldn't have had to enter several parameters on that dialog. If you want to learn about trading partners, check out these articles:
Preparing Trading Partner Servers For SFTP Automation
Setting Up A Trading Partner For Automated FTP
How To Set Up A Scheduled Automatic Download With A Trading Partner
Setting Up Public Key Authentication Between Trading Partners
Securing Trading Partner File Transfers w/ Auto PGP Encryption & FTPS
Once you're done, click the OK button.
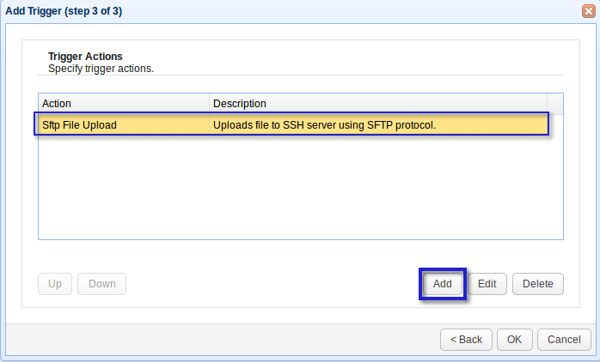
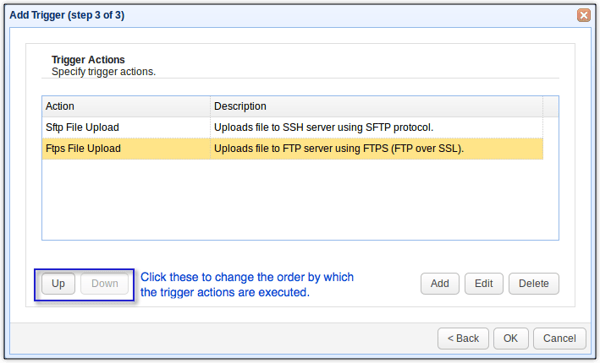
You should then see your newly created trigger action. Note that this is still for the first upload. You need to add another file upload trigger action for the second file.
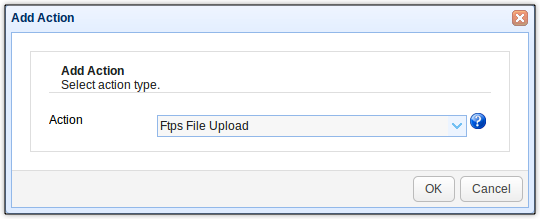
4. Add a file upload trigger action for the first file
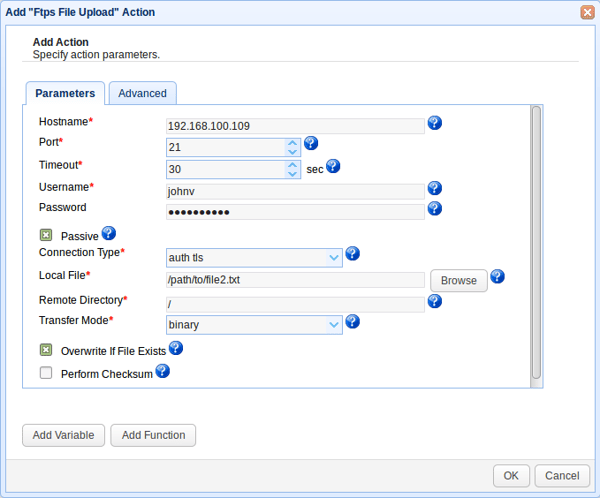
Let's say the destination server for the second upload is an FTPS server. In this case, you would need the FTPS File Upload trigger action.
Enter pertinent information.
After clicking OK, you should then see your second trigger action placed right below the trigger action you created earlier. If you want to exchange their positions, thereby allowing the FTPS upload execute before the SFTP upload, then just select the FTPS File Upload trigger action and then click the Up button.
Once you're done here, click all OK buttons until you're back at the main screen. As soon as you get there, click the Apply button to finalize the trigger creation process.
That's it.
Get Started
This tutorial was created using JSCAPE MFT Server, a managed file transfer server built for secure, automated file transfers. If you'd like to follow the steps on this tutorial but don't have a running installation of JSCAPE MFT Server, you can download a free, fully-functional evaluation edition now.
Download JSCAPE MFT Server Trial