

Overview on Setting Up a Linux FTP Server
In this post, I'll show you how easy it is to set up a Linux FTP Server using JSCAPE MFT Server. One advantage of using a Java FTP server like JSCAPE MFT Server is that it can run on virtually any platform; be it Windows, Solaris, Mac OS, Linux, etc. All you need is a suitable Java runtime environment (JRE) and you can already provide FTP file transfer services.
JSCAPE MFT Server's platform independence means you can work on the platform that you're most comfortable with. Then later on, if you decide to migrate to another platform, you can do so with ease. As you might have gathered from the title, we'll be focusing on the Linux platform in this article.
This is a 3-part blog series on how to set up a Linux FTP server, with the 1st part covering prerequisites such as removing existing FTP services and installing Java.
Need to jump to part 2 or 3? Click the links below.
- Part 1 - Setting Up a Linux FTP Server
- Part 2 - Setting up a Linux FTP Server
- Part 3 - Setting up a Linux FTP Server
Finding and removing existing FTP services
I'll assume you have your Linux server up and running and that you're logged in using an account with root privileges. Now, there's a good chance that your Linux machine already has an FTP service running on it. You might want to disable that first. >But why replace an existing FTP service if a FTP service is what you need in the first place?
Because, unlike the default FTP servers that come with some Linux distributions, an FTP service running on JCAPE MFT Server can be augmented with security features like PGP encryption, IP-based access control, DLP, auto-virus scanning, and so on. More importantly, you will have the option to shift to more secure file transfer protocols such as FTPS, SFTP, or HTTPS later on should you decide to.
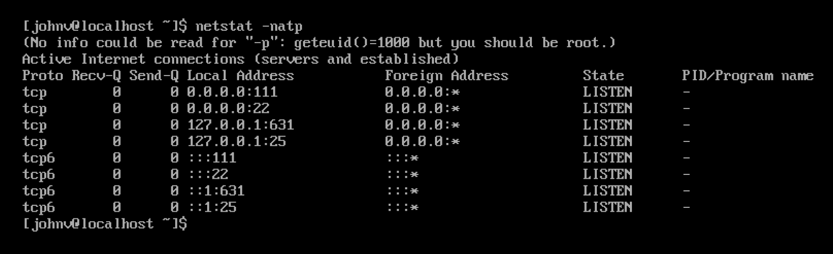
To find out whether an FTP service is alreadhy running on your Linux machine, execute the following command in the terminal:
netstat -natp
When the results appear, look for a running program listening on port 21. That's the default port used by FTP services. For example, here's the output of that command in a Linux machine without any FTP service running on it.
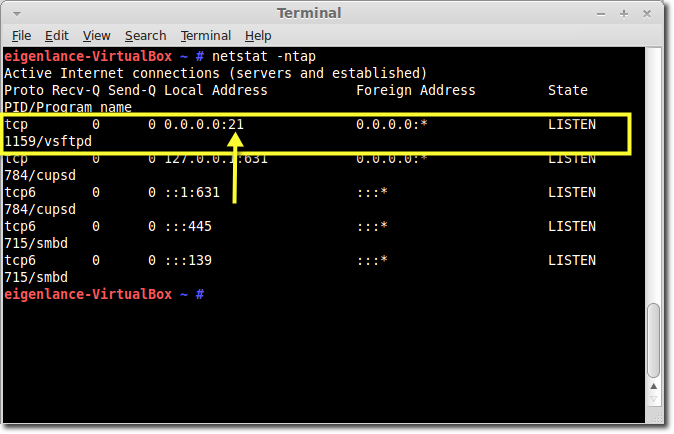
Now, here's the output of the same command on one of my Linux machines that has the FTP server named vsftpd running there.
Once you know the name of the ftp service that you want to disable, the next step of course is to disable it. The command you're supposed to use will depend on the kind of Linux distribution you have. For example, Red Hat users that have a vsftpd service running on their Linux box can use:
chkconfig vsftpd off
>
Debian users, on the other hand, can use:
update-rc.d -f vsftpd remove
>
Here's that second command in one particular Linux machine of mine running on Mint, a Debian-based distribution:

Note however that, even after executing the appropriate command, the changes won't take effect until you've restarted the computer.
Once you've successfully disabled the FTP service in question, you may proceed with the next step - installing Java. If you already have the Java runtime environment (JRE) running on your machine, you may skip the following section and go directly to the next to install JSCAPE MFT Server.
Execute the following command to see if Java is installed:
java -version
If you get something like a 'command not found', that means you still need to install Java:

Downloading and installing Java
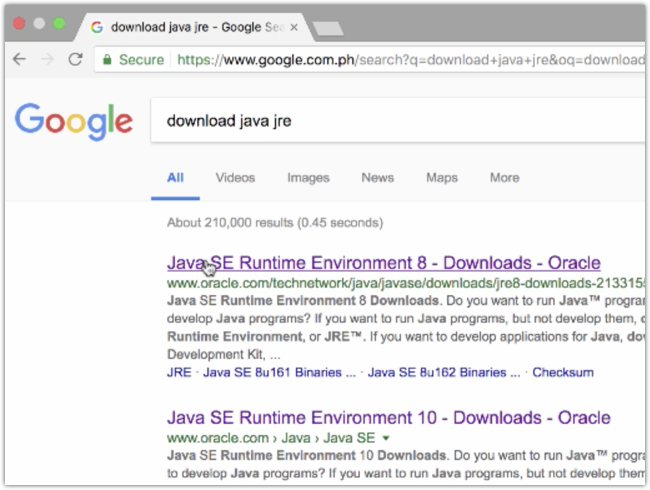
To download Java, google "download java jre" and look for the download link on oracle.com. >We're doing it this way because the download link sometimes changes. As of this writing, the download page is https://www.oracle.com/technetwork/java/javase/downloads/.
>
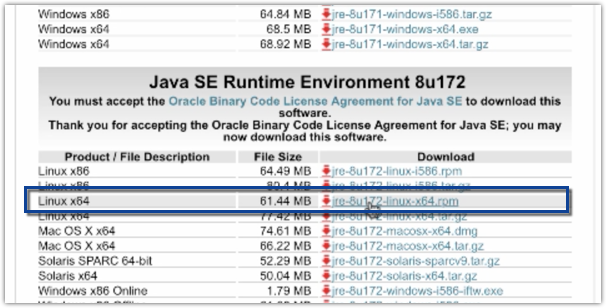
>When you get to the download page, select the version you want to download and then read and accept the license agreement.
>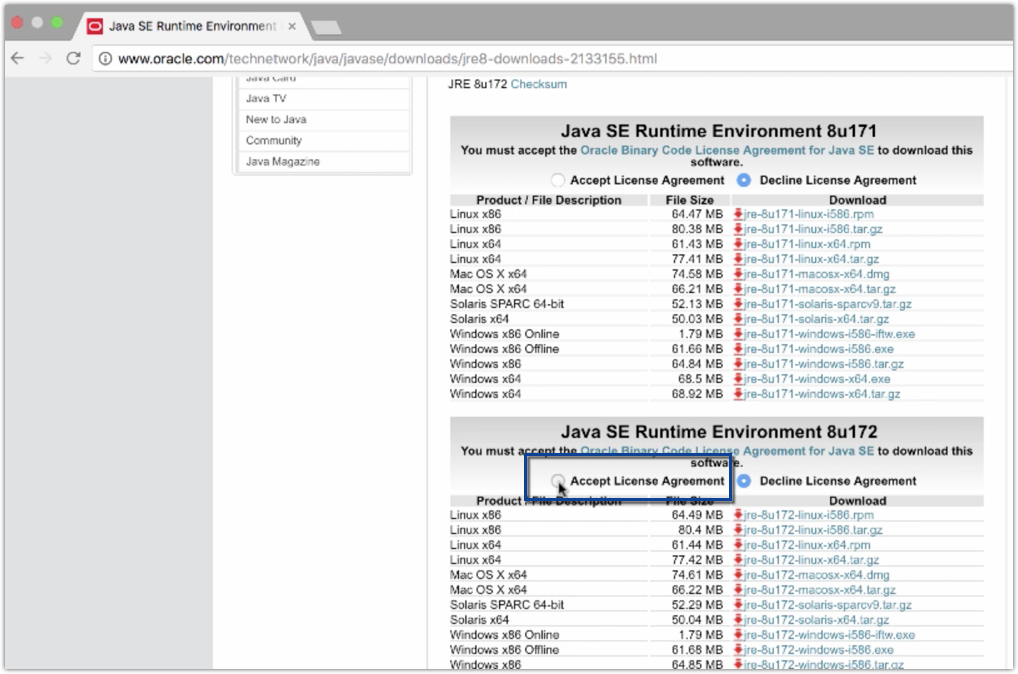
Download the specific installer suited for your target platform. Here, I'm choosing the Linux x64 rpm installer.
Once you've downloaded the installer, make it accessible to your target Linux machine and copy it there. Let's say I want to copy it into my home directory. So I navigate into the folder (a mounted folder, in my case) containing the Java installer and copy it likeso:
cp jre-8u172-linux-x64.rpm ~

The exact filename of the rpm package might vary depending on the specific version and patch number. Once the rpm package has been copied into your target machine, proceed with the installation. My target machine is CentOS Linux system, so I'll use the yum package manager likeso:
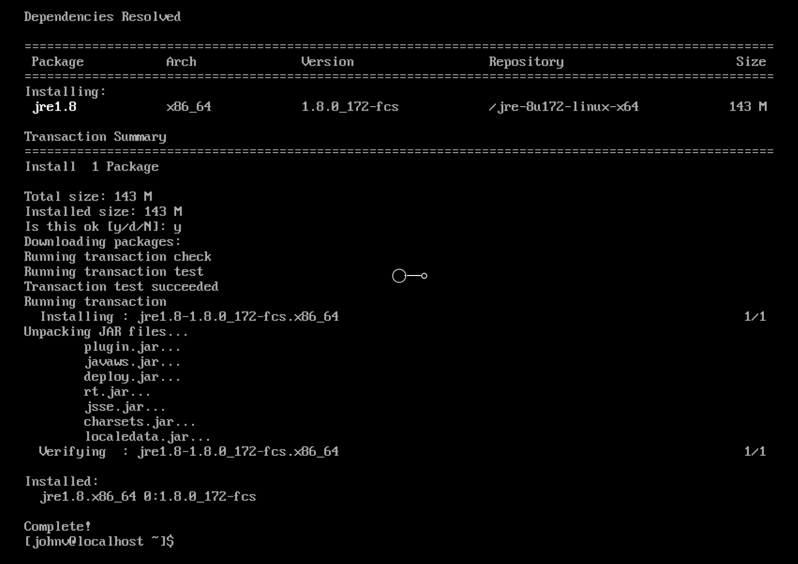
yum localinstall jre-8u172-linux-x64.rpm
If all goes well, the Java rpm package should unpack and you should see something like this on your screen:
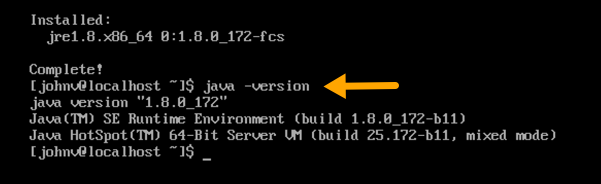
To verify if Java has indeed installed successfully, run 'java -version' again.
The output below, which returns the correct Java version, is indicative of a successful installation.
That's it! Your system is now ready to support JSCAPE MFT Server.
See you in Part 2 of this post, where we'll teach you how to install MFT Server.
In the meantime, you might want to download JSCAPE MFT Server first.